A generic setup for all raspberry pi models.
Designed by:
Colin "MrSwirlyEyes" Keef
This tutorial walks you through setting up any model of Raspberry Pi, which we have tested on Raspberry Pi 3 and Raspberry Pi 0 W. These are the generic steps involved in preparing an rPi for use in any project. At the time of writing, the current distribution of Raspbian is Stretch. You may experience different results or need to make changes for using distributions before or after Stretch - if you find something out of date, please let us know. We will be working consistently on keeping this tutorial relevant!
| DEVICE | VENDOR URL | QUANTITY | NOTES |
|---|---|---|---|
| Raspberry Pi 3 B+ (B Plus) Starter Kit (32 GB) | Amazon | 1 |
| DEVICE | VENDOR URL | QUANTITY | NOTES |
|---|---|---|---|
| Raspberry Pi Zero W (Wireless) Starter Kit (16 GB) | Amazon | 1 | microSD card adapter and HDMI cable not included. |
| MICROSD ADAPTER | Digikey | 1 | Needed for Raspberry Pi Zero W kit. |
| CBL HDMI M-M CON 3' 30AWG | Digikey | 1 | Needed for Raspberry Pi Zero W kit. |
| USB TO TTL SERIAL CABLE | Digikey | 1 |
We advertise the Rasberry Pi 3+ and Raspberry Pi Zero W kit. You only need one of the two. If you already have a Raspberry Pi, this tutorial should cover all Raspberry Pi variants.
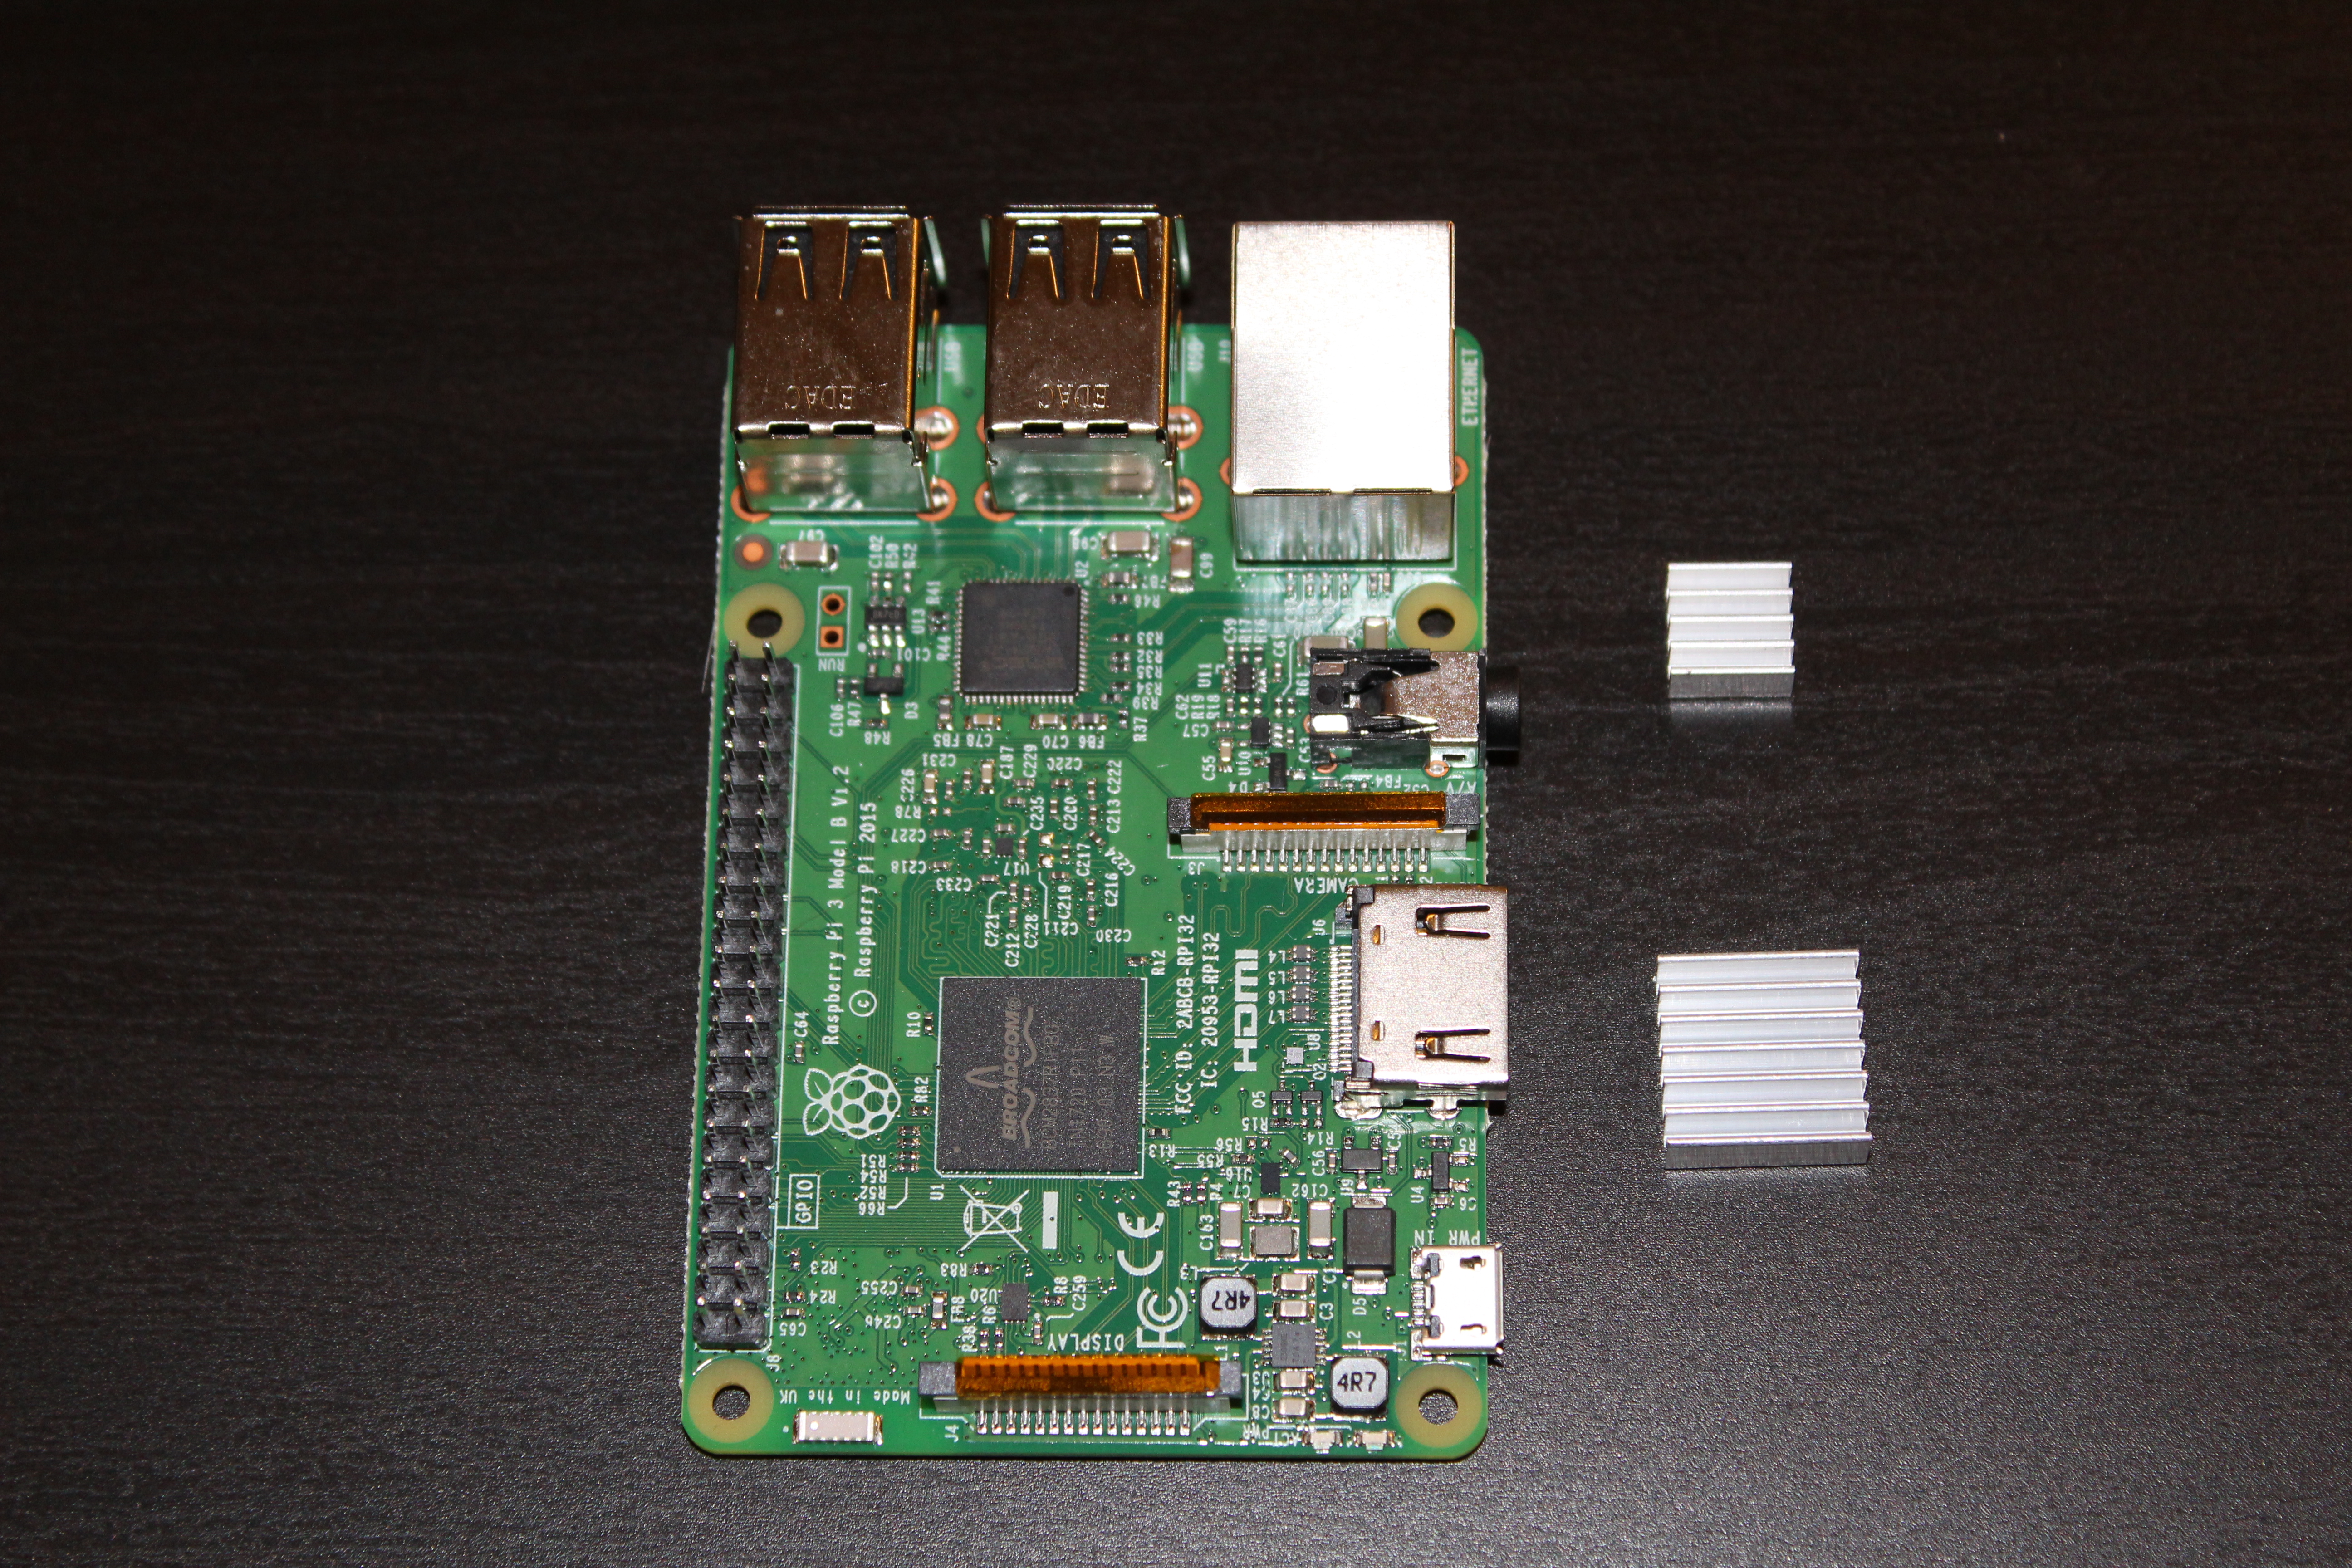
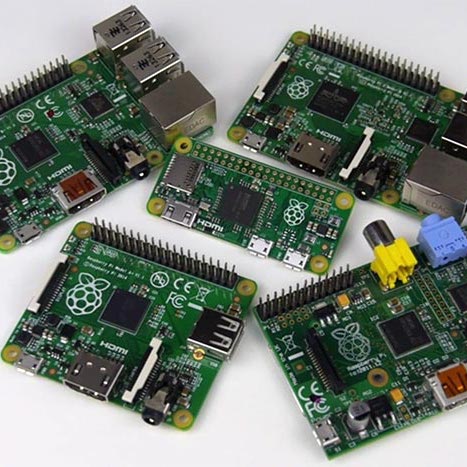
Introduce the Raspberry Pi hardware.
From left to right, we have the following:
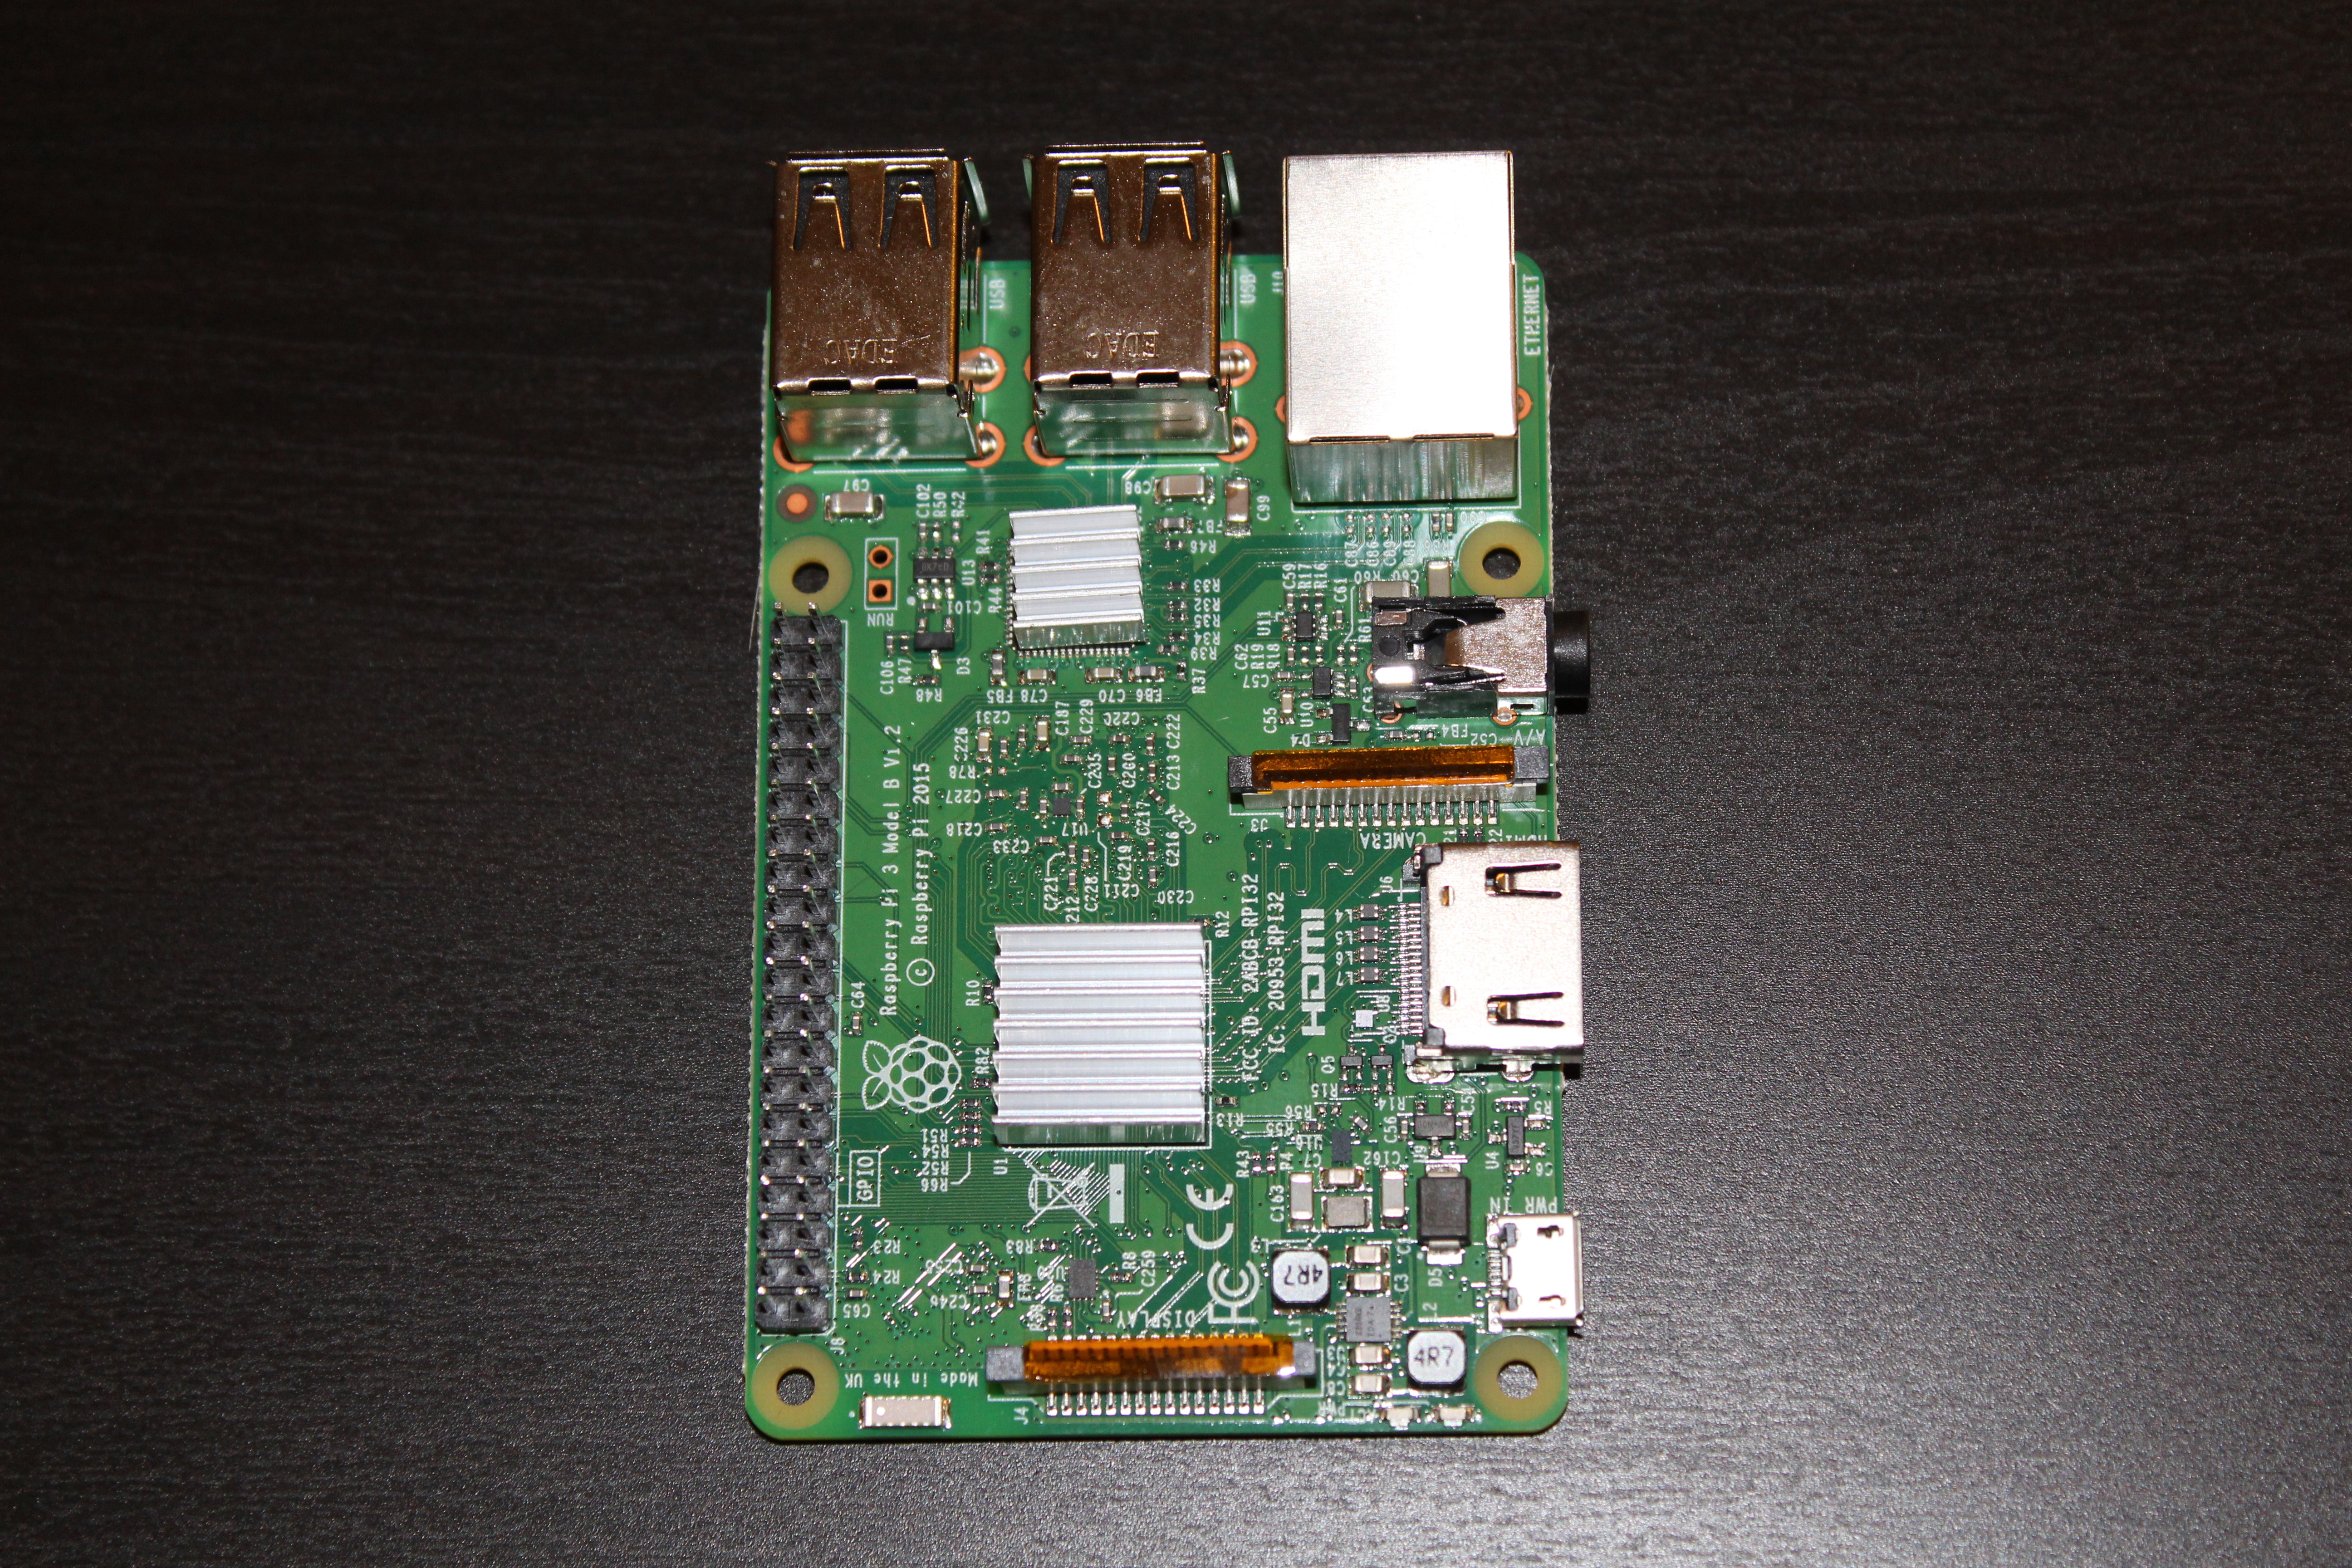
Remove the thin white stickers from the bottom of the heatsinks to expose the adhesive and place them onto the raspberry pi as follows:
The orientation of the fins is not important.
Install SD Card Formatter, format your microSD card, download the latest version of NOOBs, and place it onto microSD card.
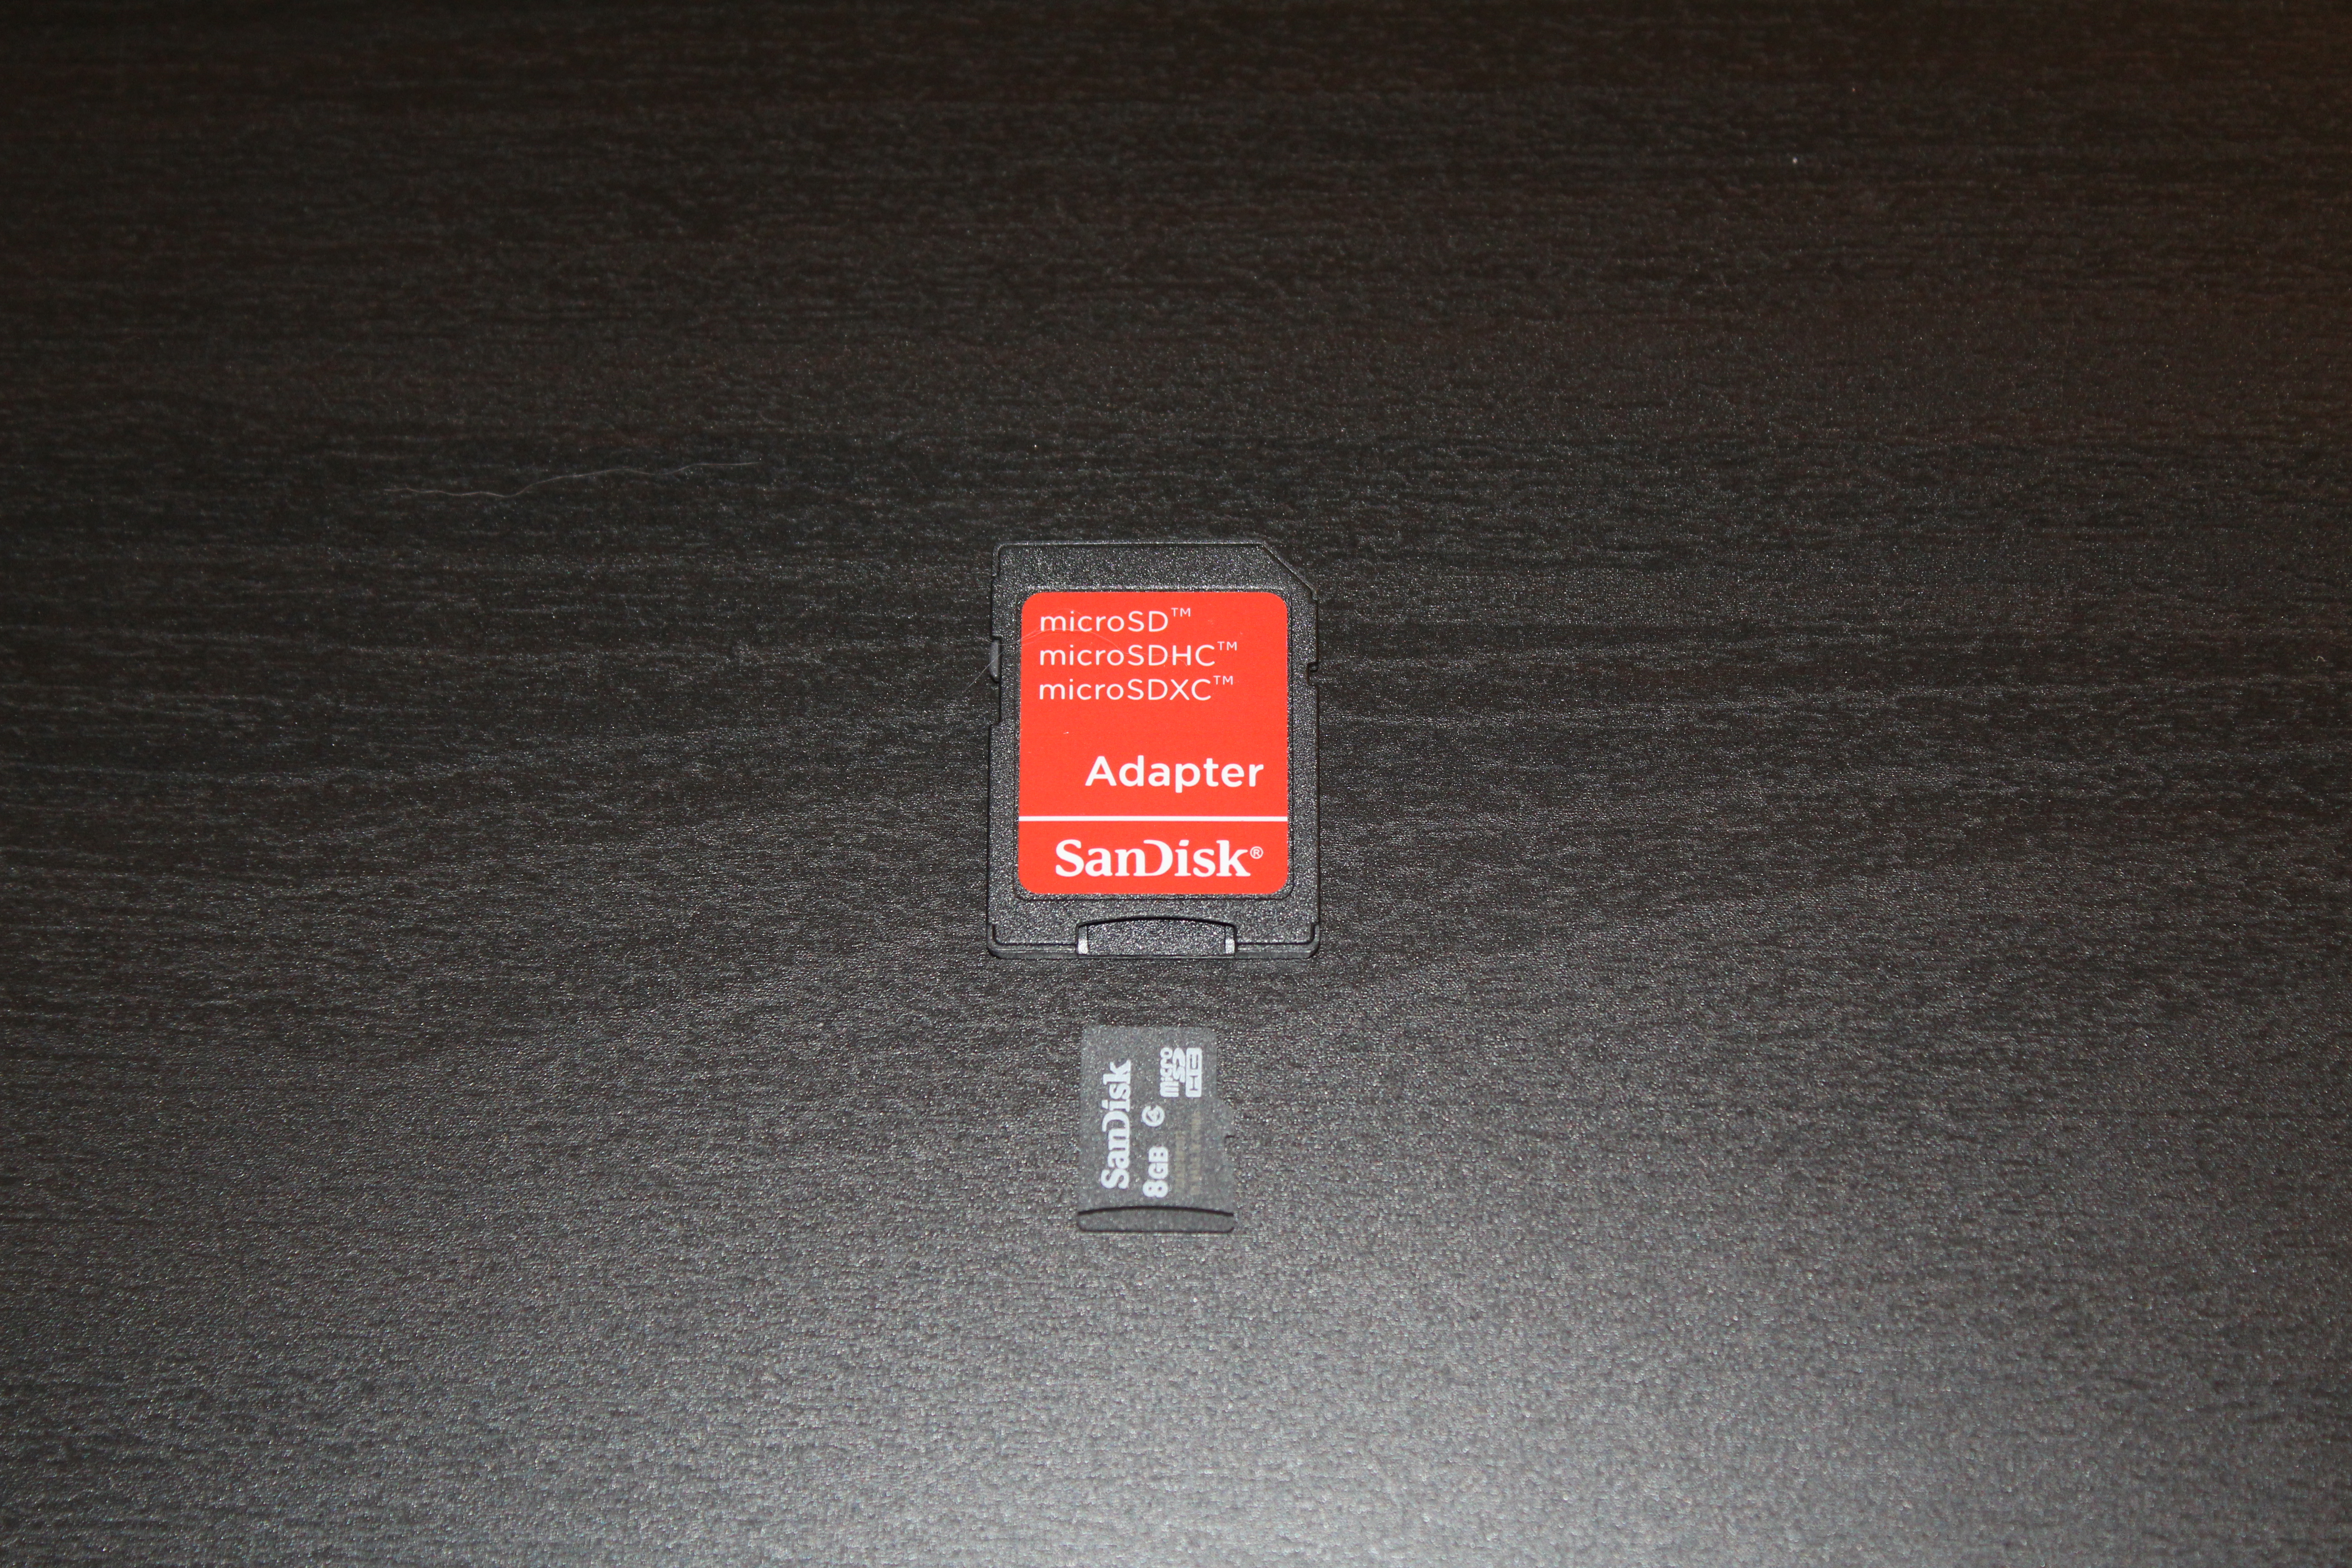
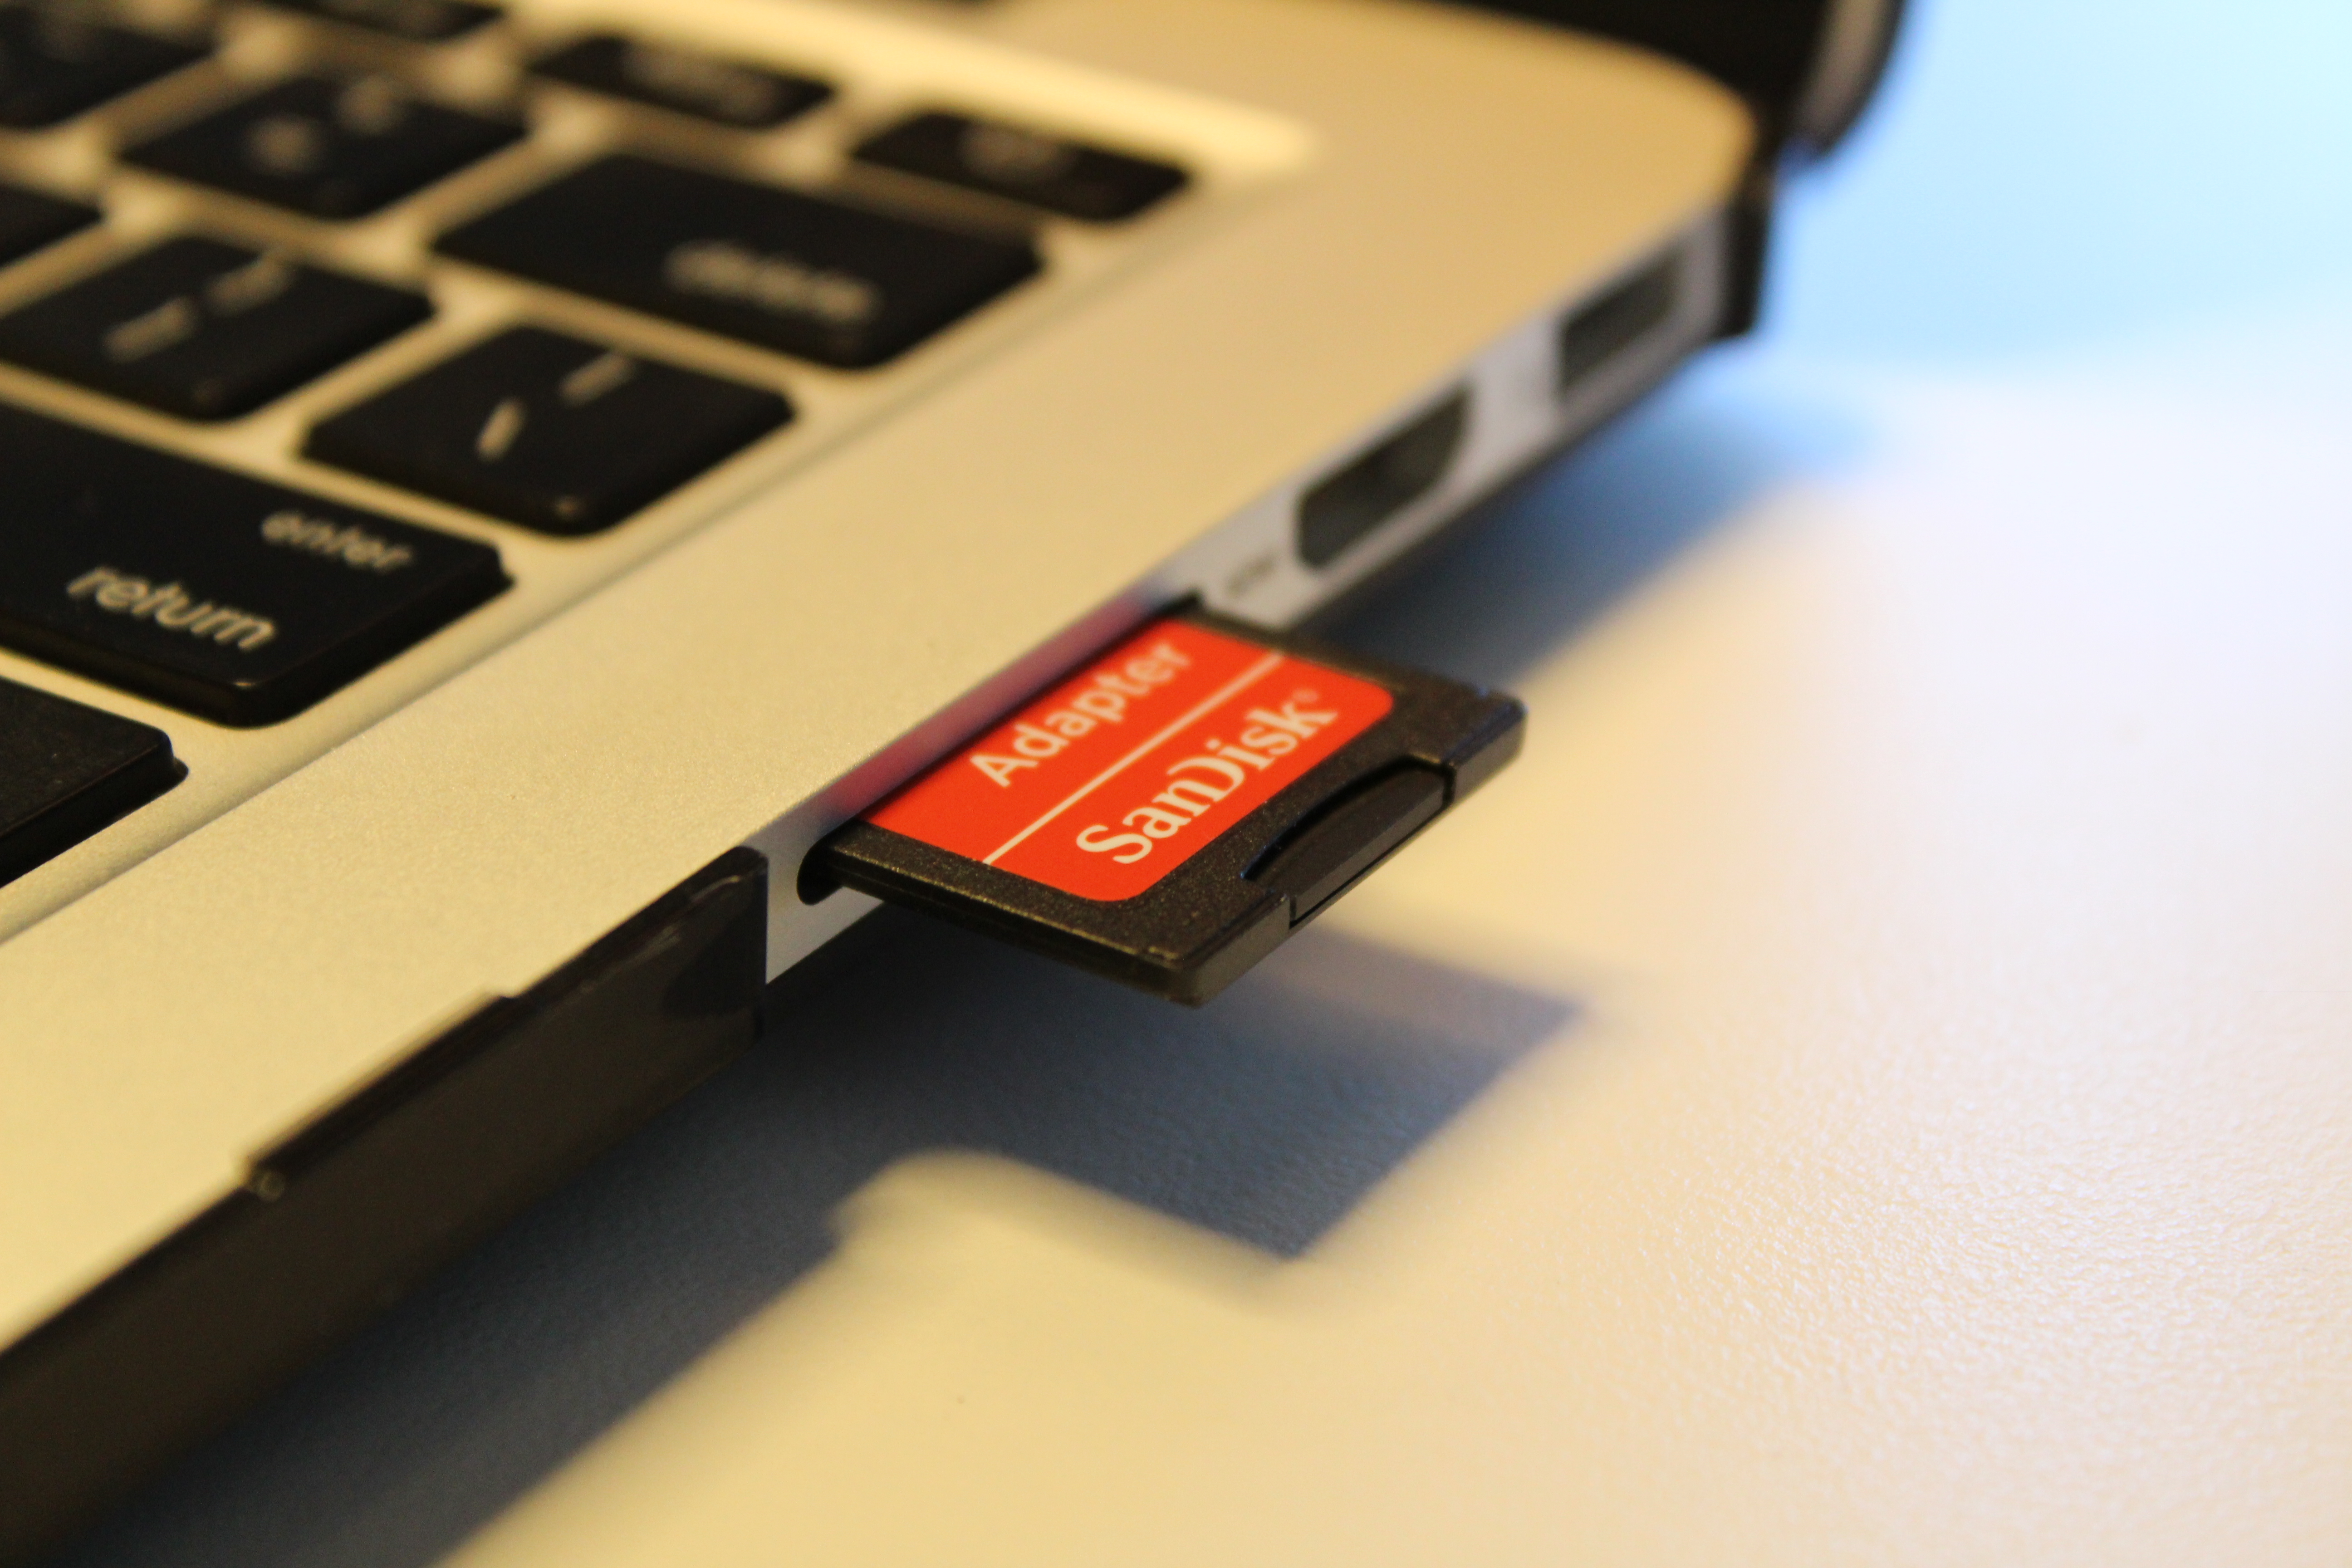
Obtain the rPi microSD card and microSD card adapter. Install the microSD card into the microSD card adapter.
Be sure to insert the microSD card with the appropriate orientation if not keyed.
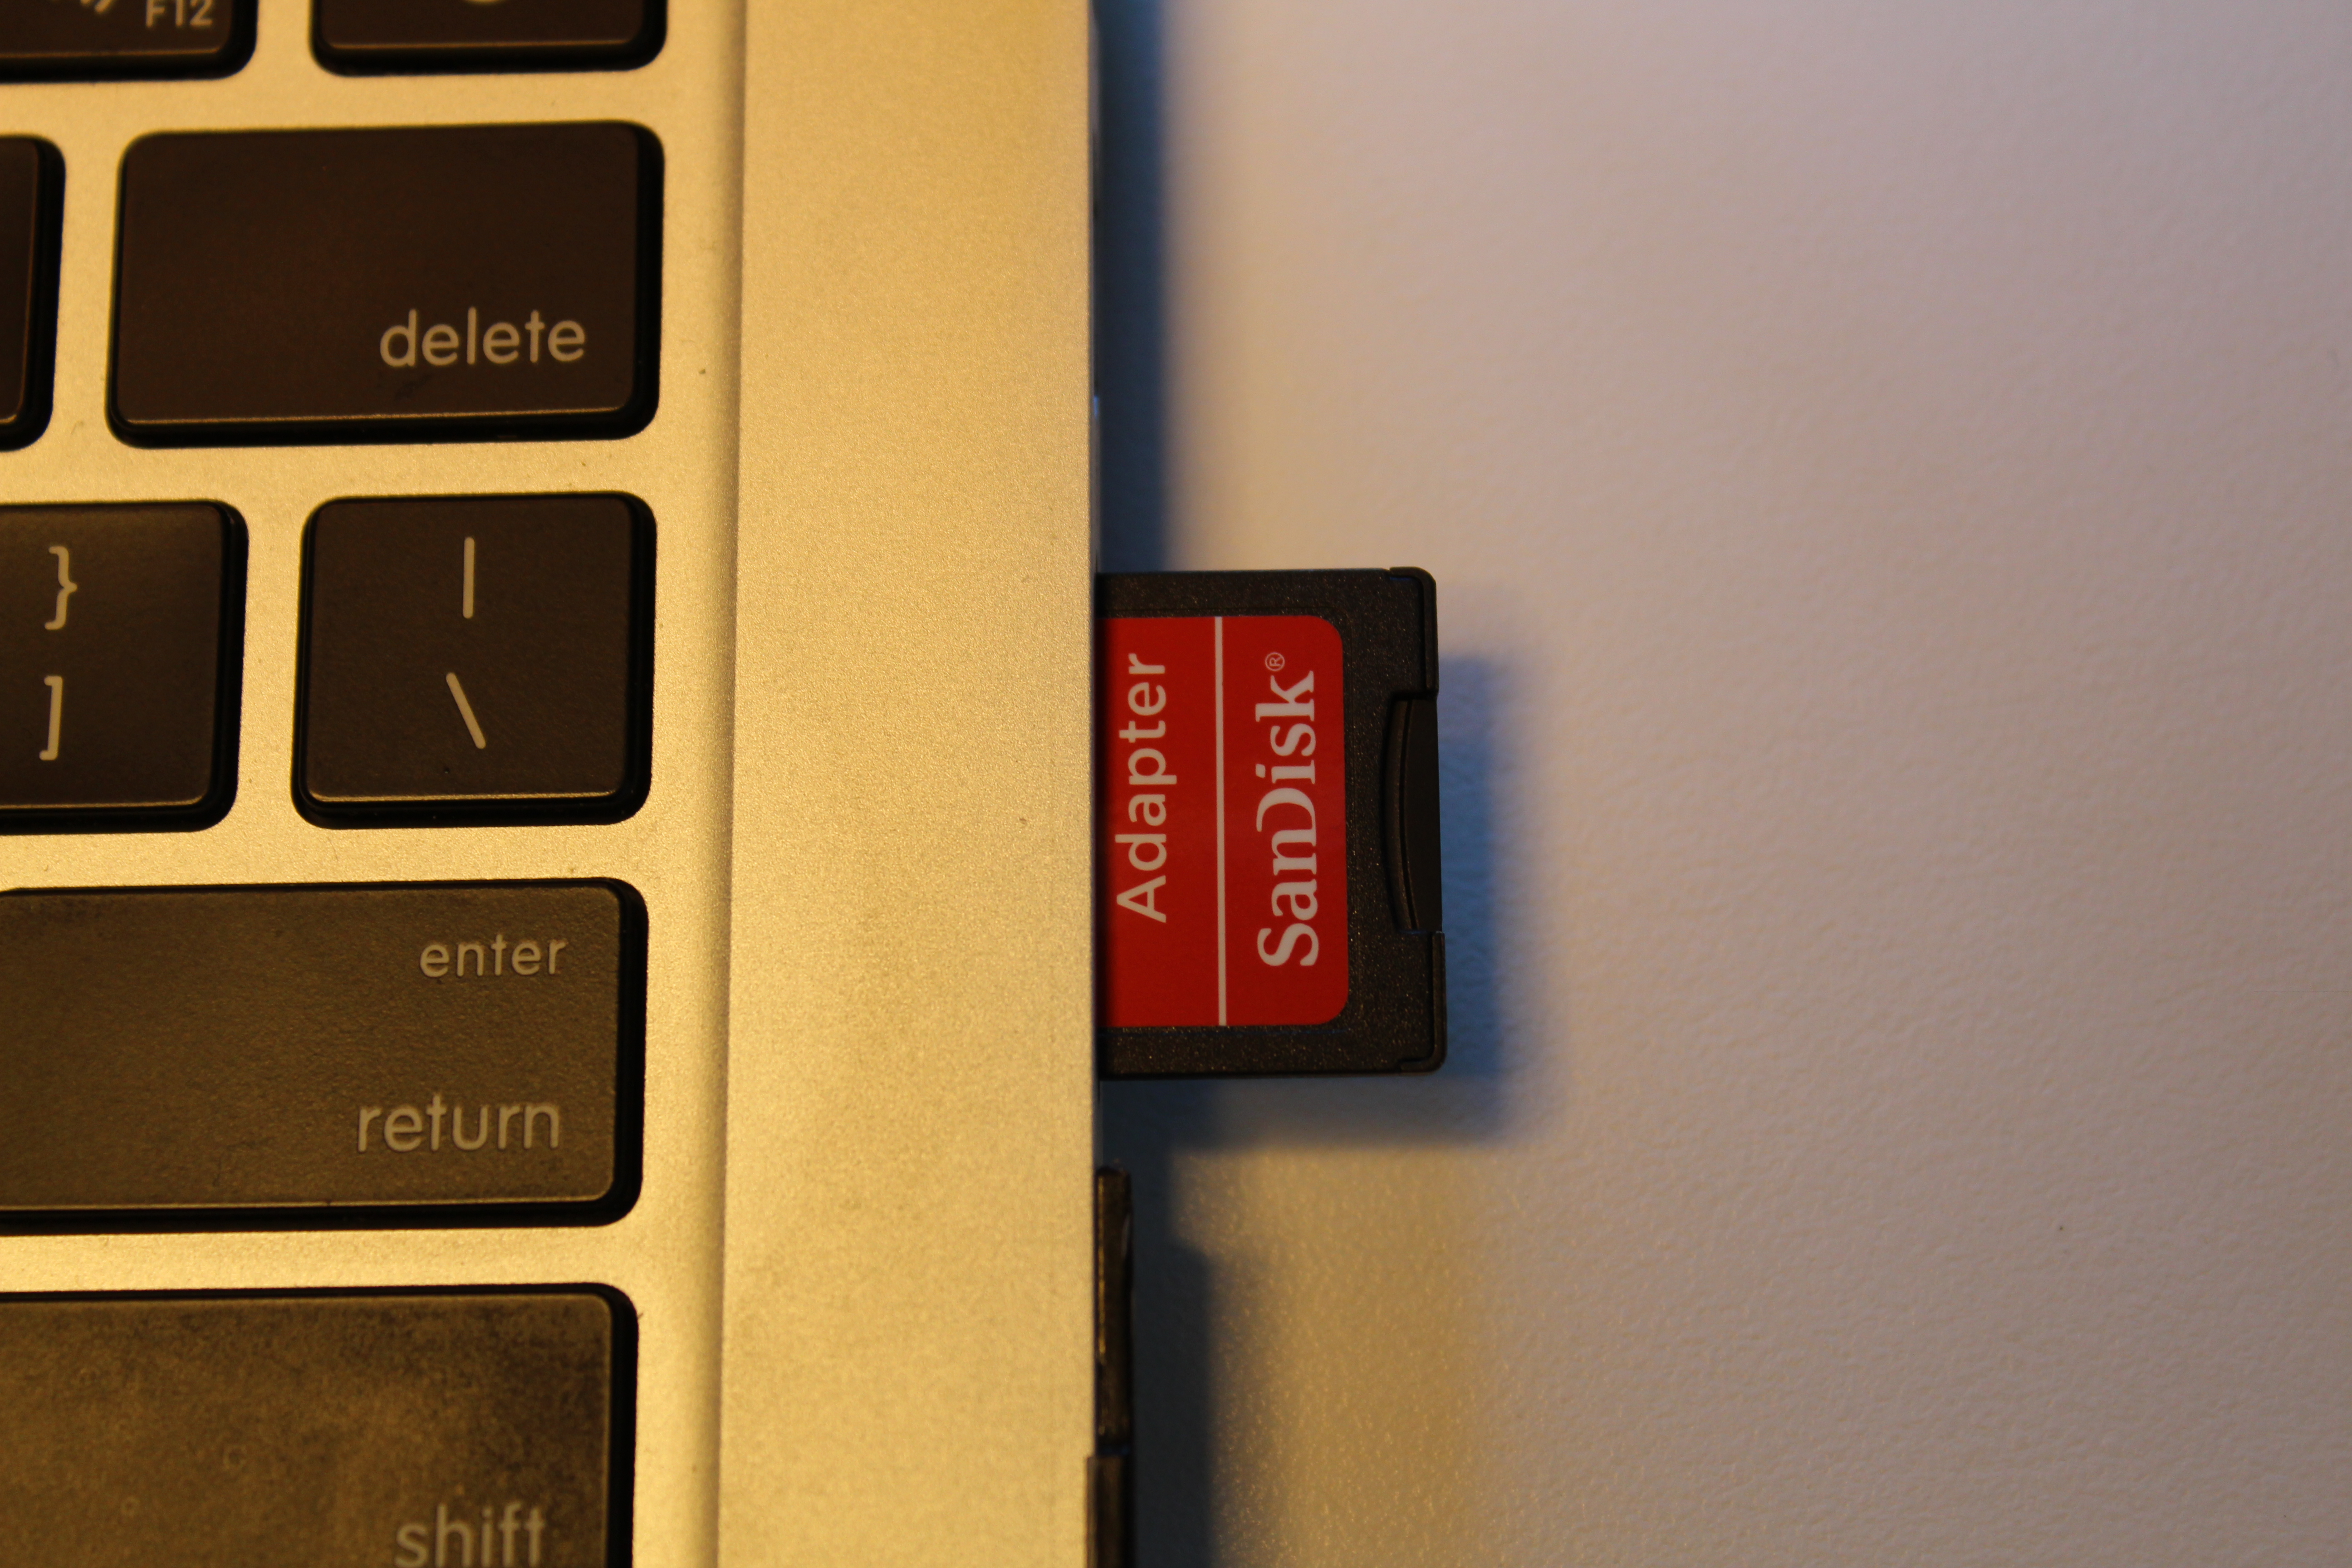
Place the microSD card adapter into your computer. If your computer does not have a card reader peripheral, place the microSD card adapter into a usb portable card reader, and connect the card reader to your computer.
Be sure to insert the SD card with the appropriate orientation if not keyed
If your computer has a microSD port, you may insert it directly. No adaptor necessary.
We will now install SD Memory Card Formatter (SD Card Formatter) so we can place NOOBS onto the microSD card. At the time of this writing, SD Memory Card Formatter's current version is 5. Most Raspberry Pi kits come with NOOBS preinstalled on the microSD card. However, sometimes the version is outdated, so make doubly sure to follow all update commands, which we will address near the end of the tutorial. If you do have NOOBS preinstalled, you may skip to Module 03.
Navigate to SD Association's SD Memory Card Formatter download page.
Scroll down and select the appropriate operating system to download the software.
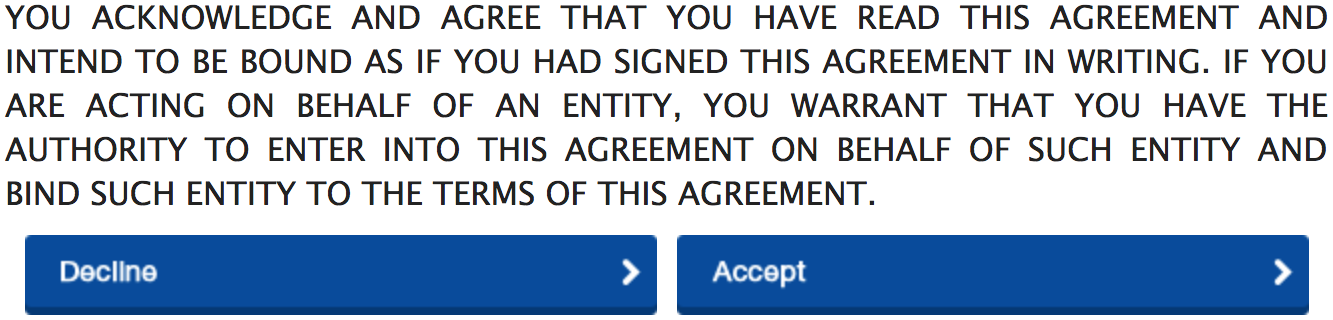
This will take you to another page with the END USER LICENSE AGREEMENT. Accept the terms and conditions to initiate the download.
The download may be flagged if using Google Chrome!
If the download is interrupted by the following flag, follow the next few steps. Otherwise skip ahead to installing SD Card Formatter.
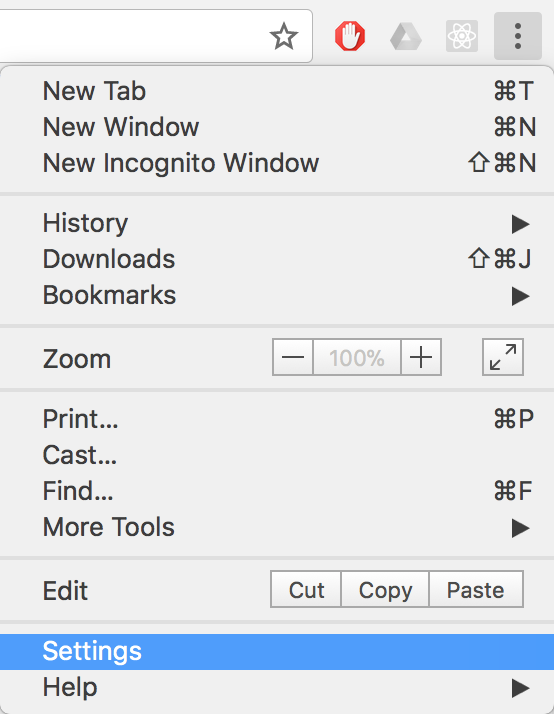
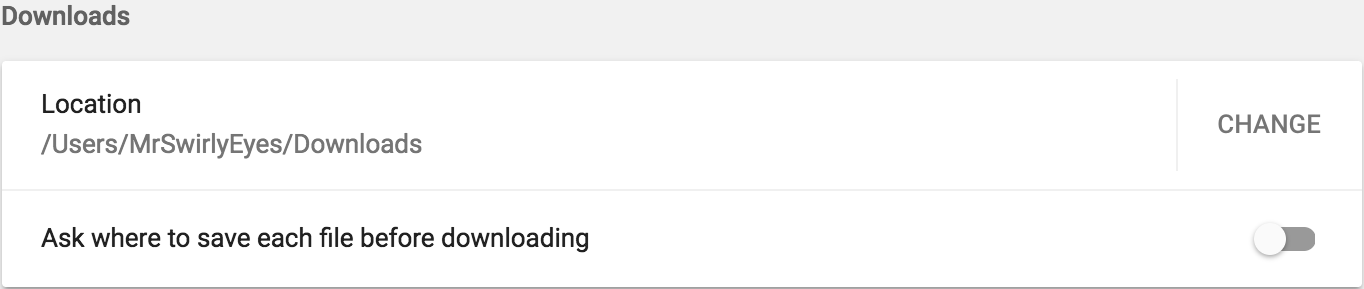
In the top right-corner of the Google Chrome browser, click on the hamburger menu, and select Settings.
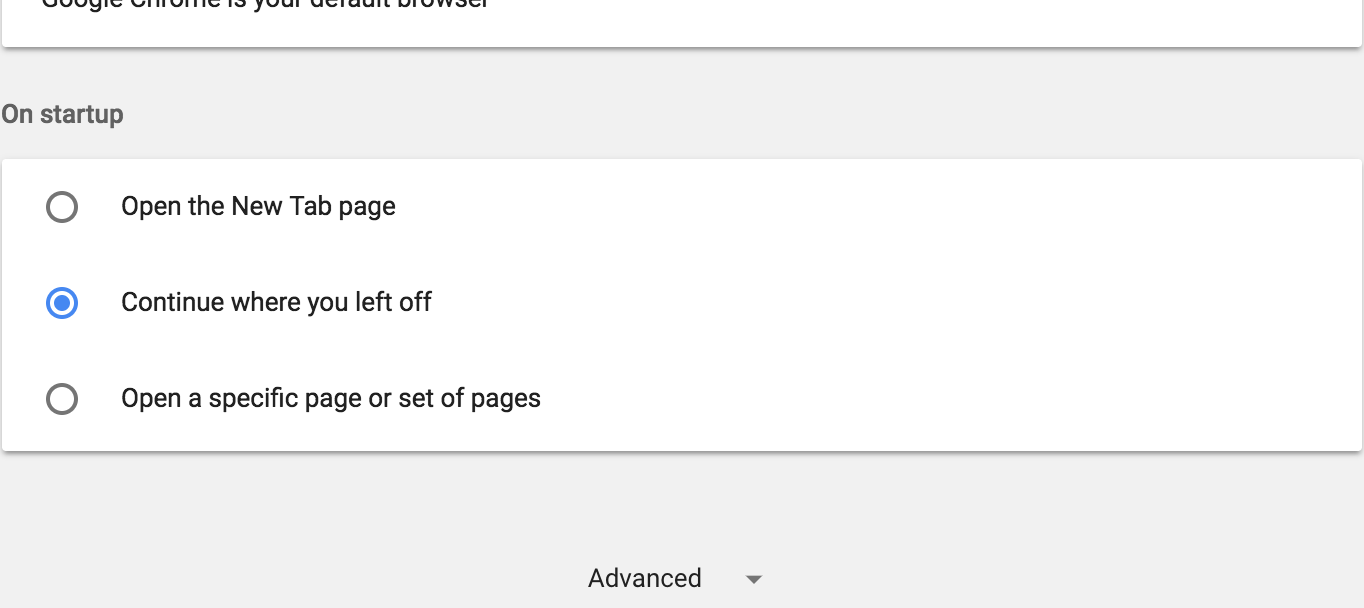
Scroll down to the bottom of the Settings page and toggle the Advanced chevron.
Scroll down further to the Downloads section.
Toggle on the Ask where to save each file before downloading.
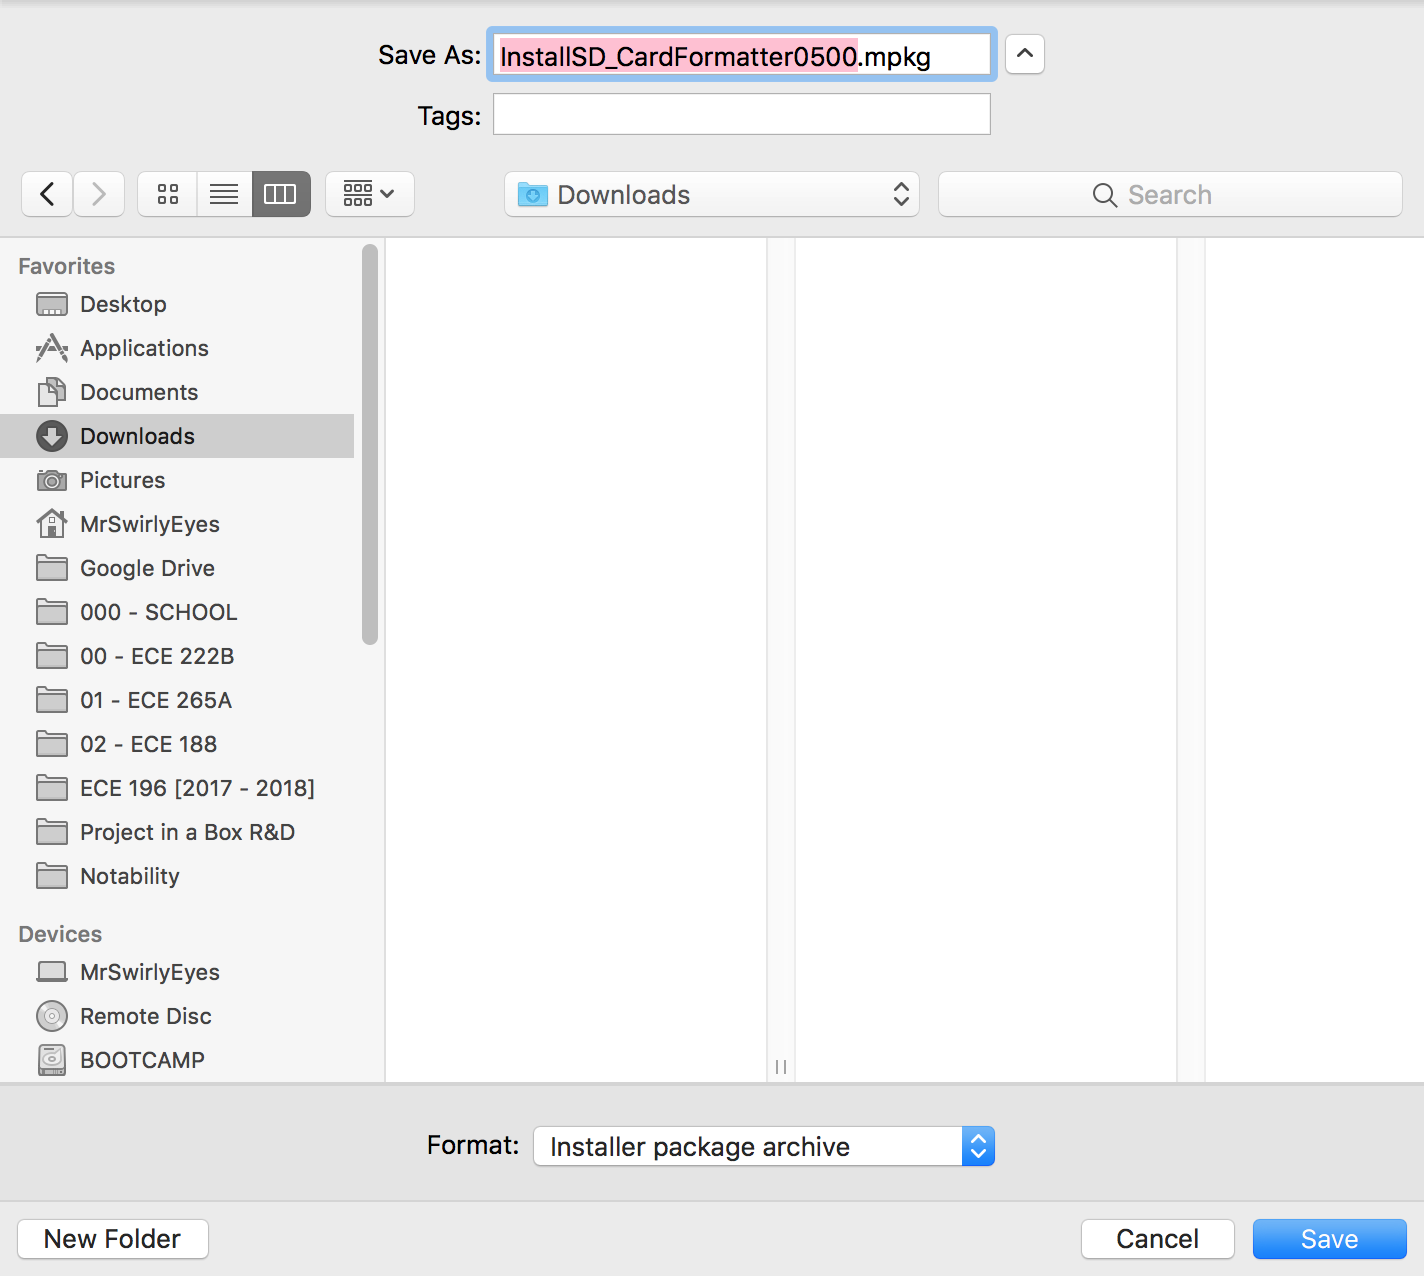
Proceed to try to download the software again as done in the earlier steps. You will now be prompted to select a location to download the software. Choose anywhere to download it; we chose the Downloads folder. It should successfully download, this time without the flag, to the designated folder.
The flag that appeared before should not appear, and the installer download should be successful.
If you still have problems, please resort to a Google search.
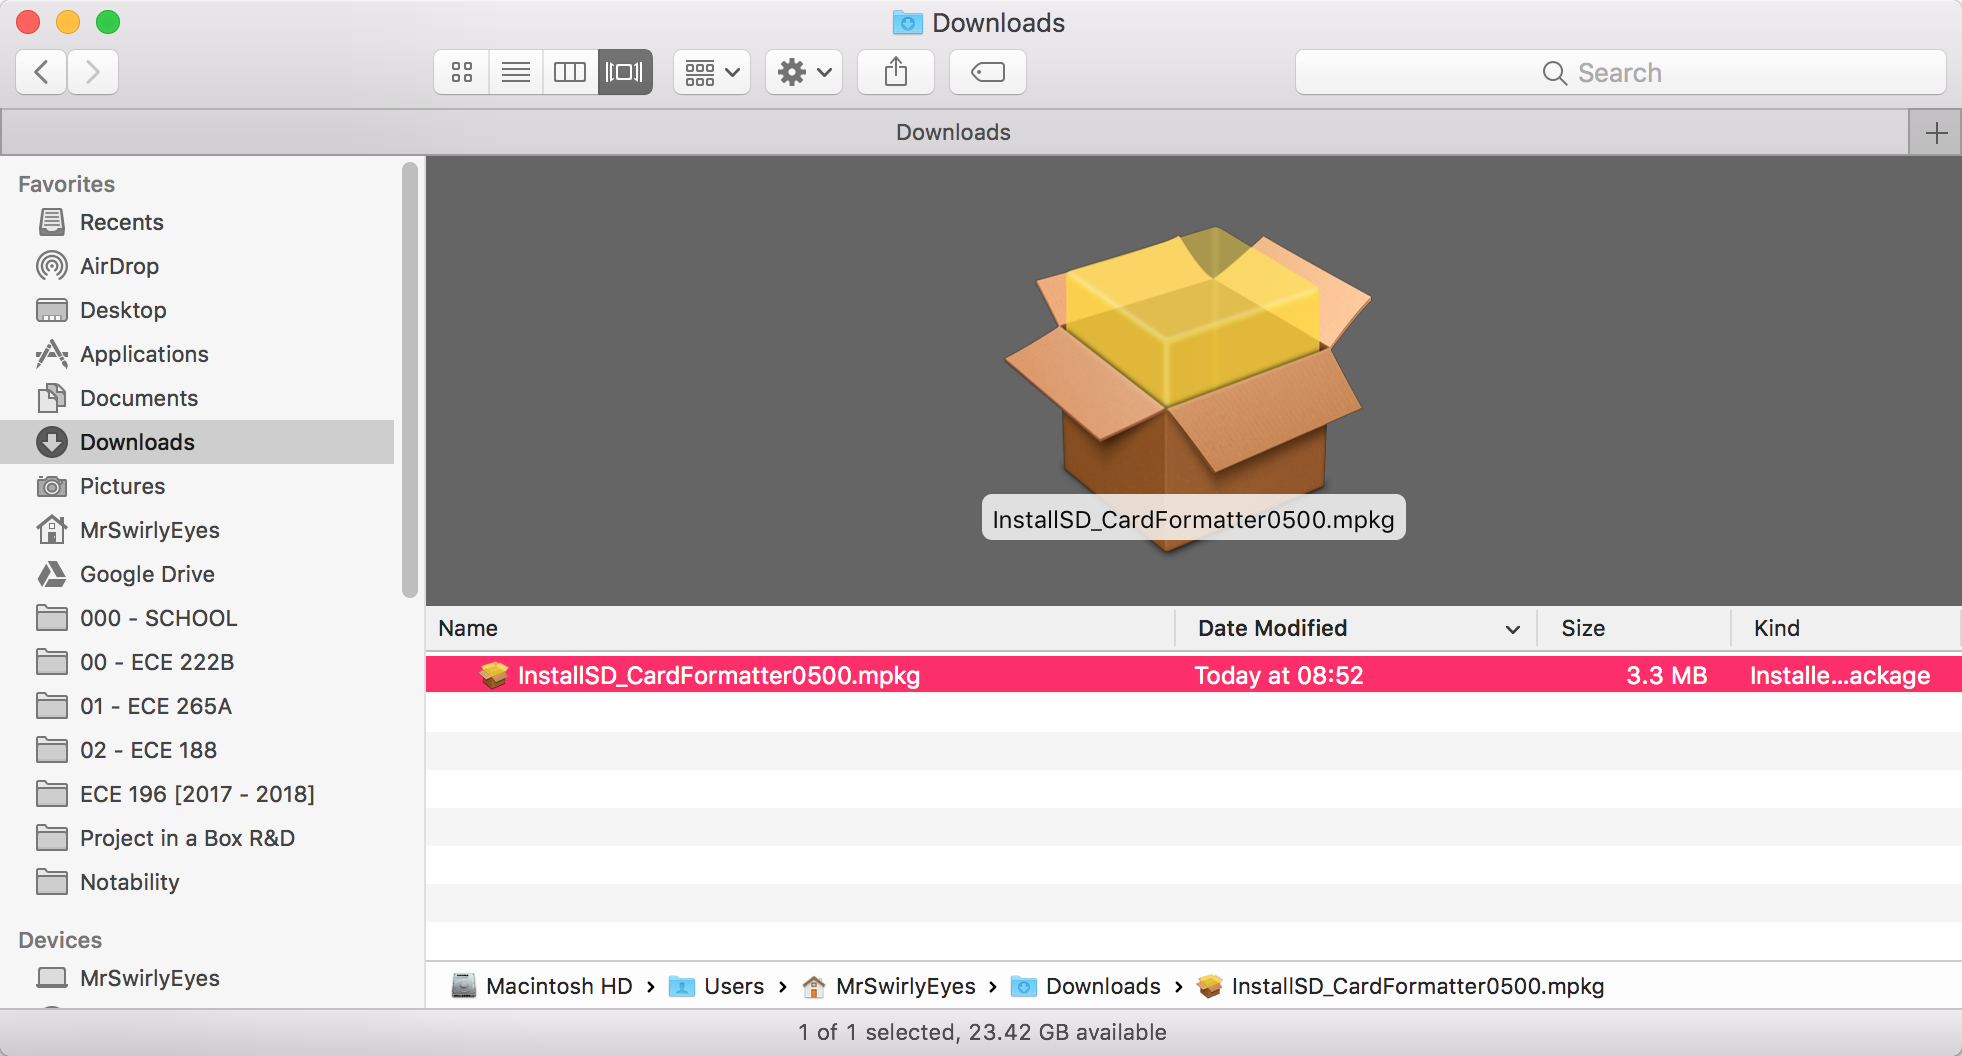
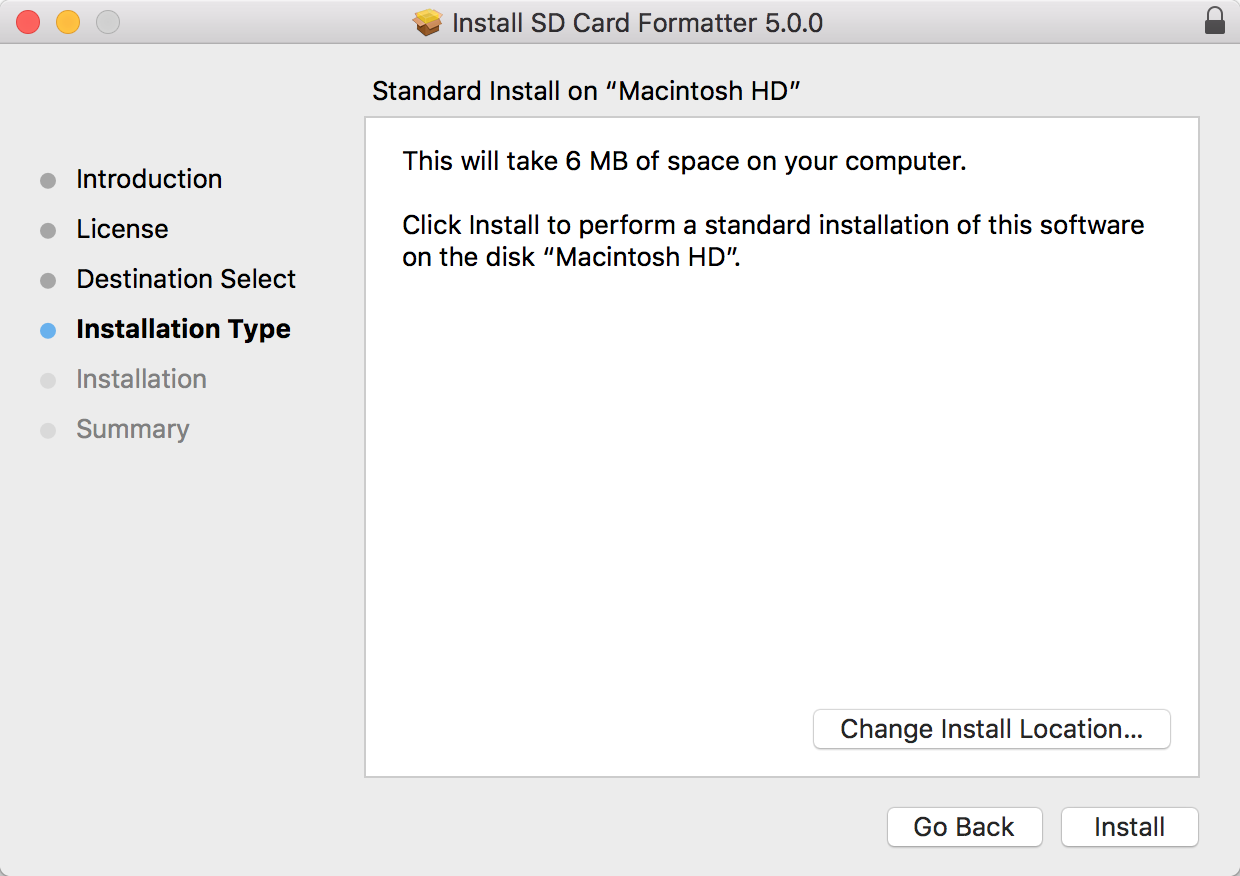
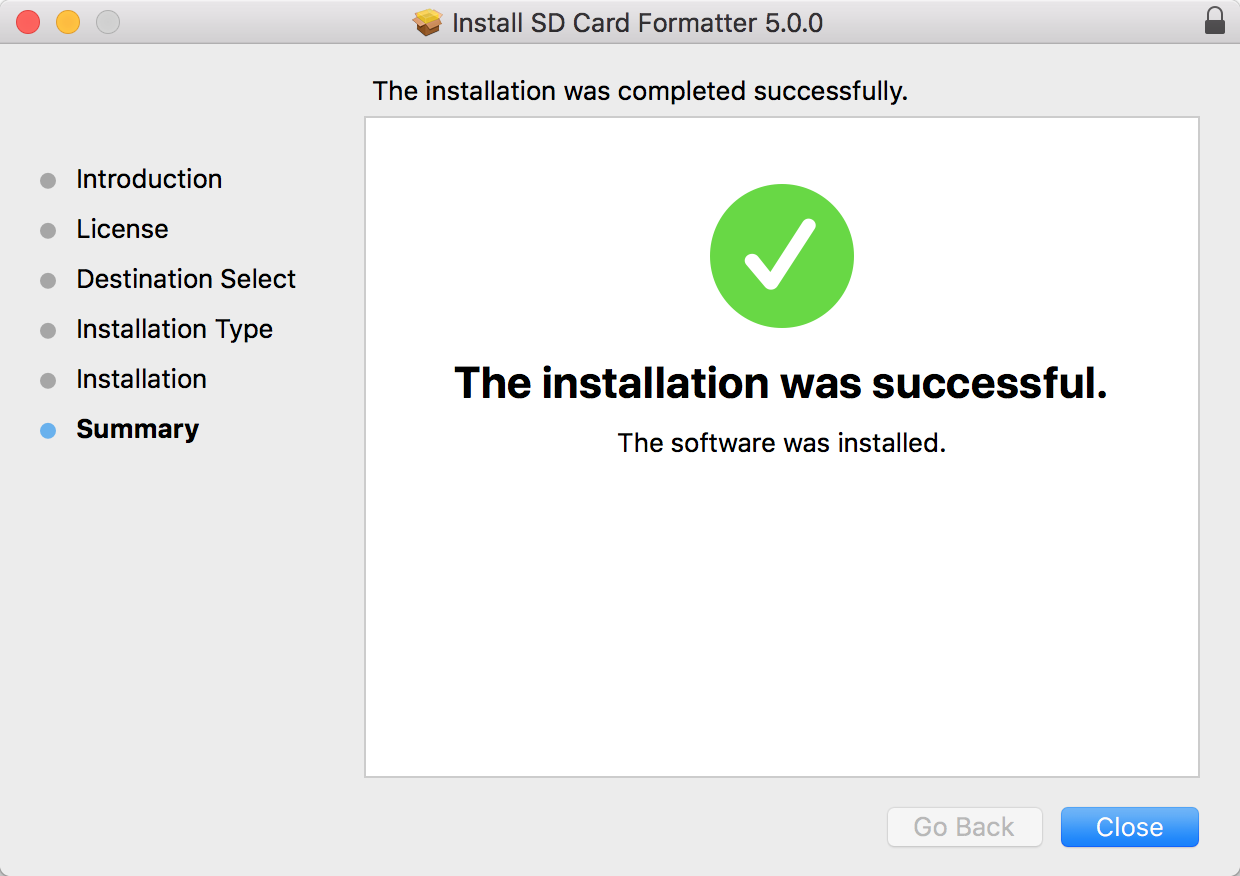
Navigate to where you downloaded the installer for SD Card Formatter. Launch the installer.
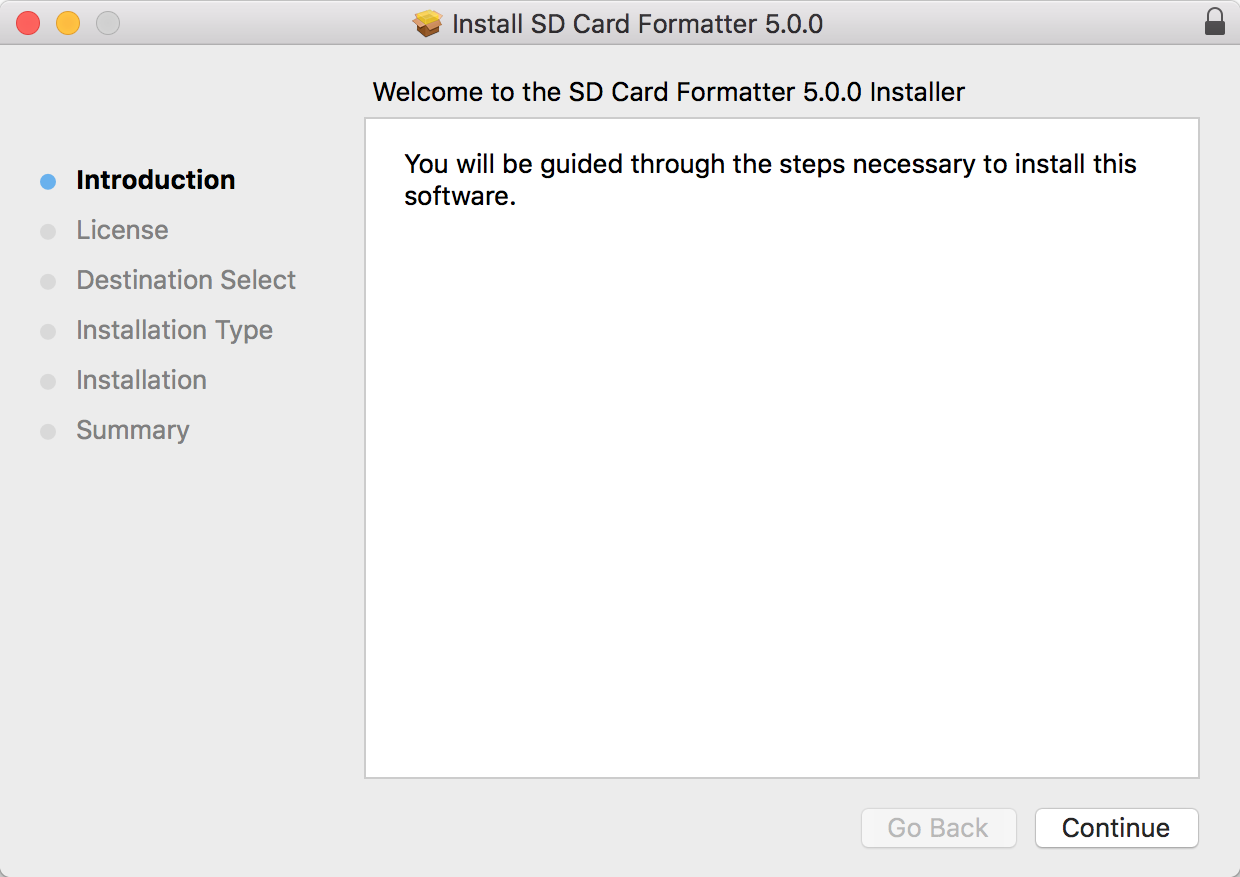
Proceed to install the software by following the installer instructions:
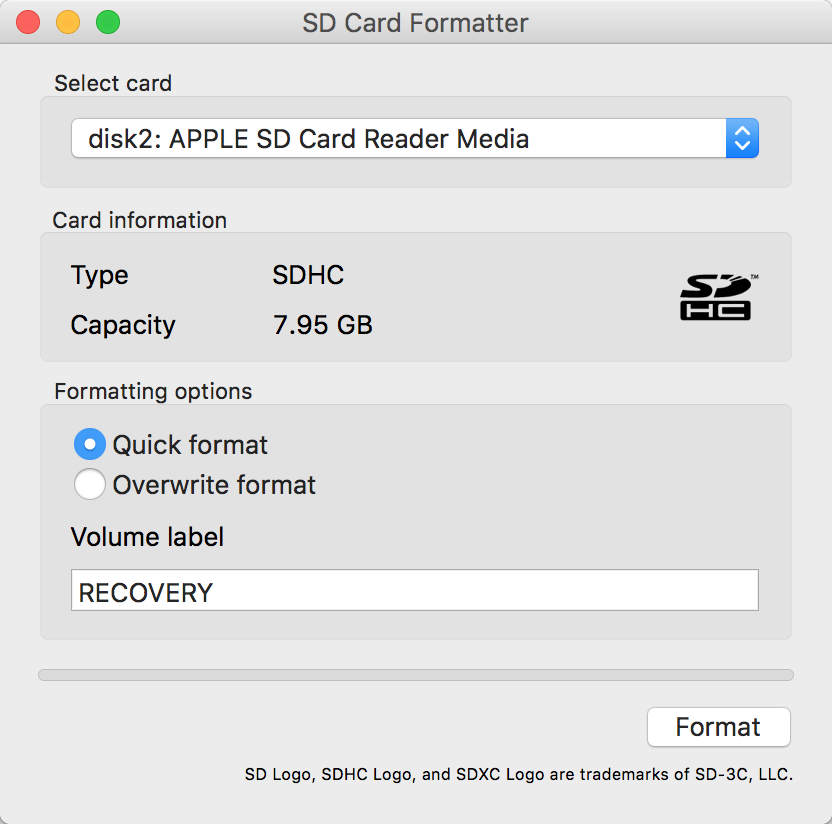
With SD Card Formatter installed, we will first use it to format the microSD card. Start by launching SD Card Formatter.
If you have your microSD card inserted, it should auto-populate as shown. If not, insert the microSD card and it should immediately populate the program.
If you have multiple drives plugged in - for example, a flash drive and the microSD card - both will be options and you must select the SD card from the dropdown list under Select Card.
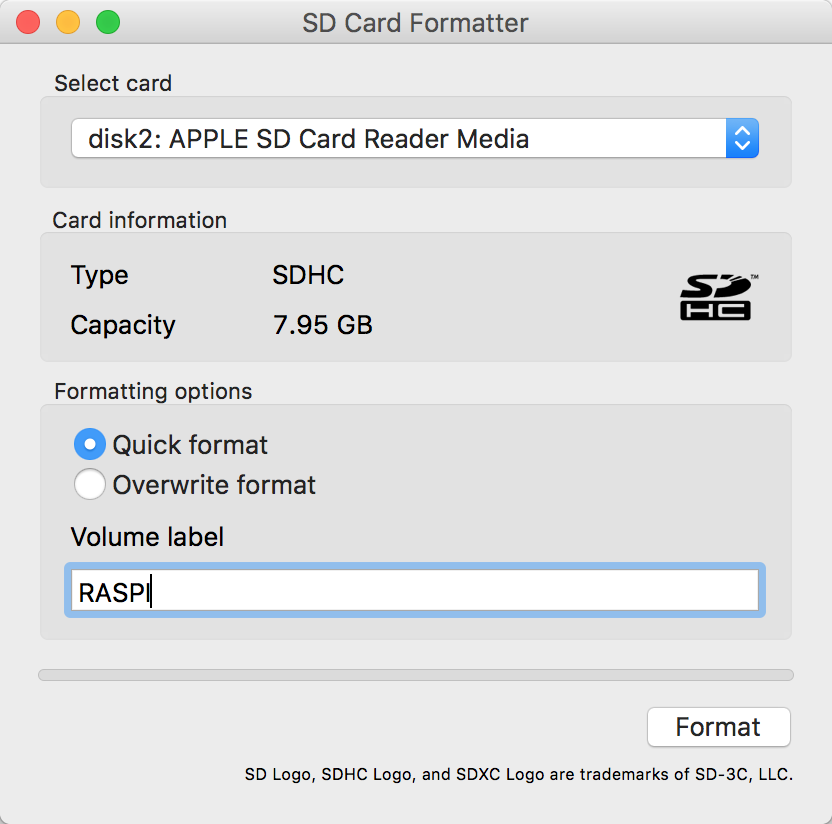
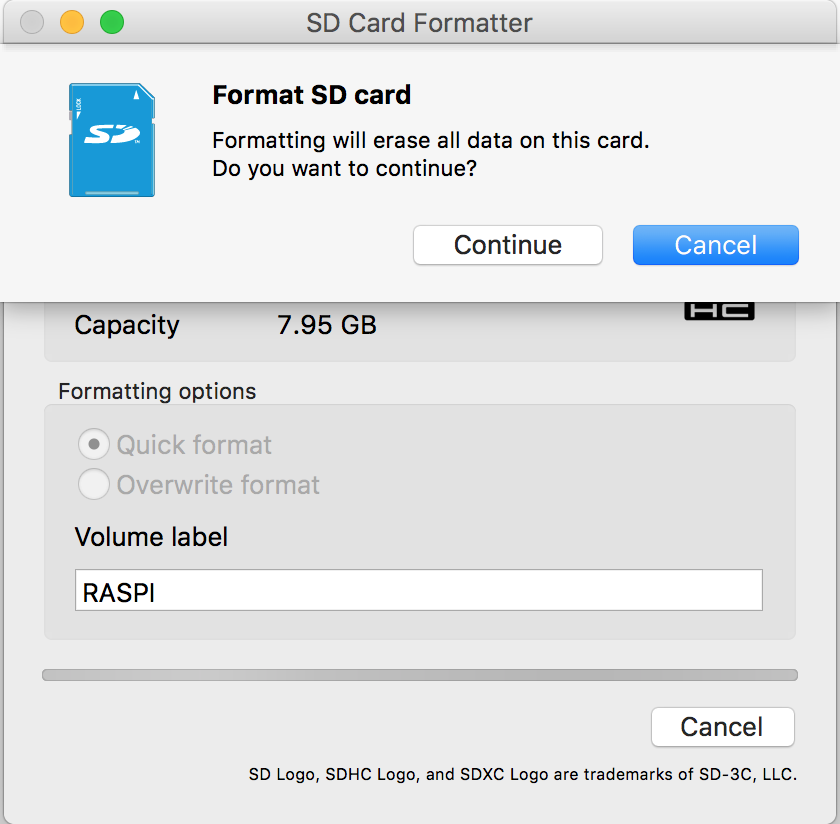
With the microSD card selected in the Formatting Options section:
You will be prompted with a confirmation. Click Continue.
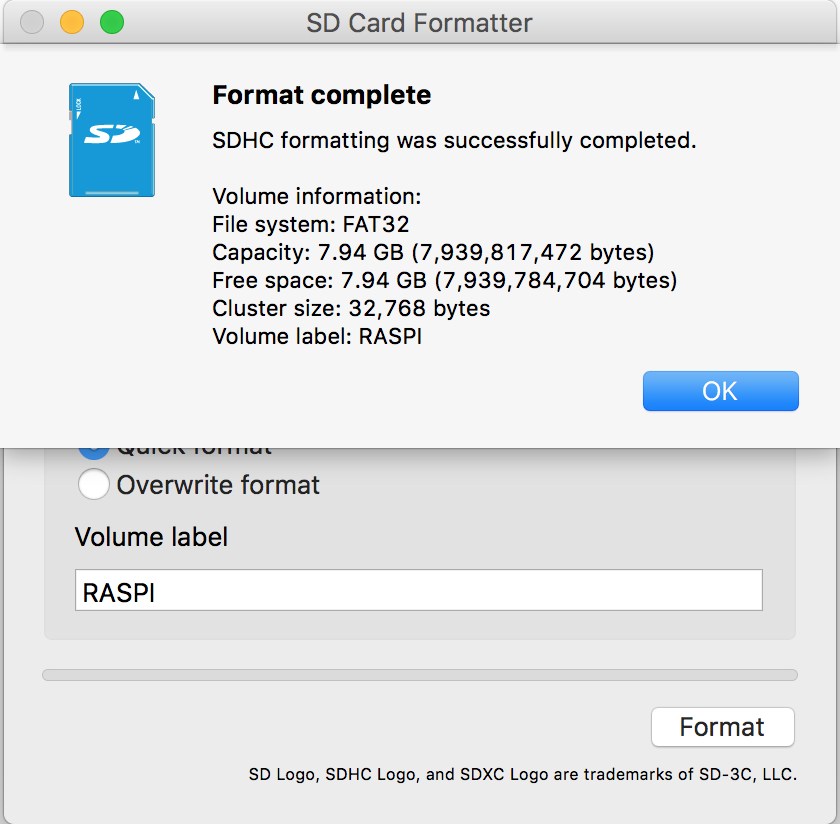
The formatting process will start. It should only take a moment, and then the program will notify you of the results of the process.
With the microSD card formatted, we are ready to install NOOBS onto it. We can close SD Card Formatter.
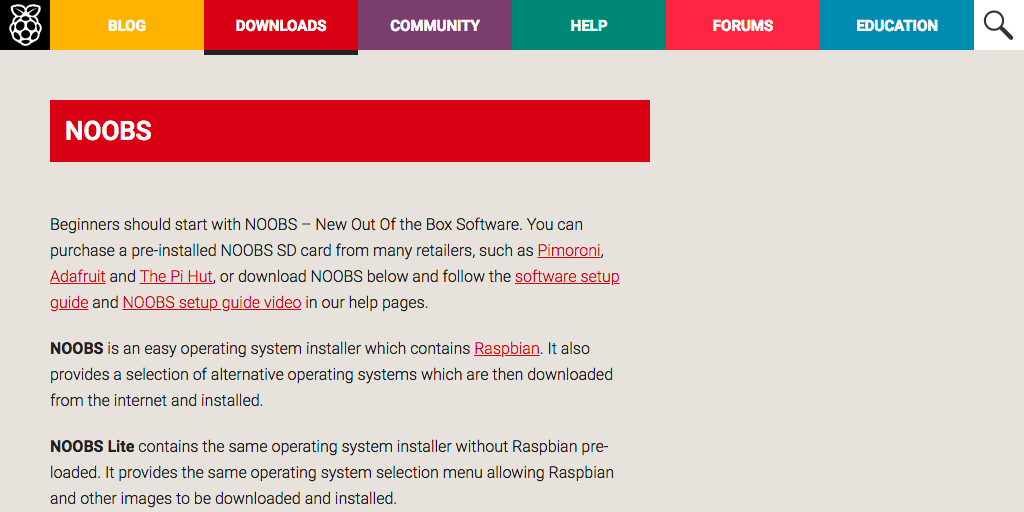
We will install the latest version of NOOBS (New Out Of the Box Software) onto the microSD card. At the time of this writing, Raspberry Pi NOOBS's current version is 2.7.0.
Navigate to Raspberry Pi's NOOBS download page.
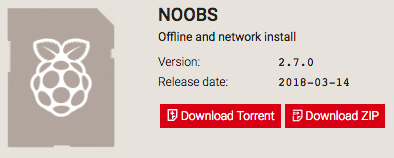
Scroll down to the download options. Choose the left-most option: Under NOOBS select Download ZIP to begin the software download.
Do not download NOOBS LITE!
The download may take several minutes, the .zip is approximately 1.0 GB
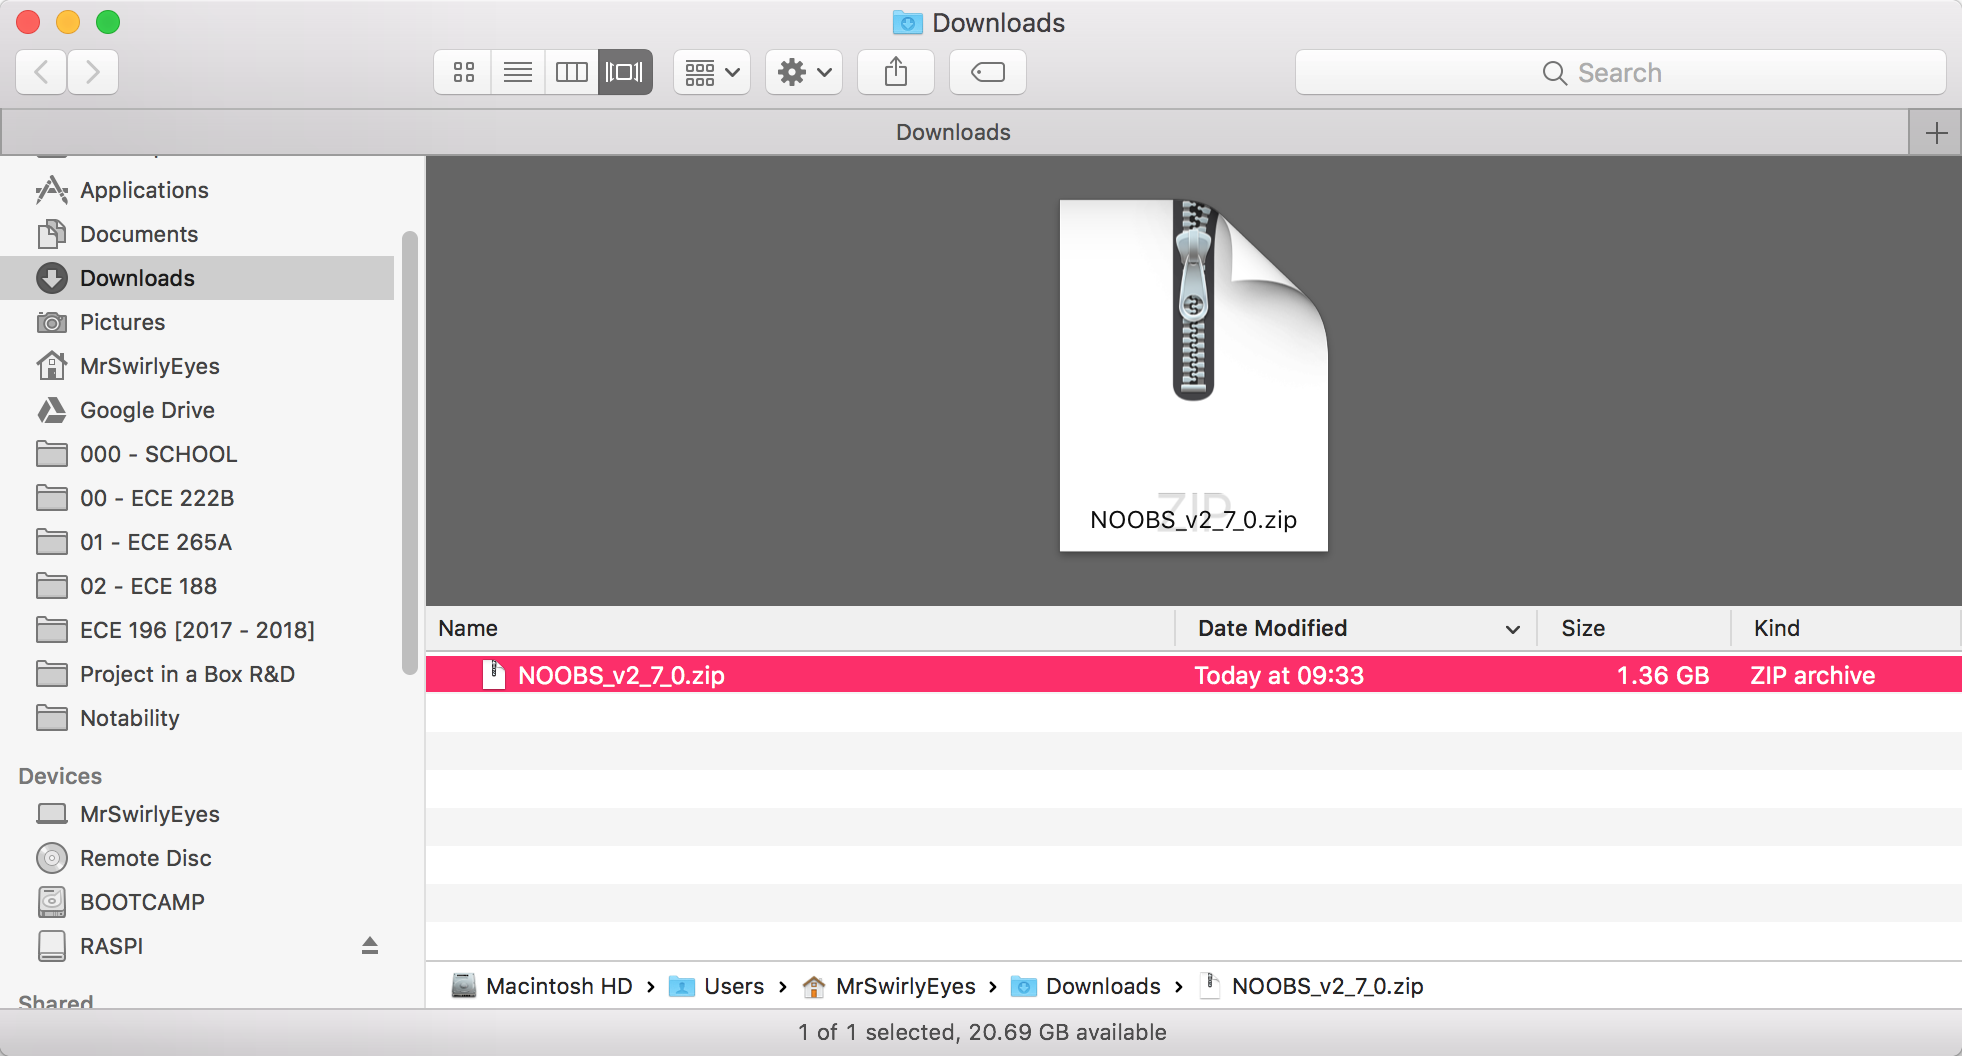
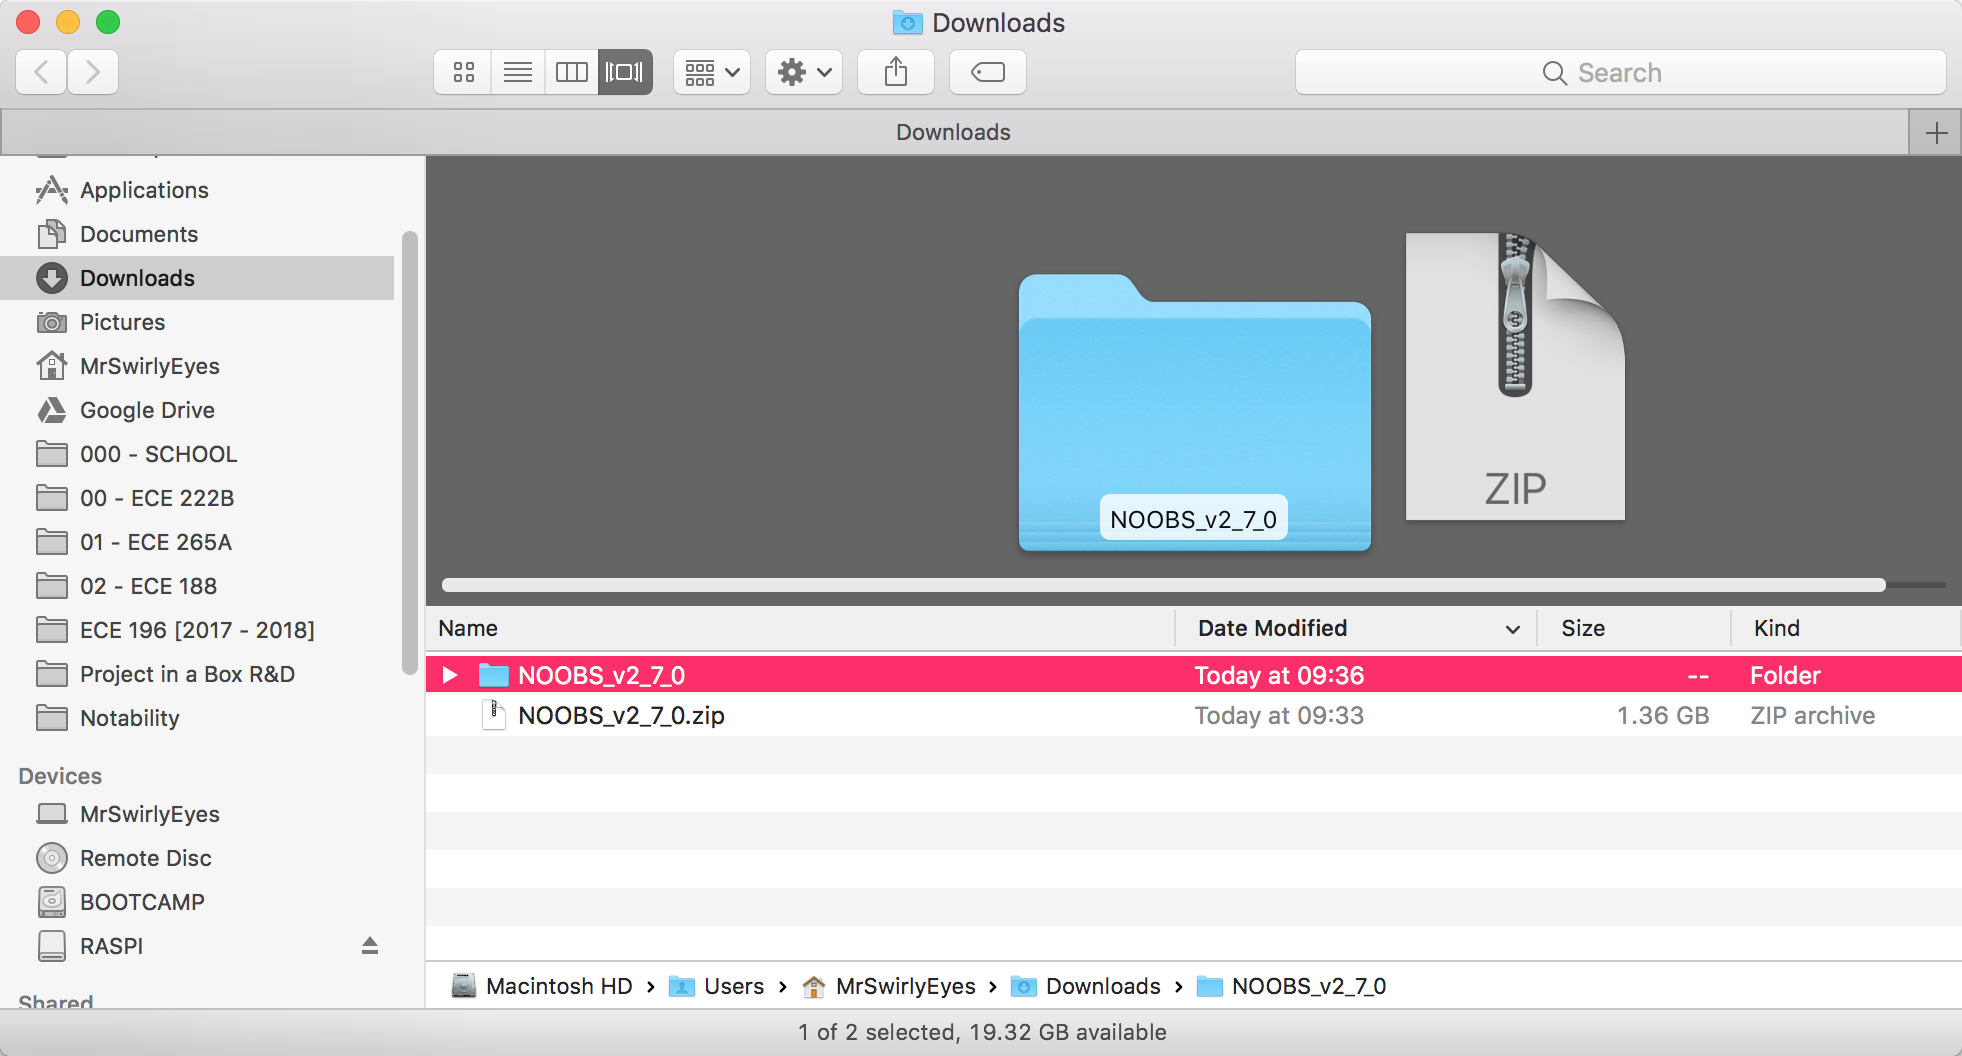
When the download is complete, navigate to the location you downloaded the NOOBS .zip folder and unzip it. Then navigate into the unzipped NOOBS folder.
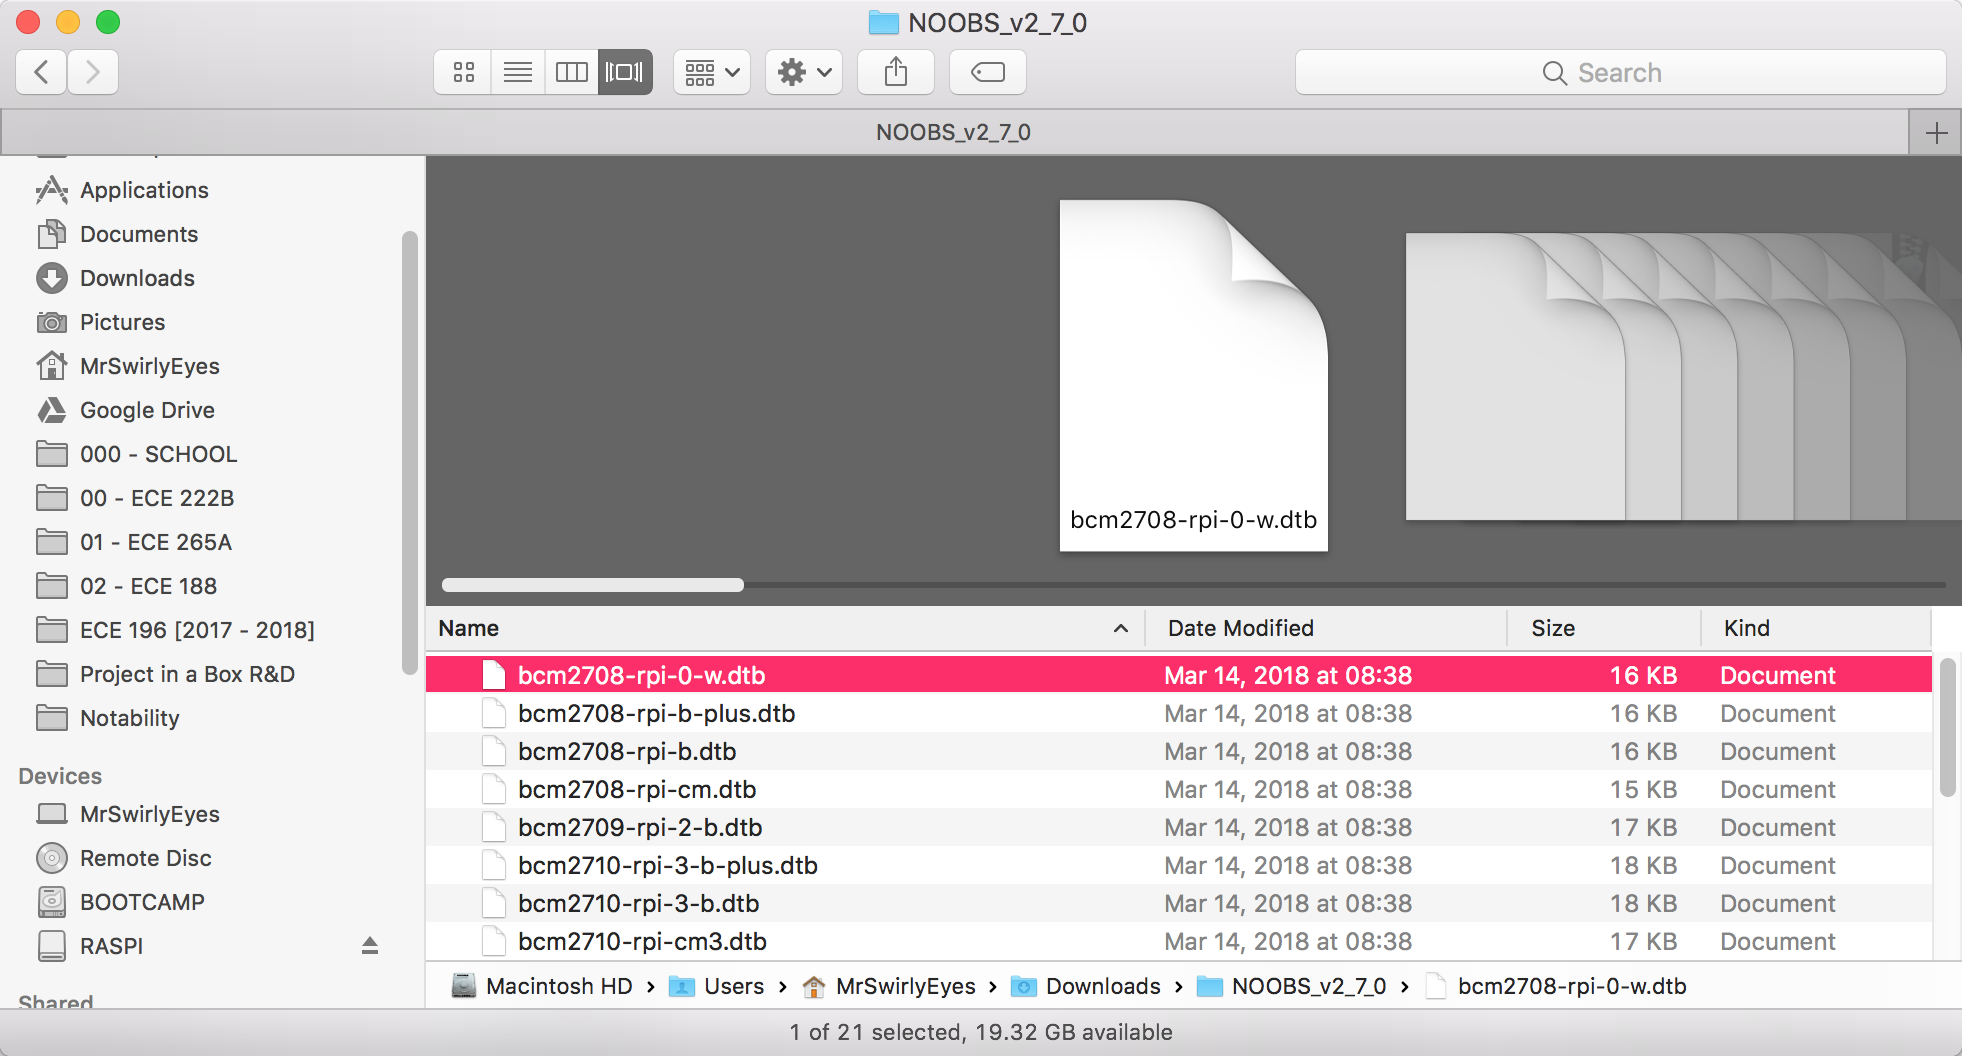
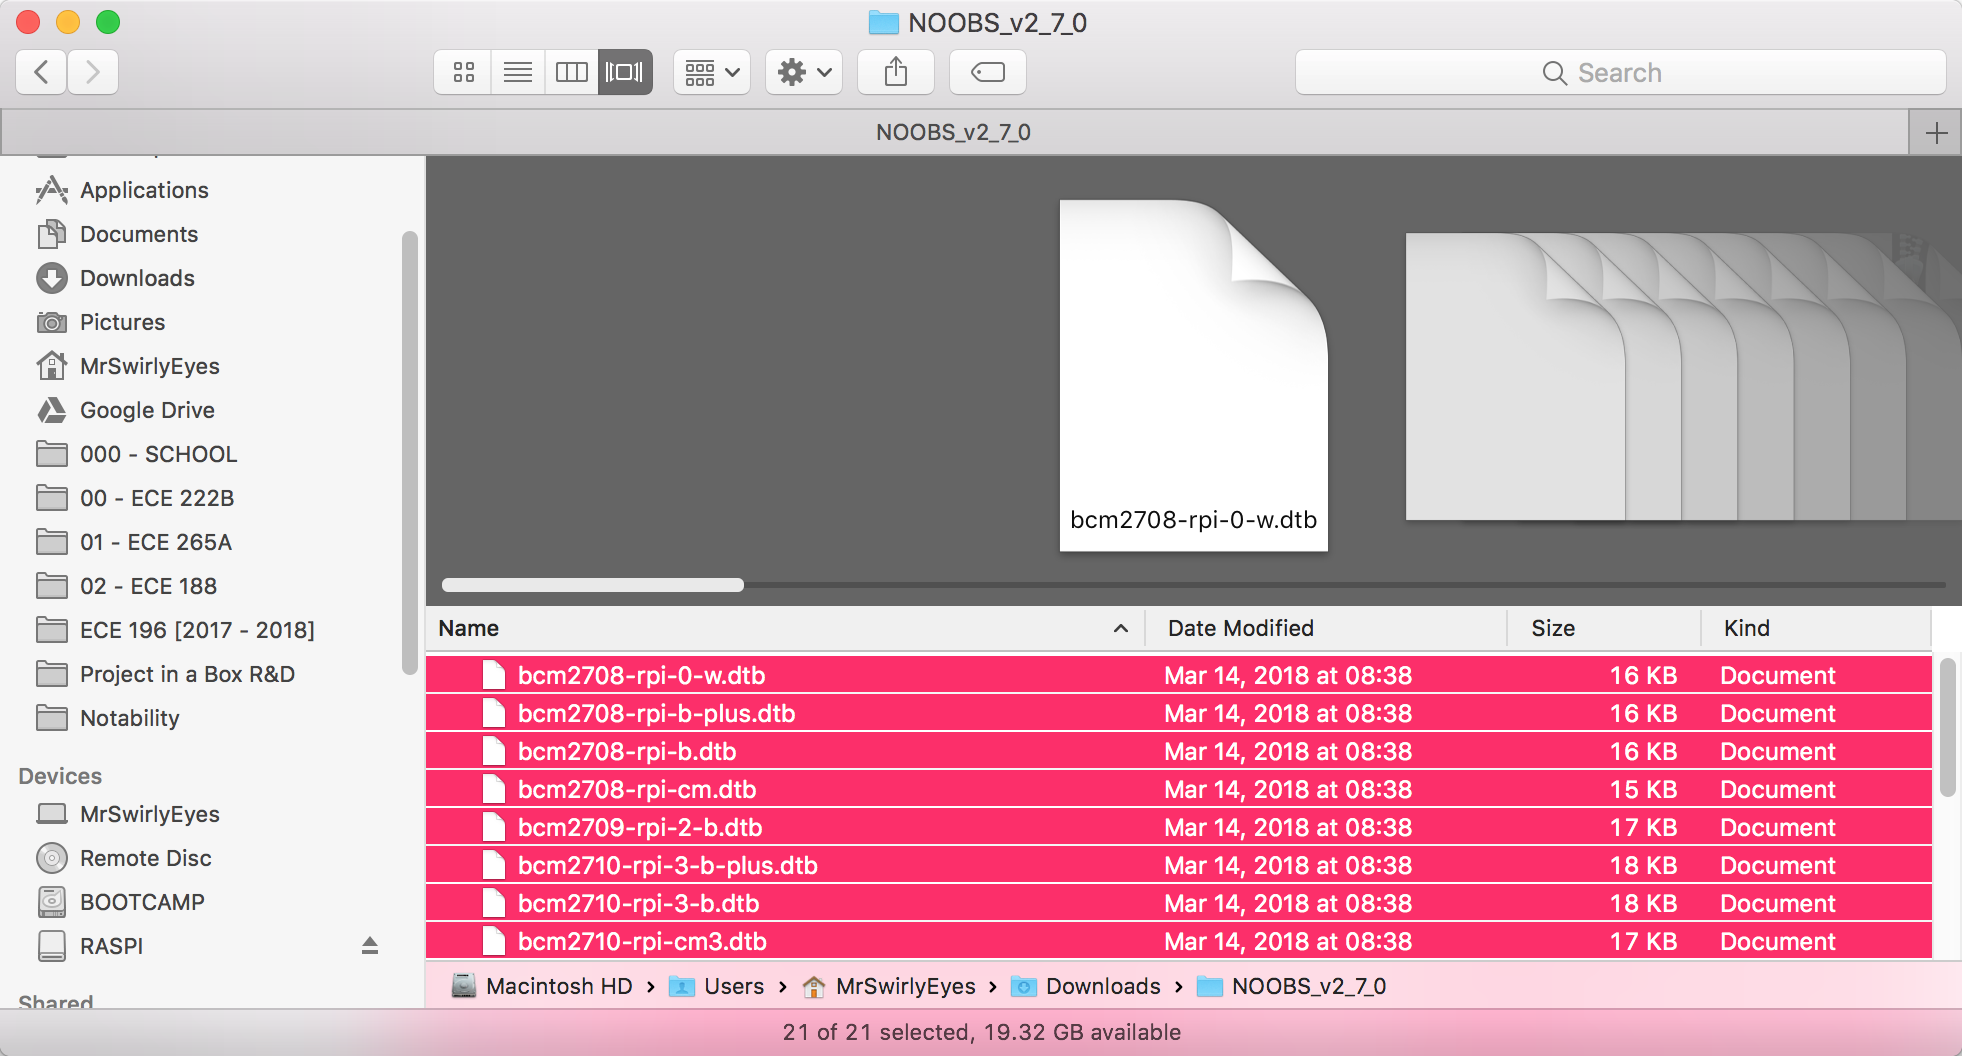
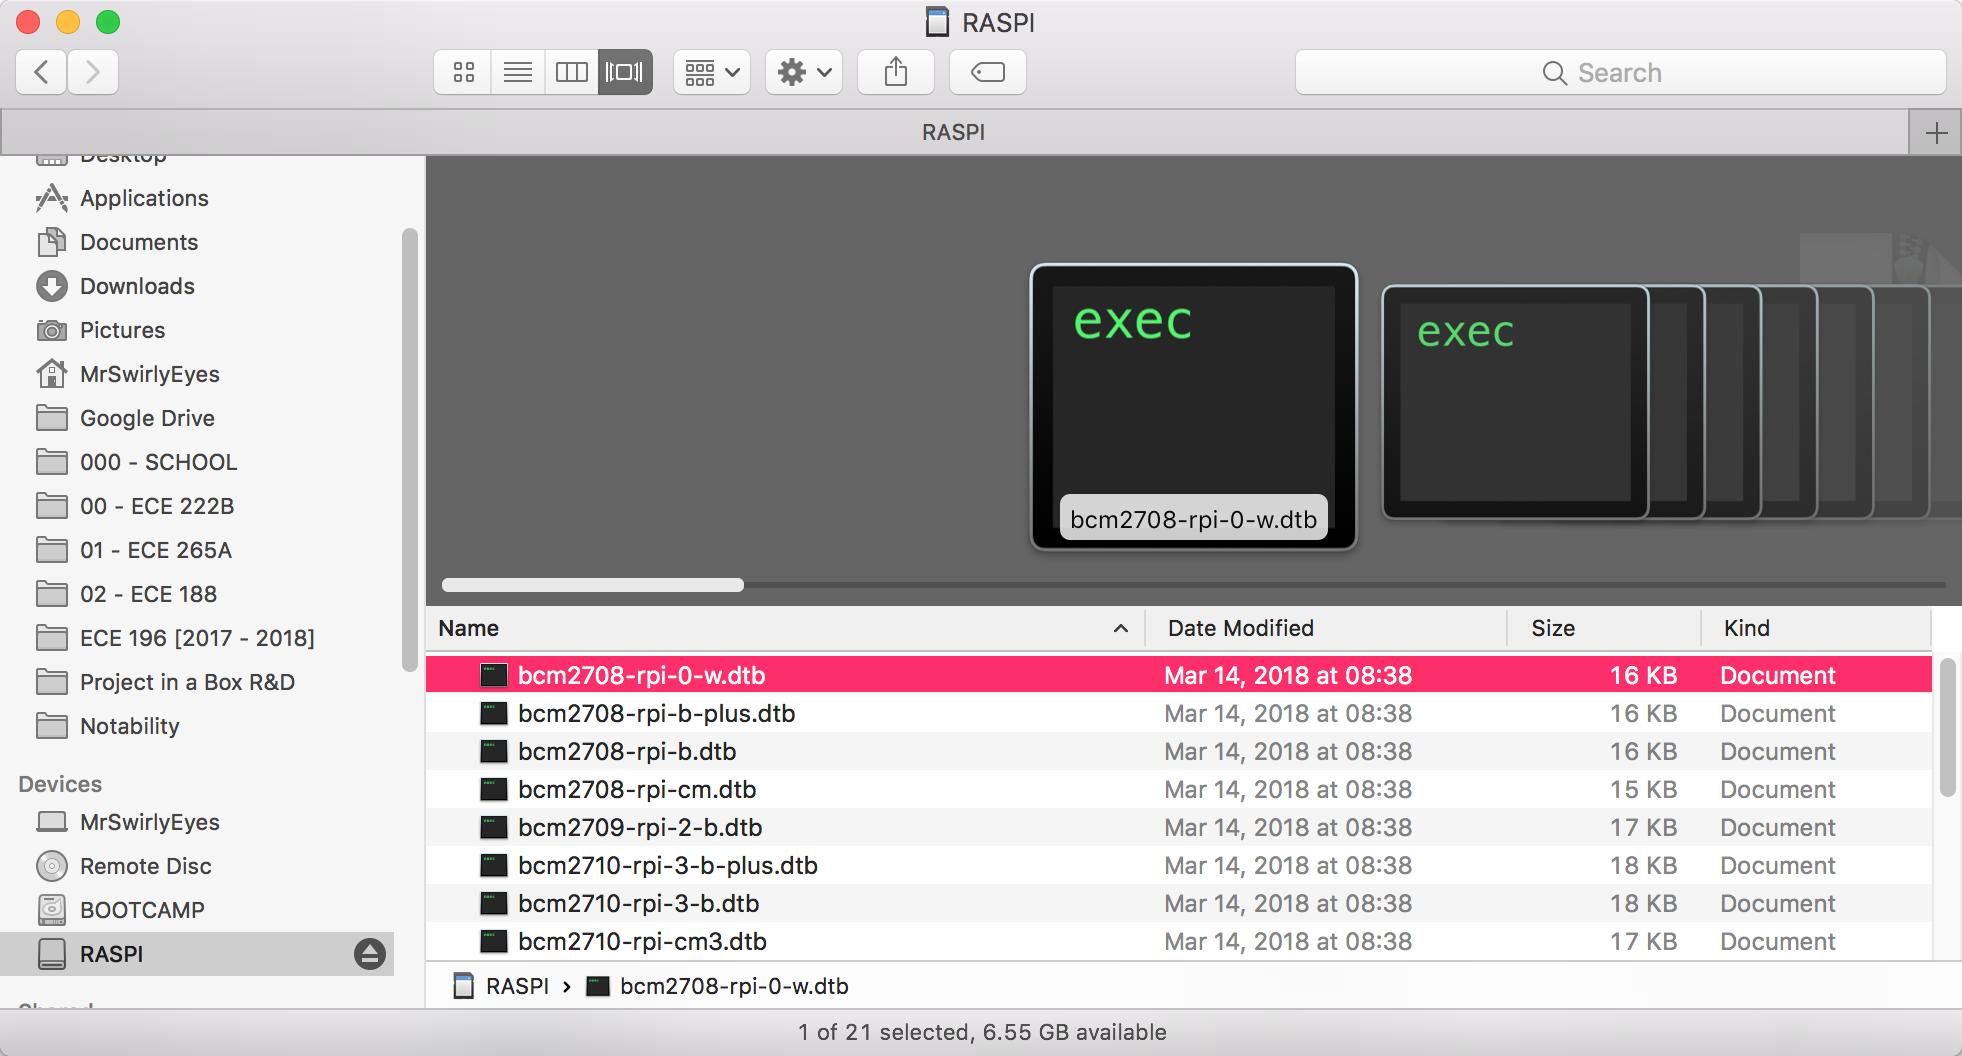
Select all the NOOBS content in the folder (ctrl + A or cmd + A).
Drag-and-drop or copy-paste the NOOBS contents of the folder into the microSD card. The copy process may take several minutes. After you verify that NOOBS has been installed onto the microSD card, you may eject the microSD card.
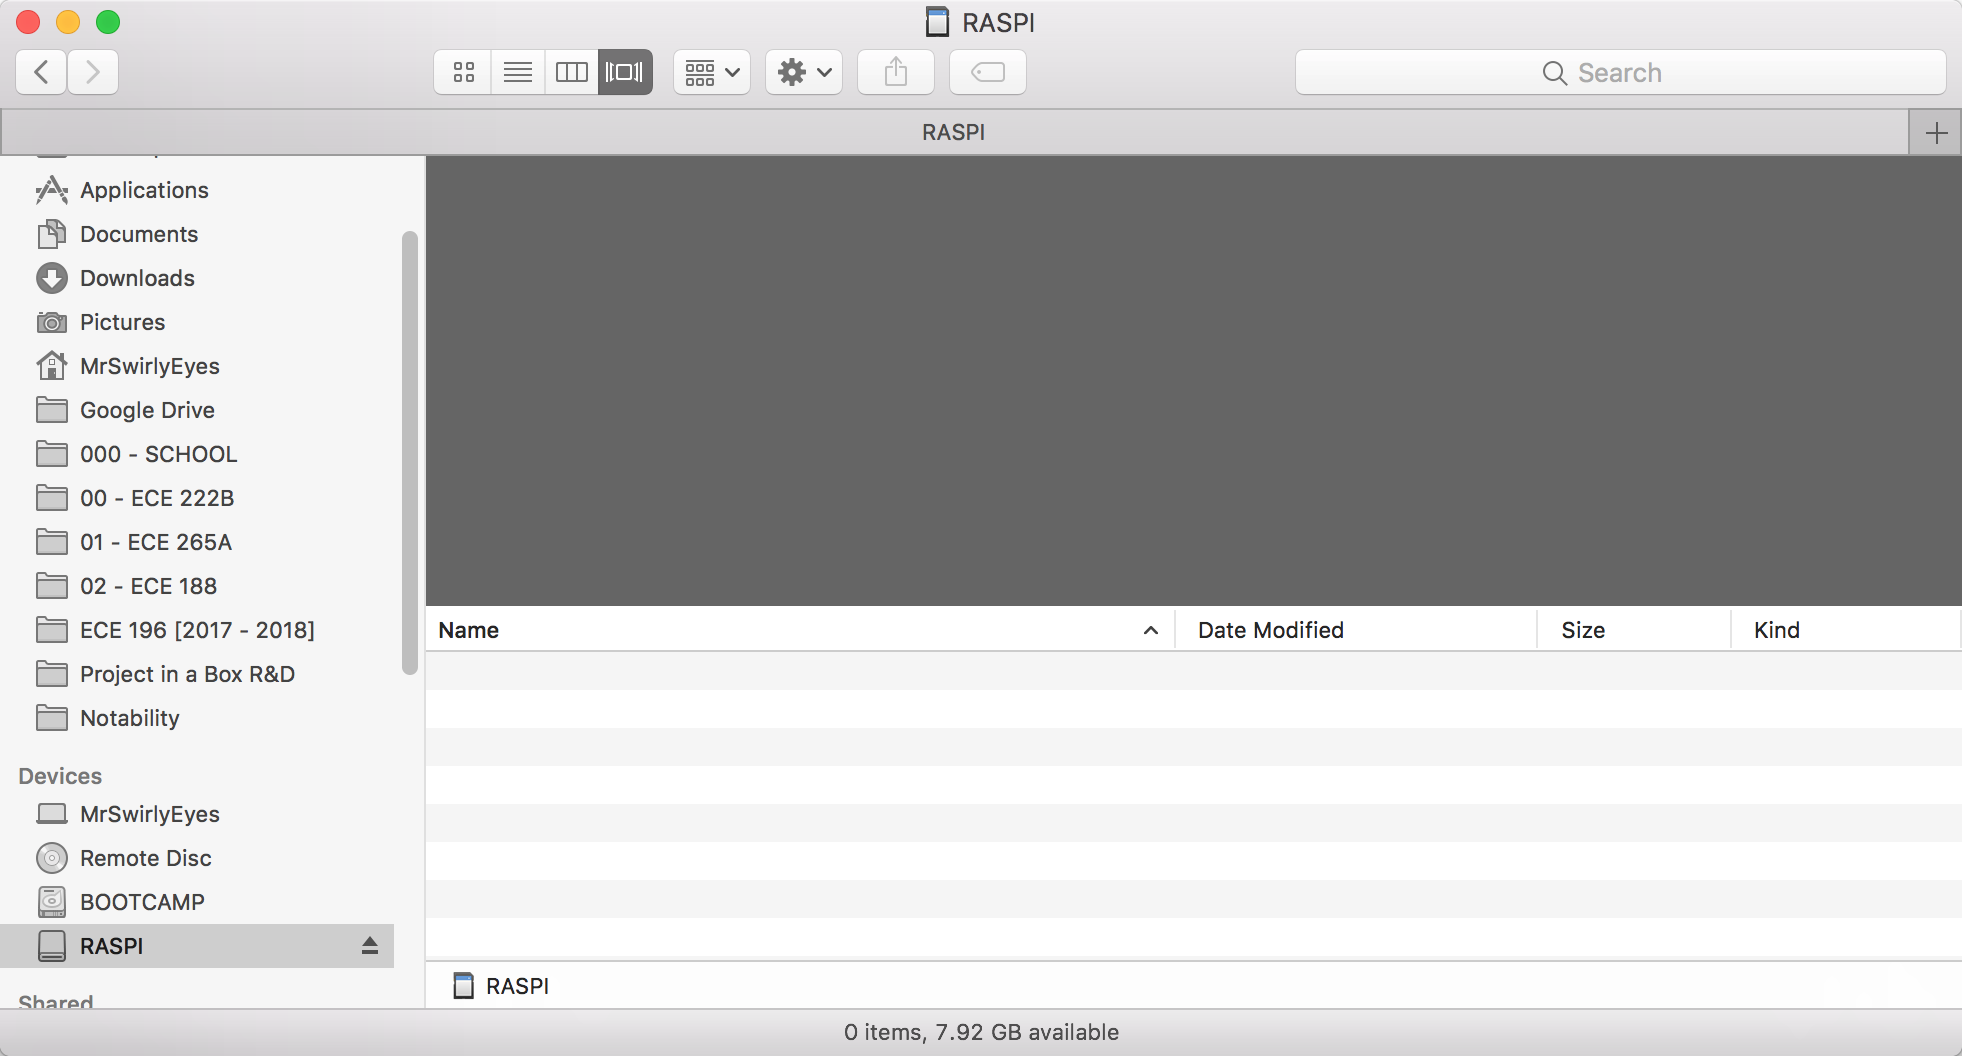
Make sure microSD card contents is like so. You cannot drop the unzipped NOOBS content folder into the microSD card; the contents of the NOOBS folder must be as shown.
Be sure to safetly eject your microSD card!
Install Raspbian, the standard Raspberry Pi operating system, onto the Raspberry Pi using NOOBS. NOOBS is simply a stepping stone - it is a newbie-ready way to install Raspbian. We will demonstrate the hardware setup and the software configurations.
I apologize in advance for some of the poor camera shots of the monitor for the Raspberry Pi Raspbian installation configuration.
With our microSD card ready to go, we can remove it from the card reader. Then, we may install it into the Raspberry Pi. The microSD card retainer is on the bottom of the Raspberry Pi.
Be sure to insert the microSD card with the appropriate orientation.
Be sure to the microSD card is well seated in the microSD card retainer.
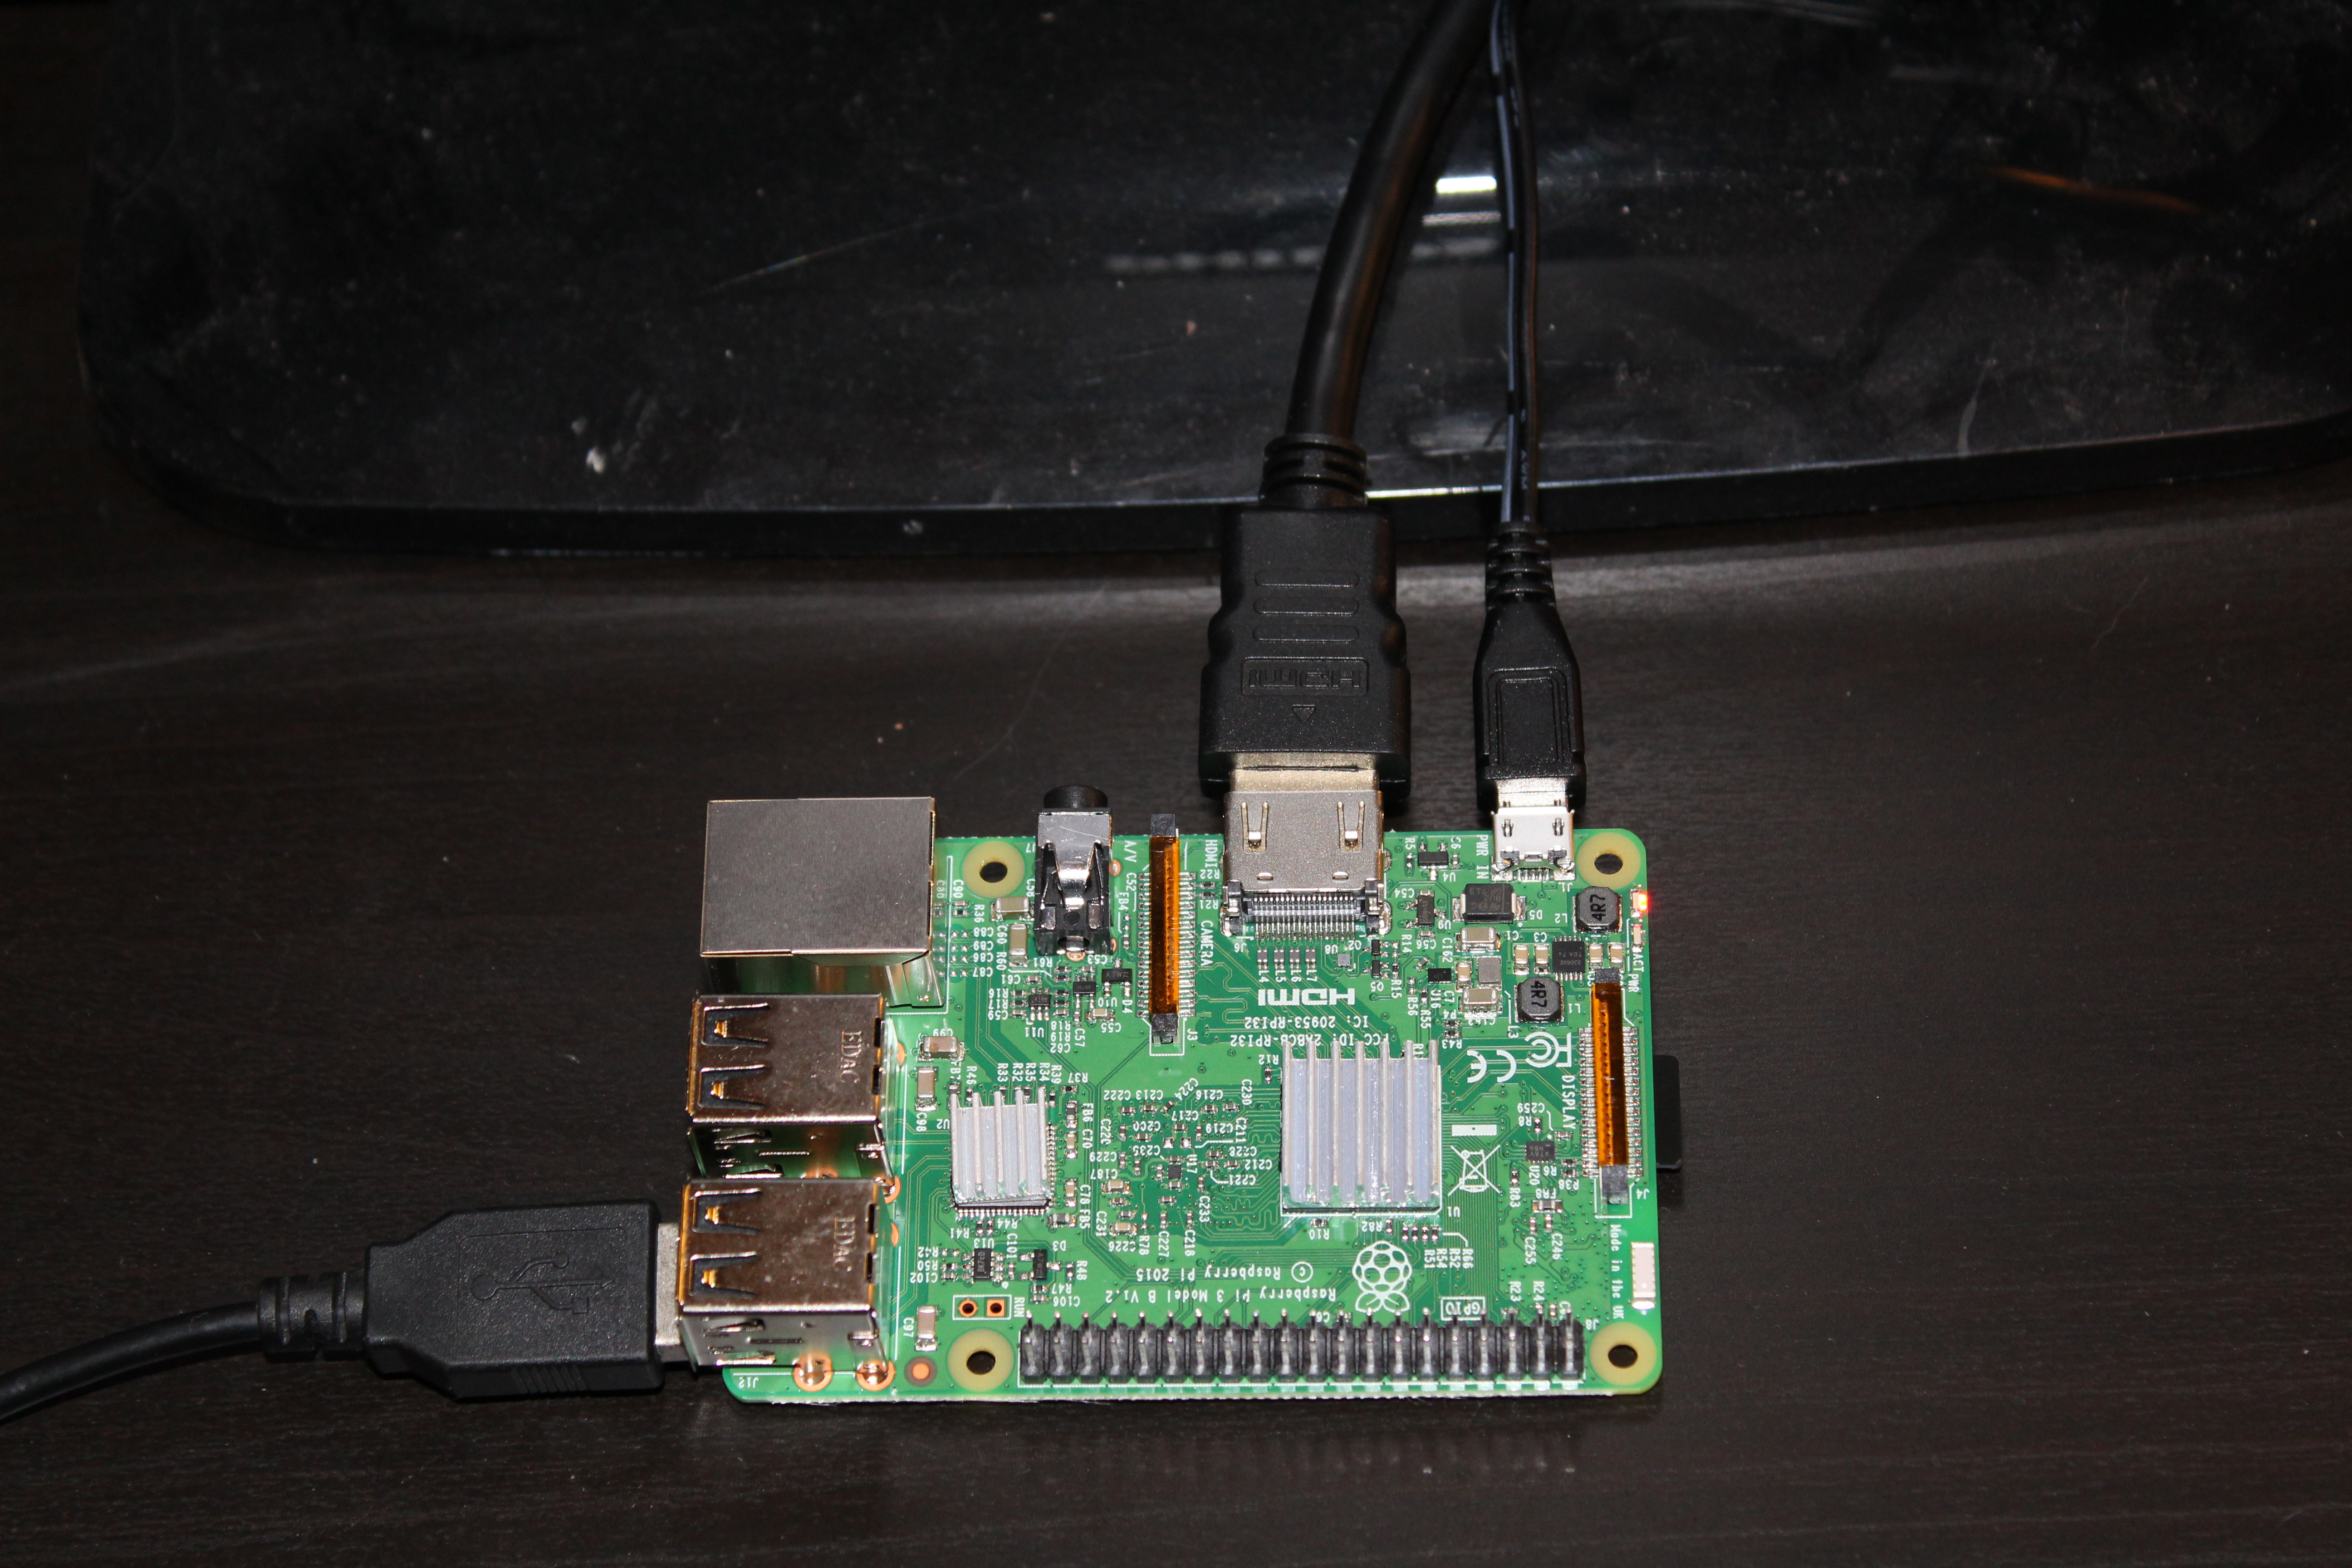
Now, we need to power the Raspberry Pi and install Raspbian. But we need to interface with the Pi. Unfortunately, by default, the Pi is not headless - that is, we are not able to interface with it without extra peripherals. We will switch to a headless setup - a.k.a, get rid of the peripherals - later.
Connect these peripherals to the Pi. You do not need a mouse, however, it may be more convenient than keyboard shortcuts.
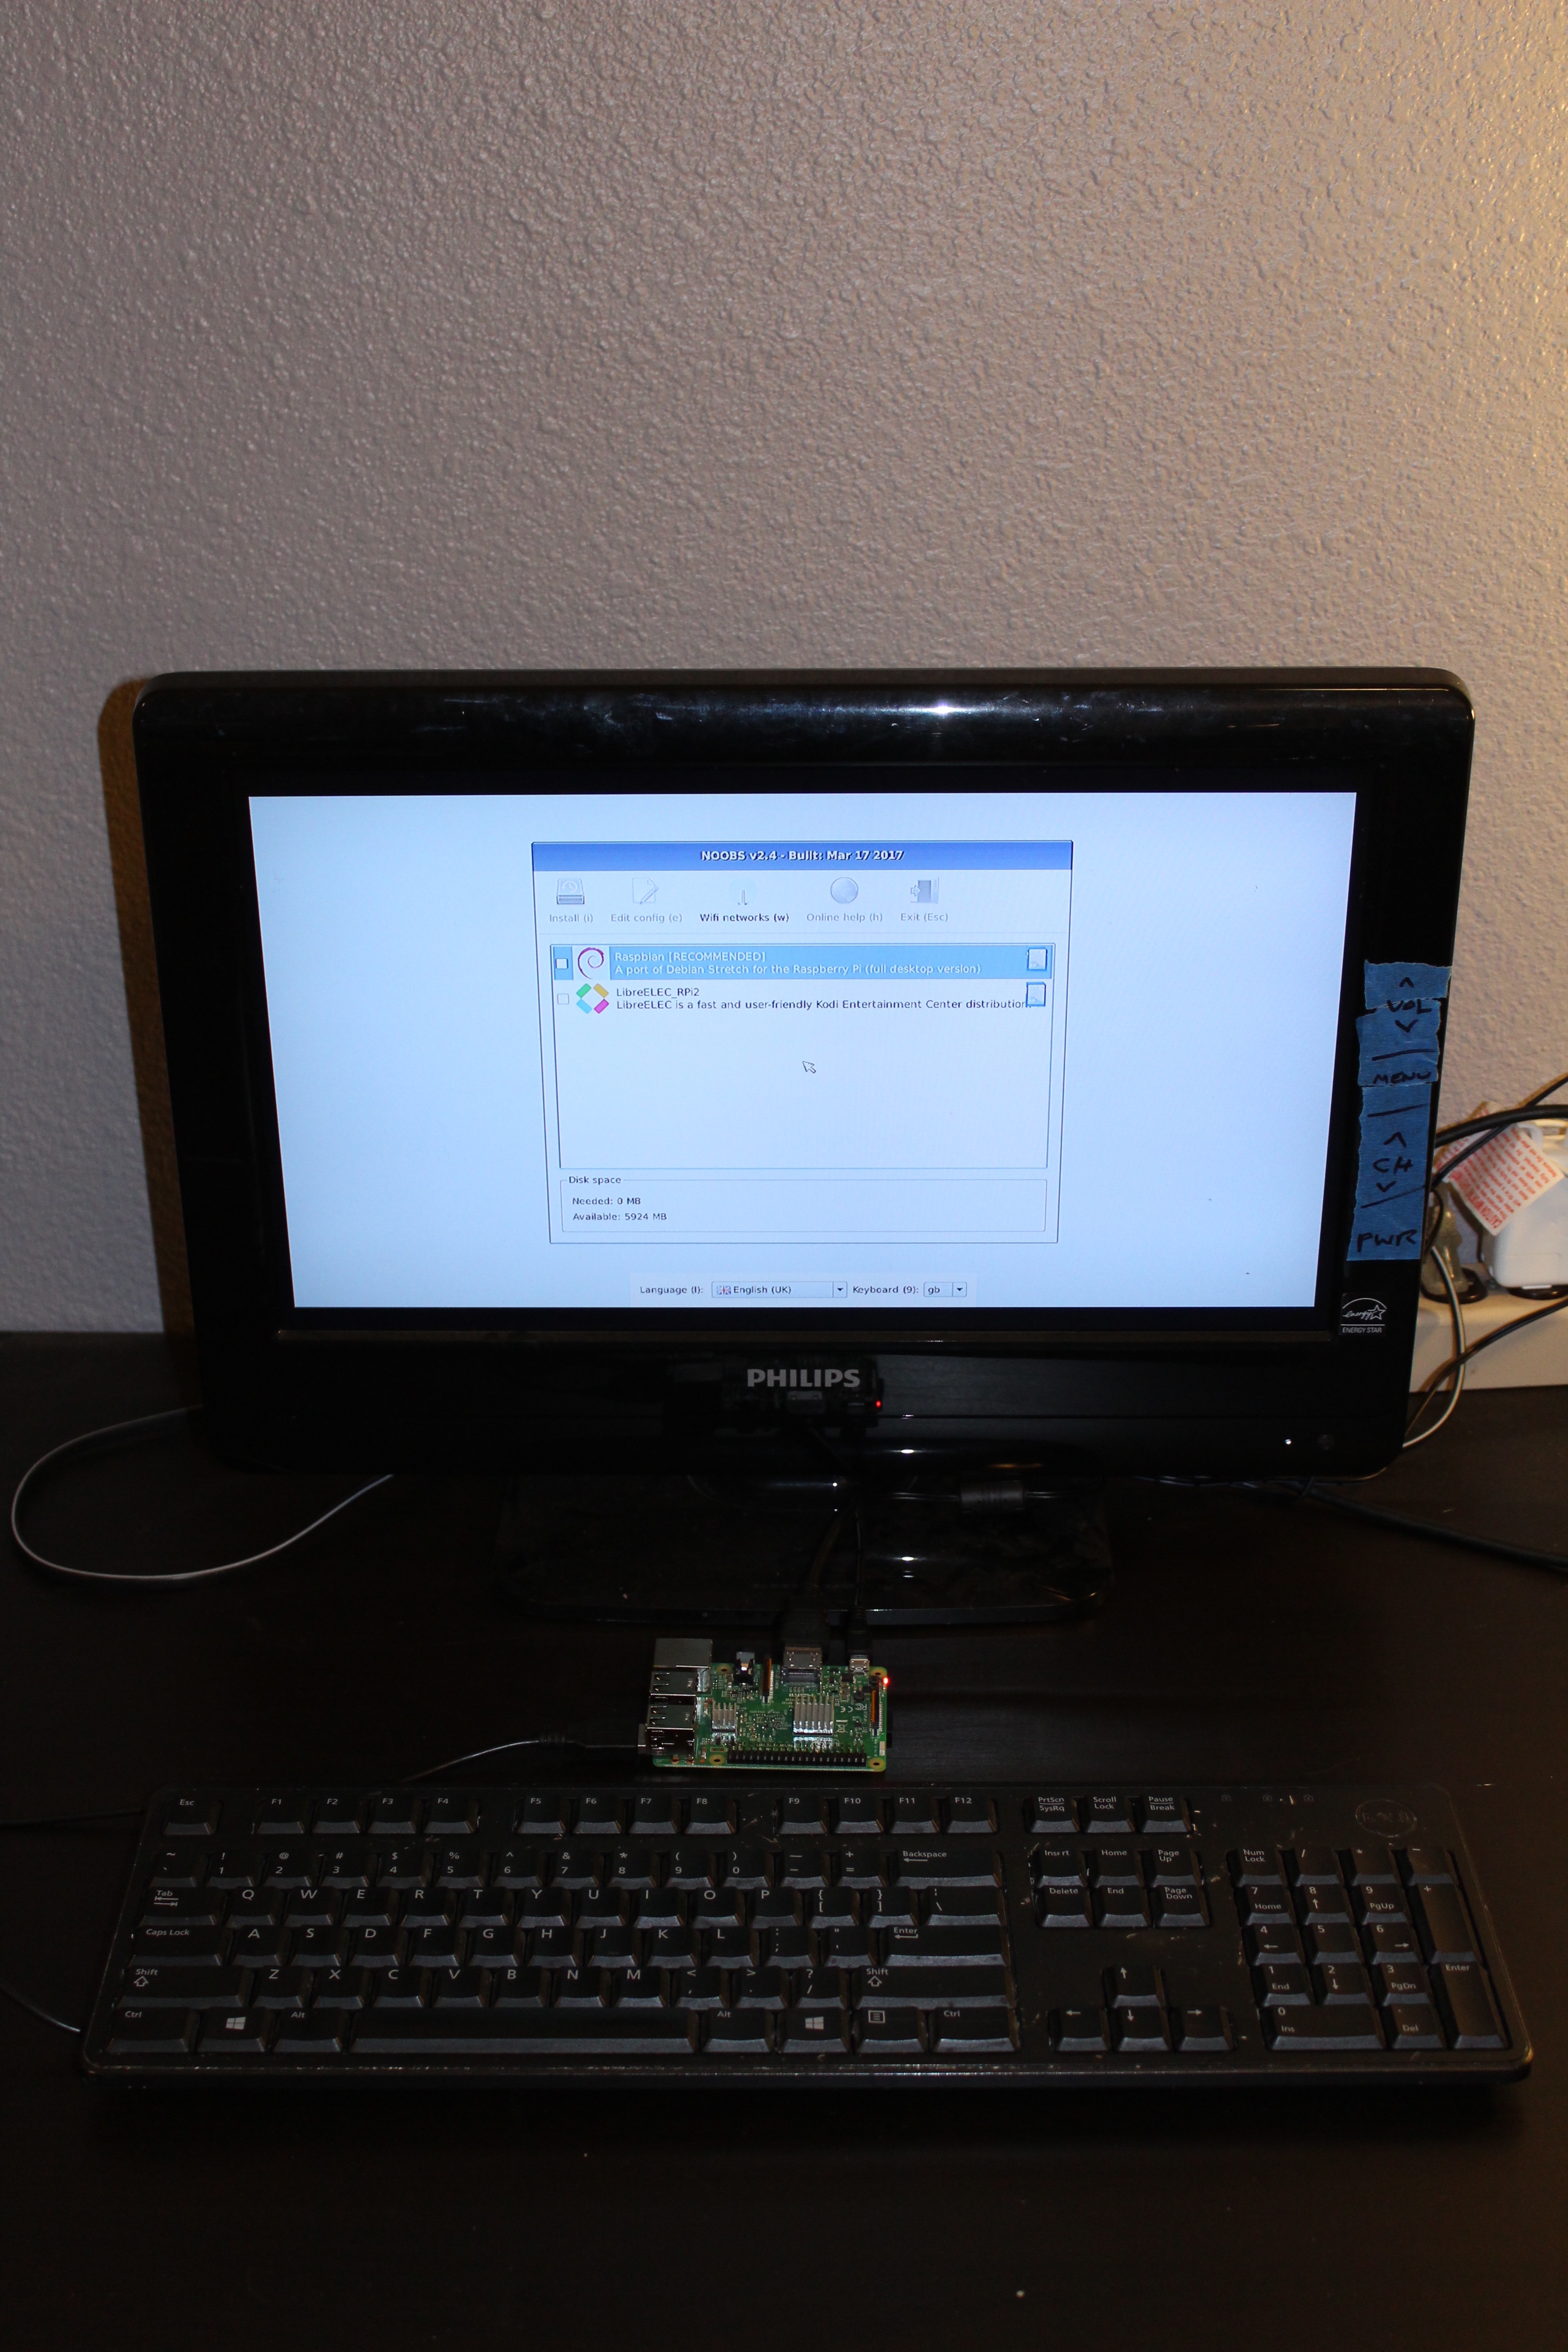
With the periperhals connected, power the rPi and the monitor.
Shortly after powering on, you should be taken to the following NOOBS installer screen.
If you are not taken to the NOOBS installer screen (e.g. Screen may be black or unresponsive), check the seating of the microSD card. Also check your NOOBS installation onto the microSD card - the NOOBS content may not have been copied correctly.
We employ several keyboard shortcuts here. If you are using a mouse, feel free to use the mouse to do the same function - it should be pretty intuitive.
| Configuration | Instruction |
|---|---|
| Language ( lowercase L ) |
To select, or change the language press the L key on your keyboard. A dropdown menu should appear. Press the arrow keys on the keyboard to select the appropriate language, and press the Enter key to confirm your language choice. Here we choose: English (US)   There is a difference between English (UK) and English (US)! |
| Keyboard ( 9 ) |
To select, or change the keyboard layout press the 9 key on your keyboard. A dropdown menu should appear. Press the arrow keys on the keyboard to select the appropriate language, and press the Enter key to confirm your keyboard layout choice. Here we choose: us 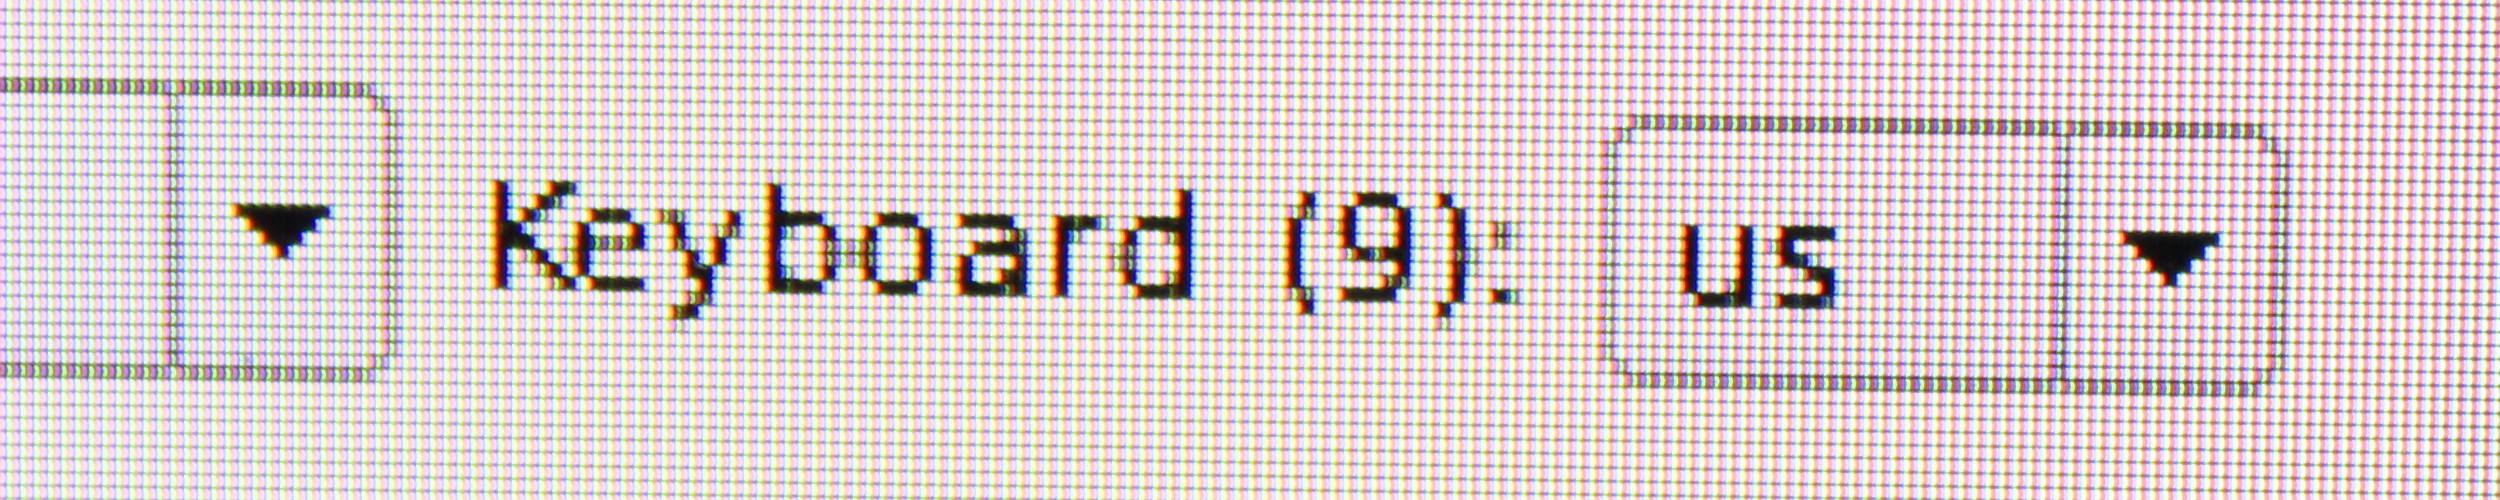 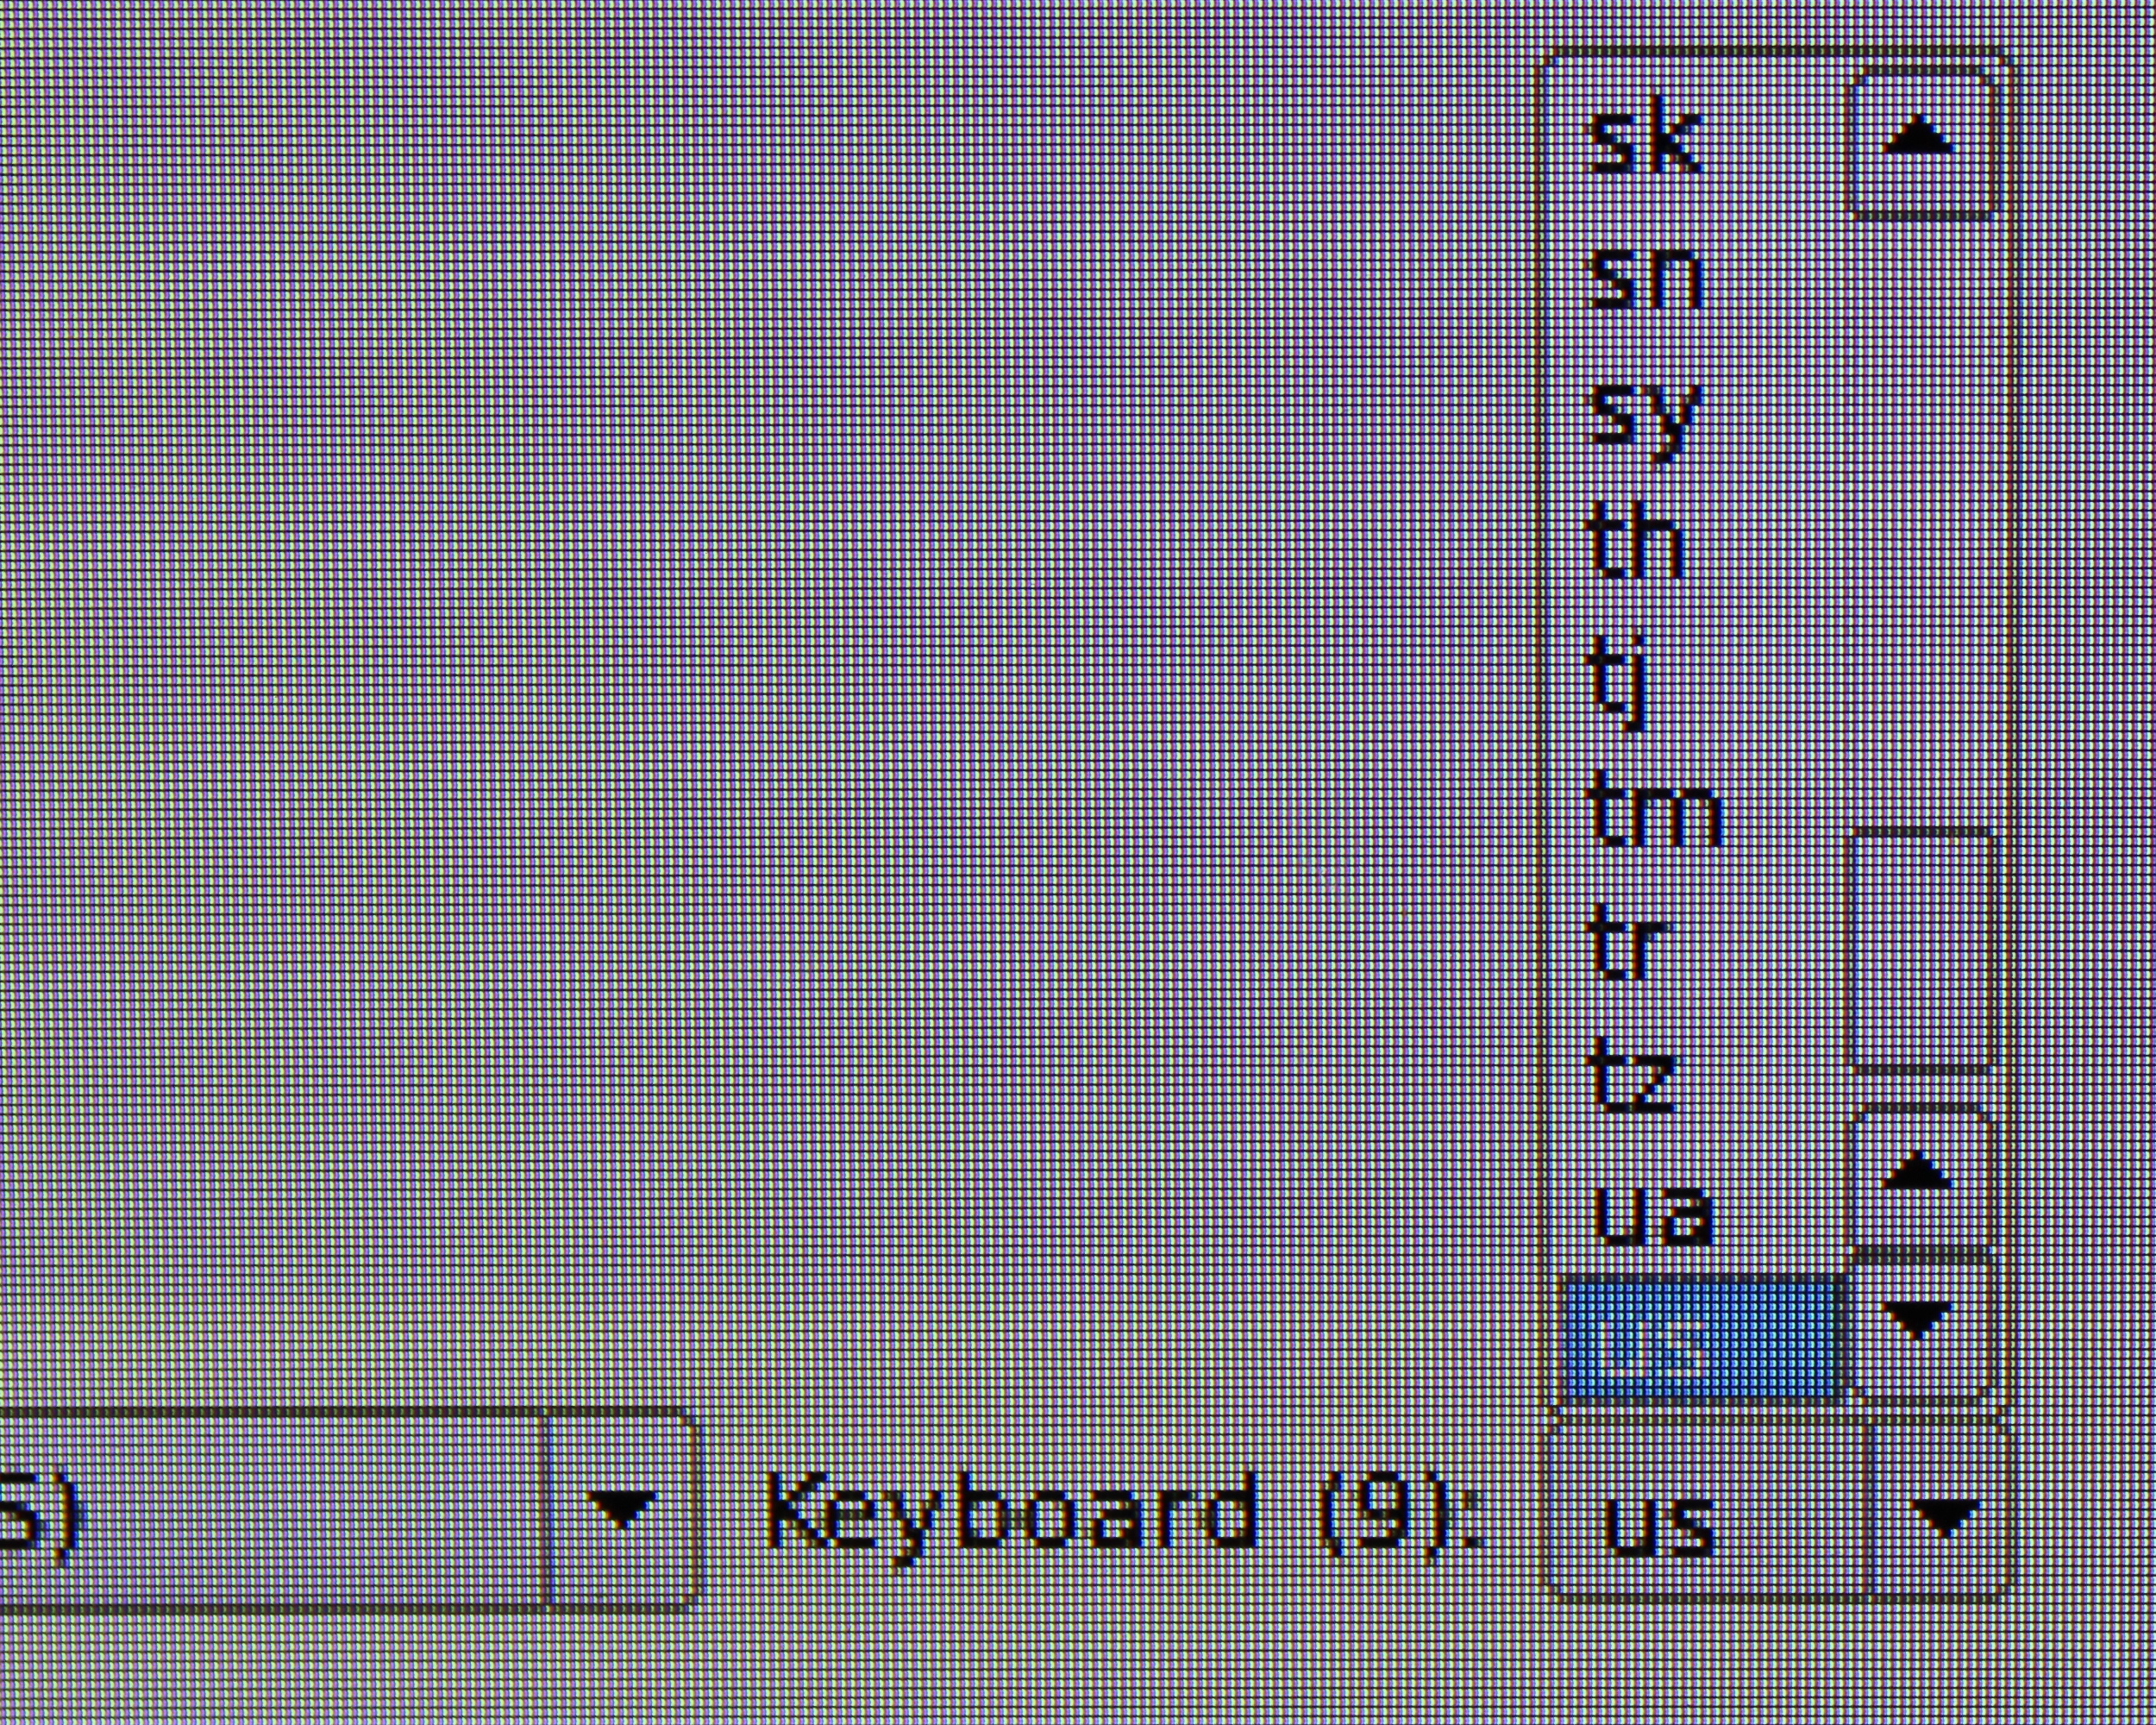 |
| Operating System |
To select, or change the operating system to install, press the arrow keys on the keyboard to select the operating system, and press the Enter key to confirm, and check your operating system choice. Here we choose: Raspbian 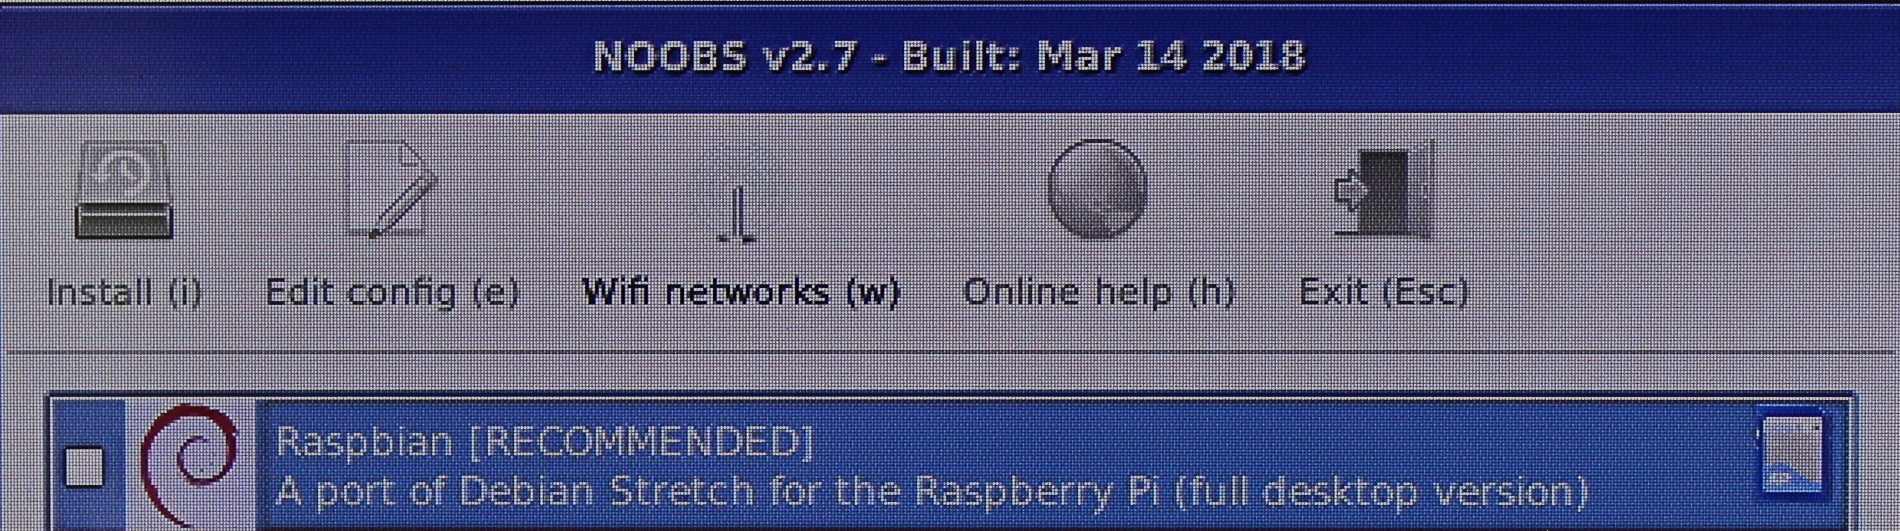 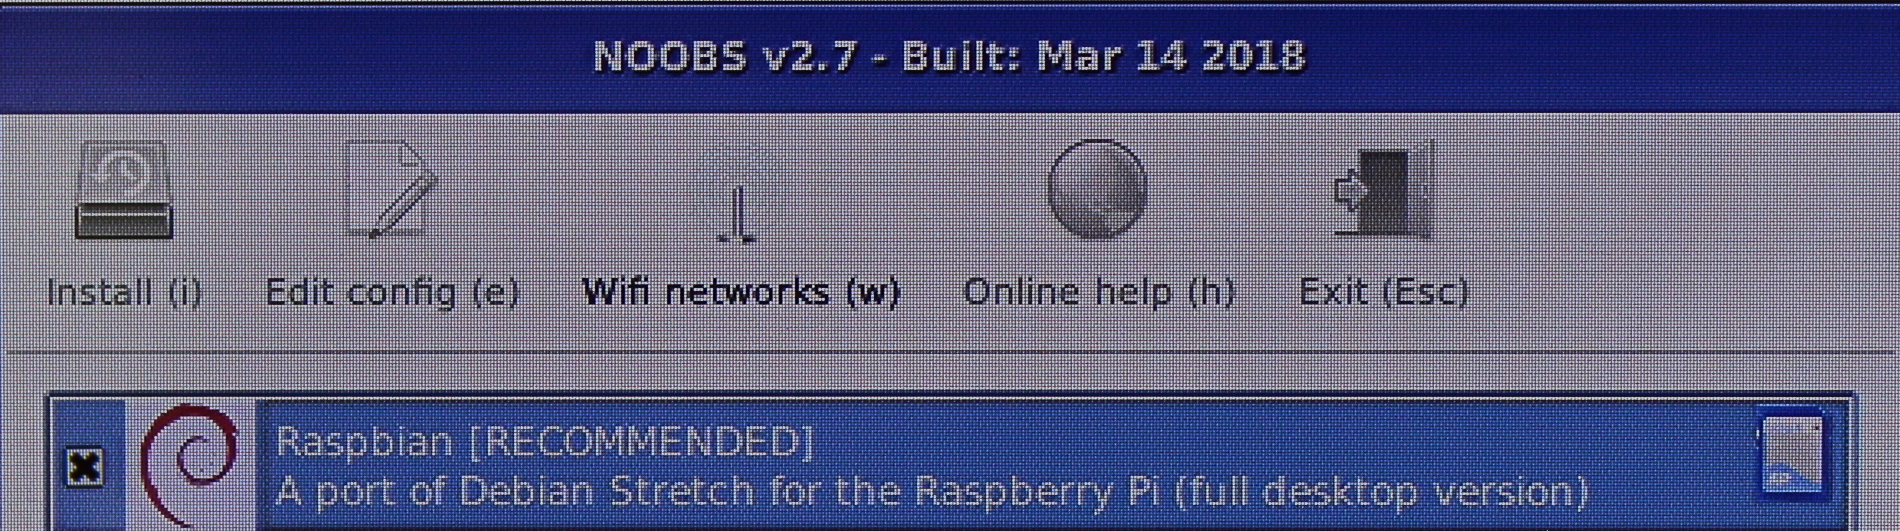 We are aware only one choice is shown here, but past (and potentially future) versions of NOOBS (may) have different multiple OS choices. |
| Install ( i ) |
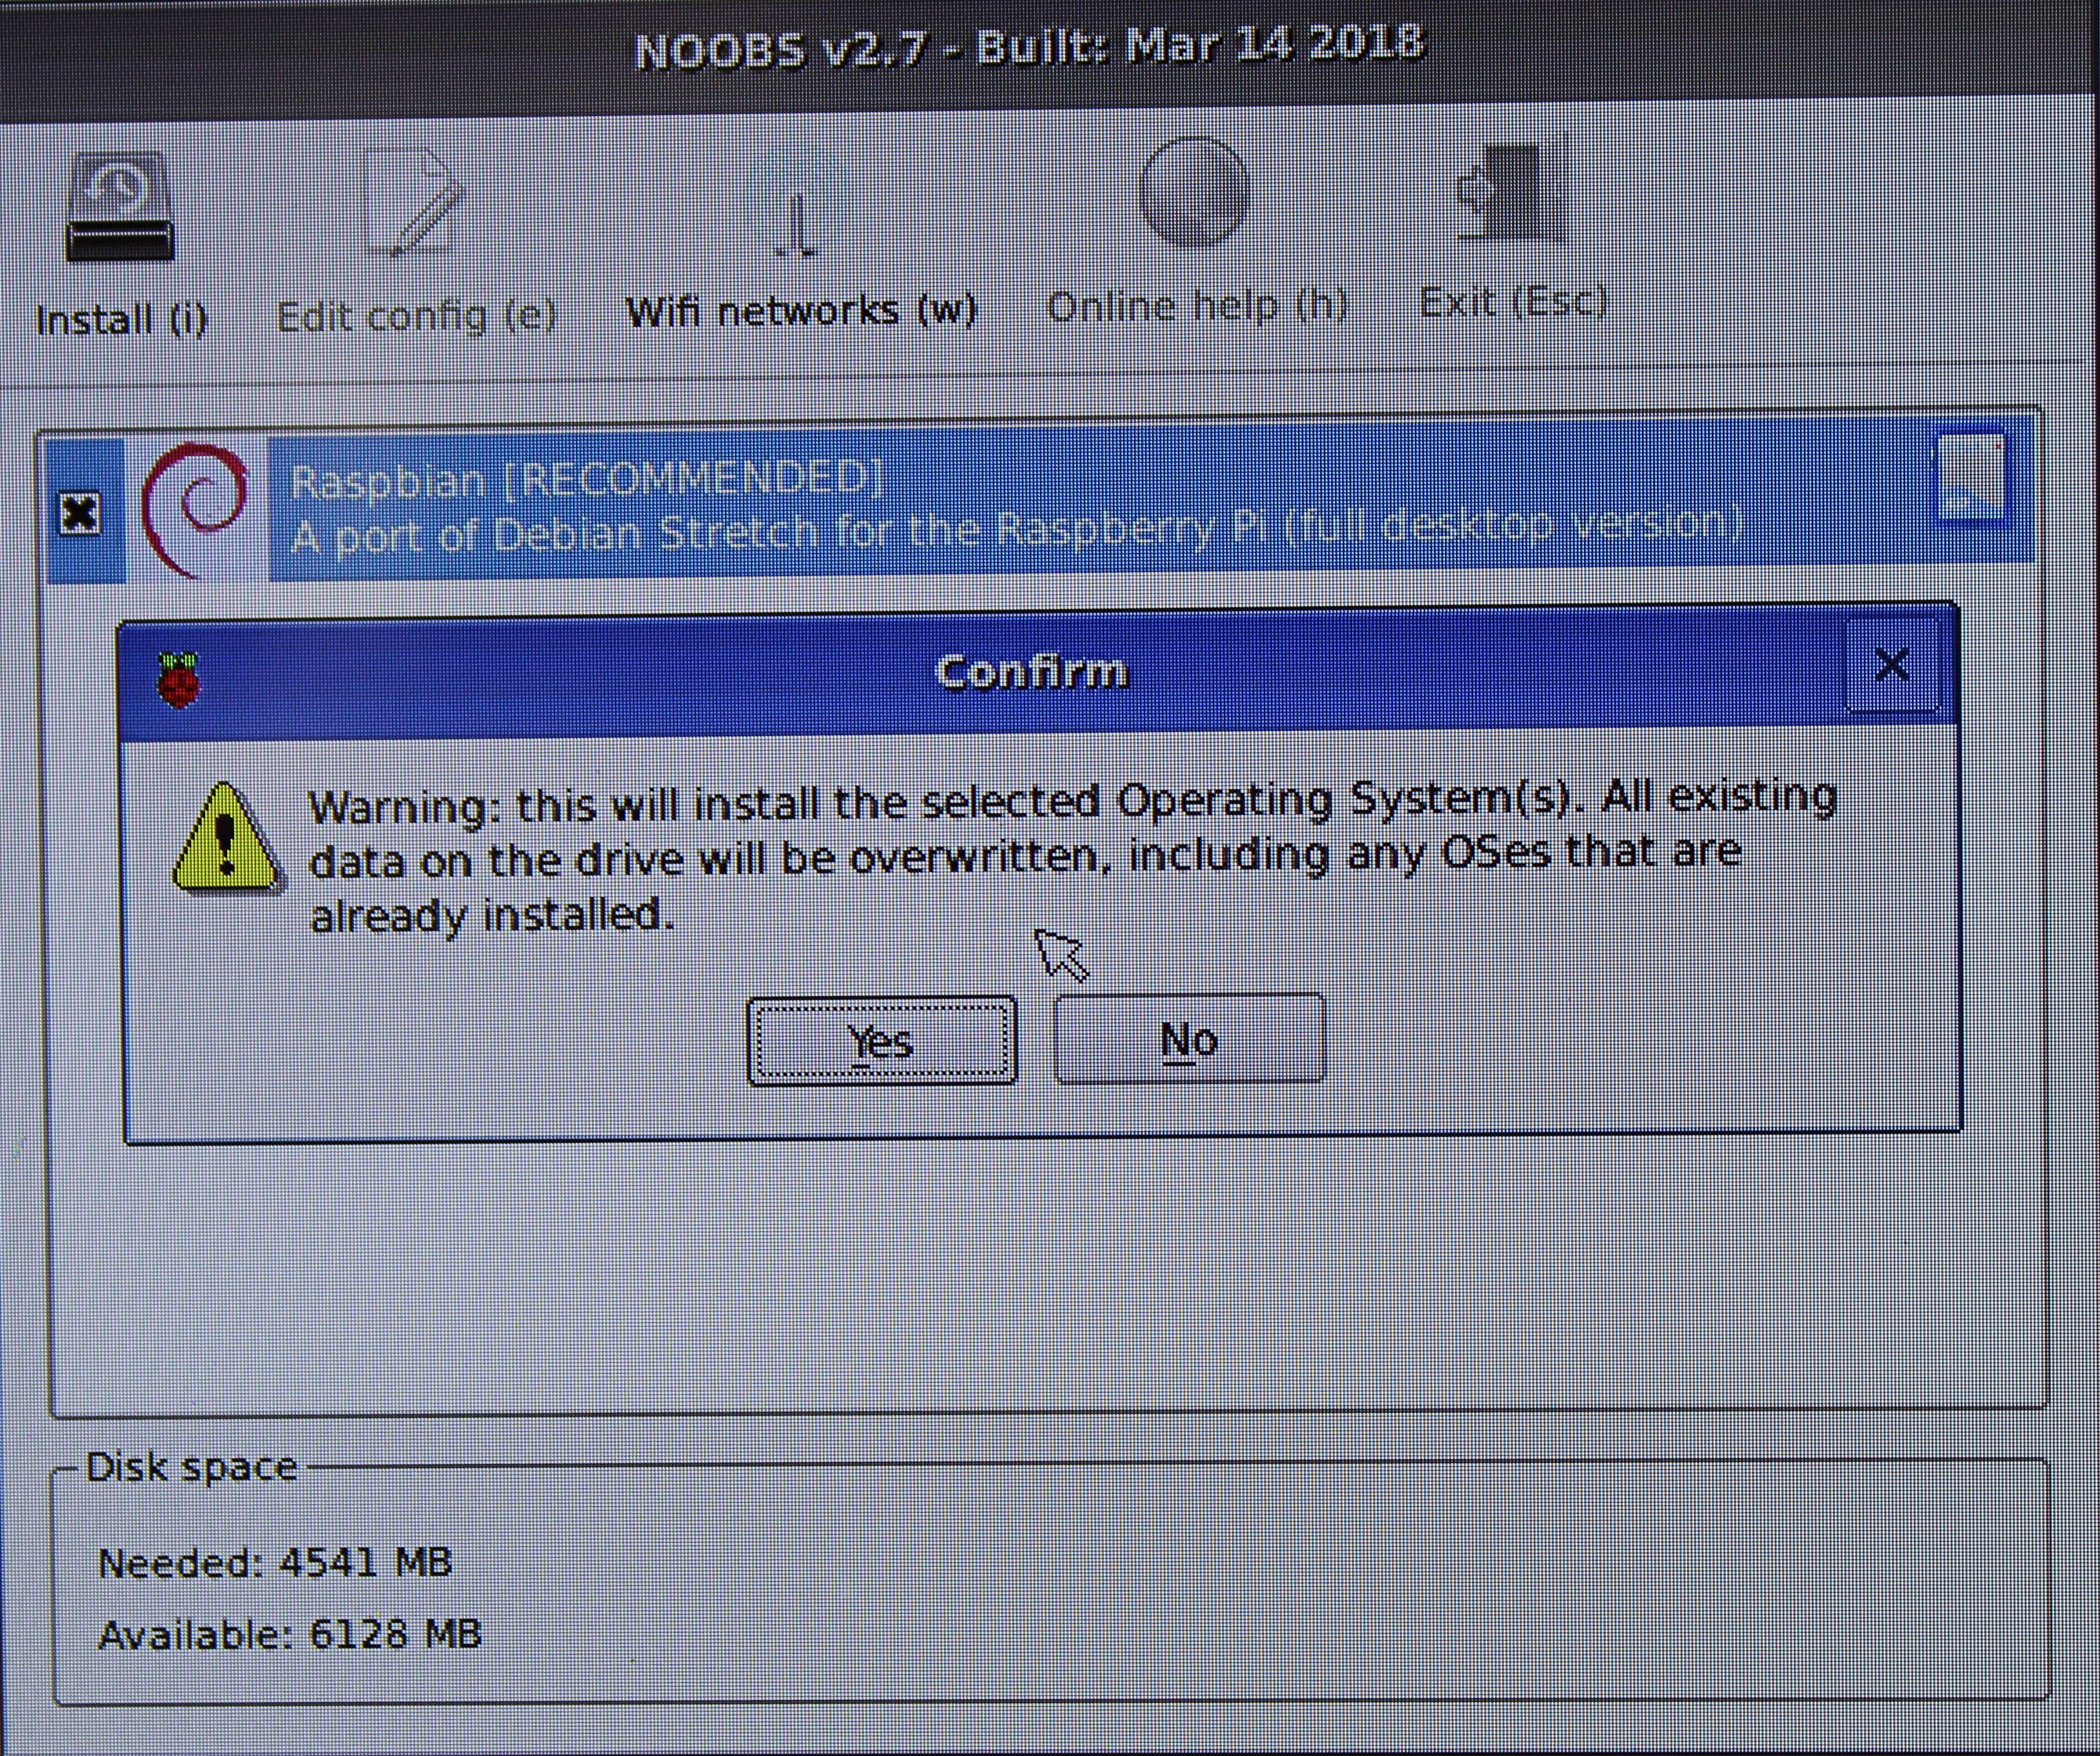
With the appropriate language, keyboard layout, and operating system selected, press the i key on your keyboard to initiate the Raspbian installation. Select Yes to the confirmation.
|
The Raspbian installation takes approximately 30 minutes to complete.
After the installation completes, press OK which will restart the Raspberry Pi. When it reboots, you will be taken to the Desktop GUI.
Congratuations! We installed the Raspbian operating System onto the Raspberry Pi. We will spend the rest of this tutorial doing configurations necessary for most rPi projects. There are a few configurations that will not be used in every rPiproject, however we cover them for those that may need it so that this guide is comprehensive. If you are certain that your project does need a particular step, feel free to skip it.
We have our Raspberry Pi installed with Raspbian, which is a Linux operating system. But, for most projects, using the keyboard, mouse, and monitor is inconvenient. You do not want to need these everytime you interface with your Pi. So, our goal is to use a headless setup - one where we do not need these extra peripherals, and we can access the Pi remotely. Futhermore, we will switch to a CLI (Command Line Interface) instead of the default GUI because CLIs are the most common way of working with a Linux device.
To these ends, in this section we do some basic configurations using raspi-config to set the boot up sequence to go to the CLI. We also enable Serial on the Raspberry Pi so that we no longer need the keyboard, mouse, and monitor peripherals. We won't yet be entirely headless, but it is an improvement!
I apologize in advance for some of the poor camera shots of the monitor for the Raspberry Pi Raspbian installation configuration.
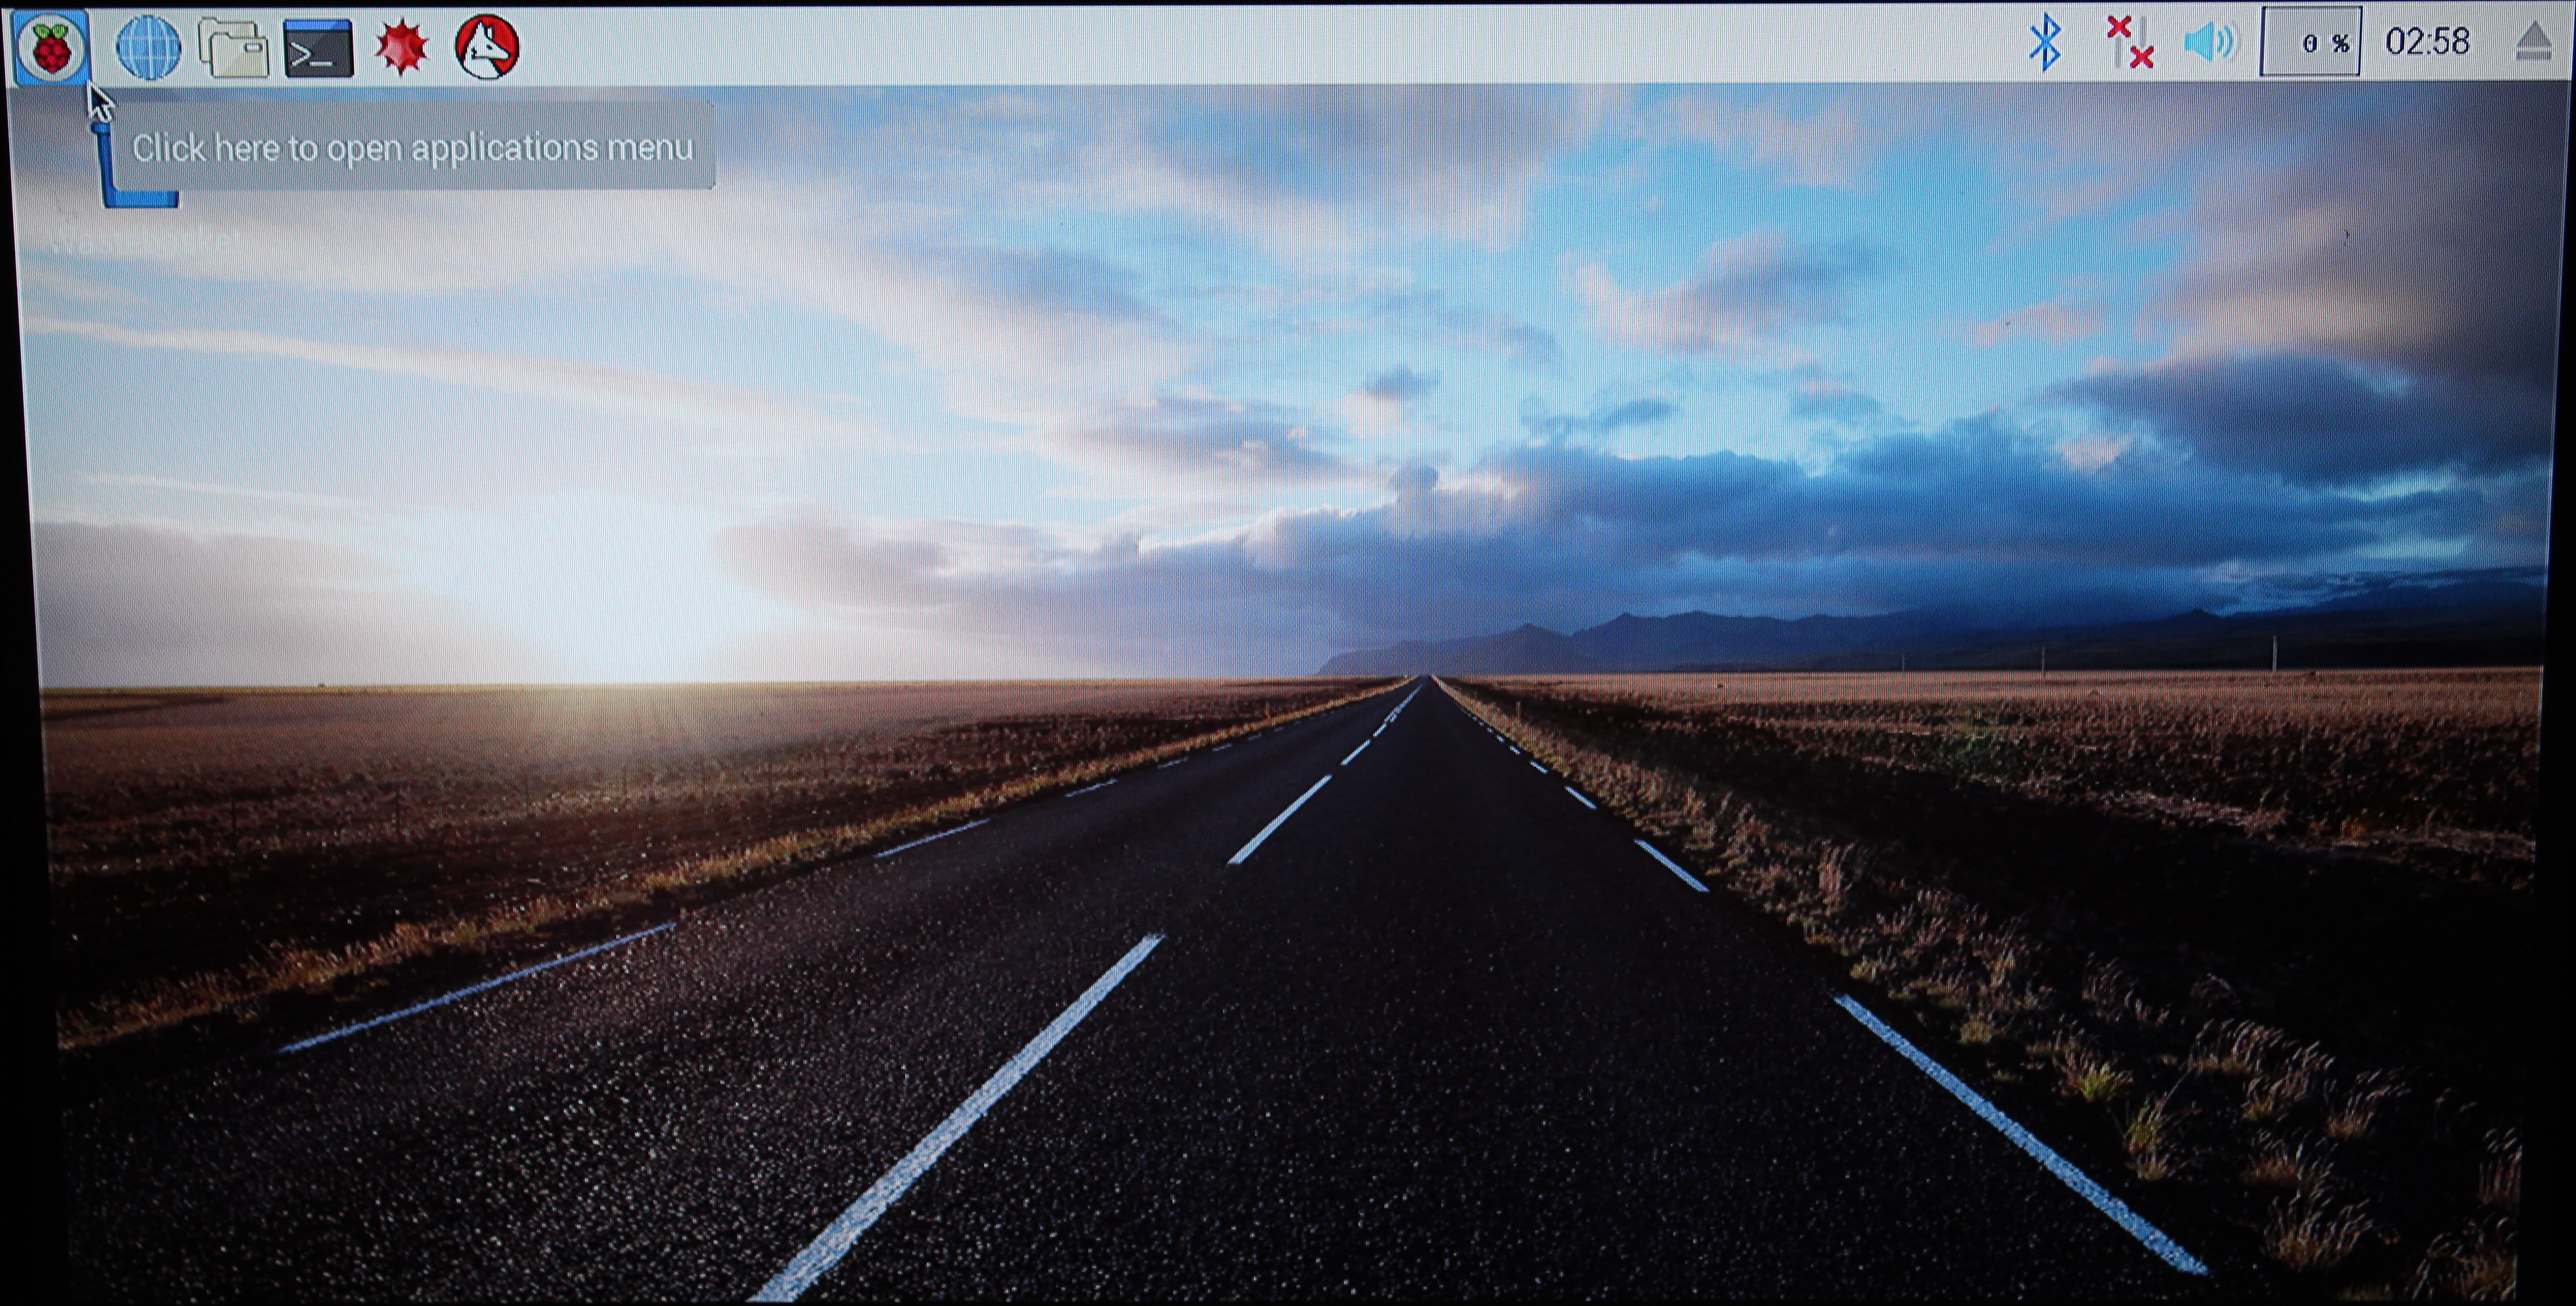
Through the Raspbian installation, the default Boot Option is to the Desktop GUI that we are taken to when we boot up the Pi.
For some Raspberry Pi projects, this may be necessary or desired. However, in general, the CLI (Command Line Interface) or Console is preferable. Although we could use this Desktop GUI to set the Boot Option to Console, we are - ironically - going to launch Terminal, and then set the Boot Option that way.
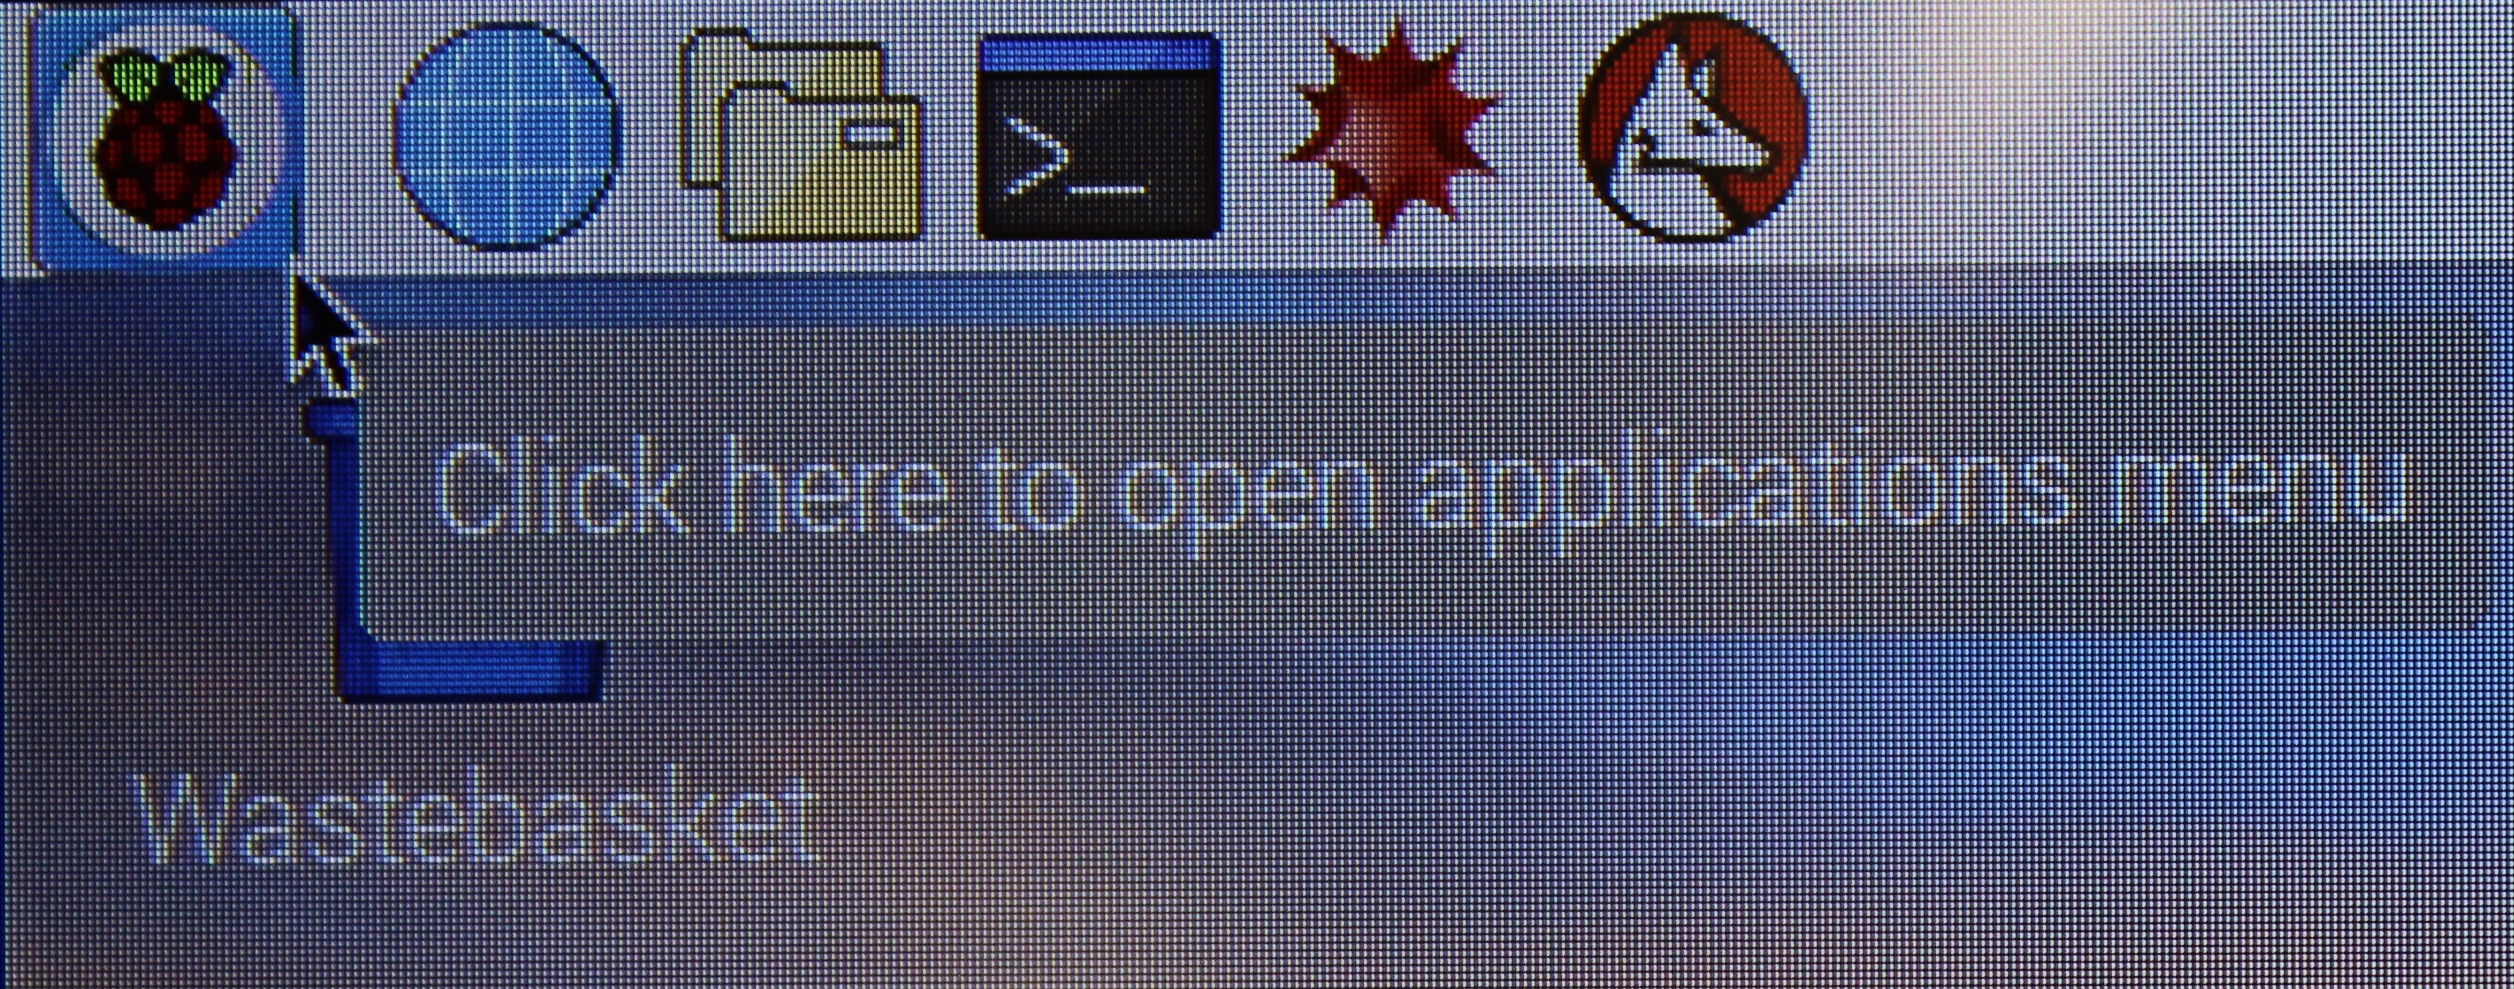
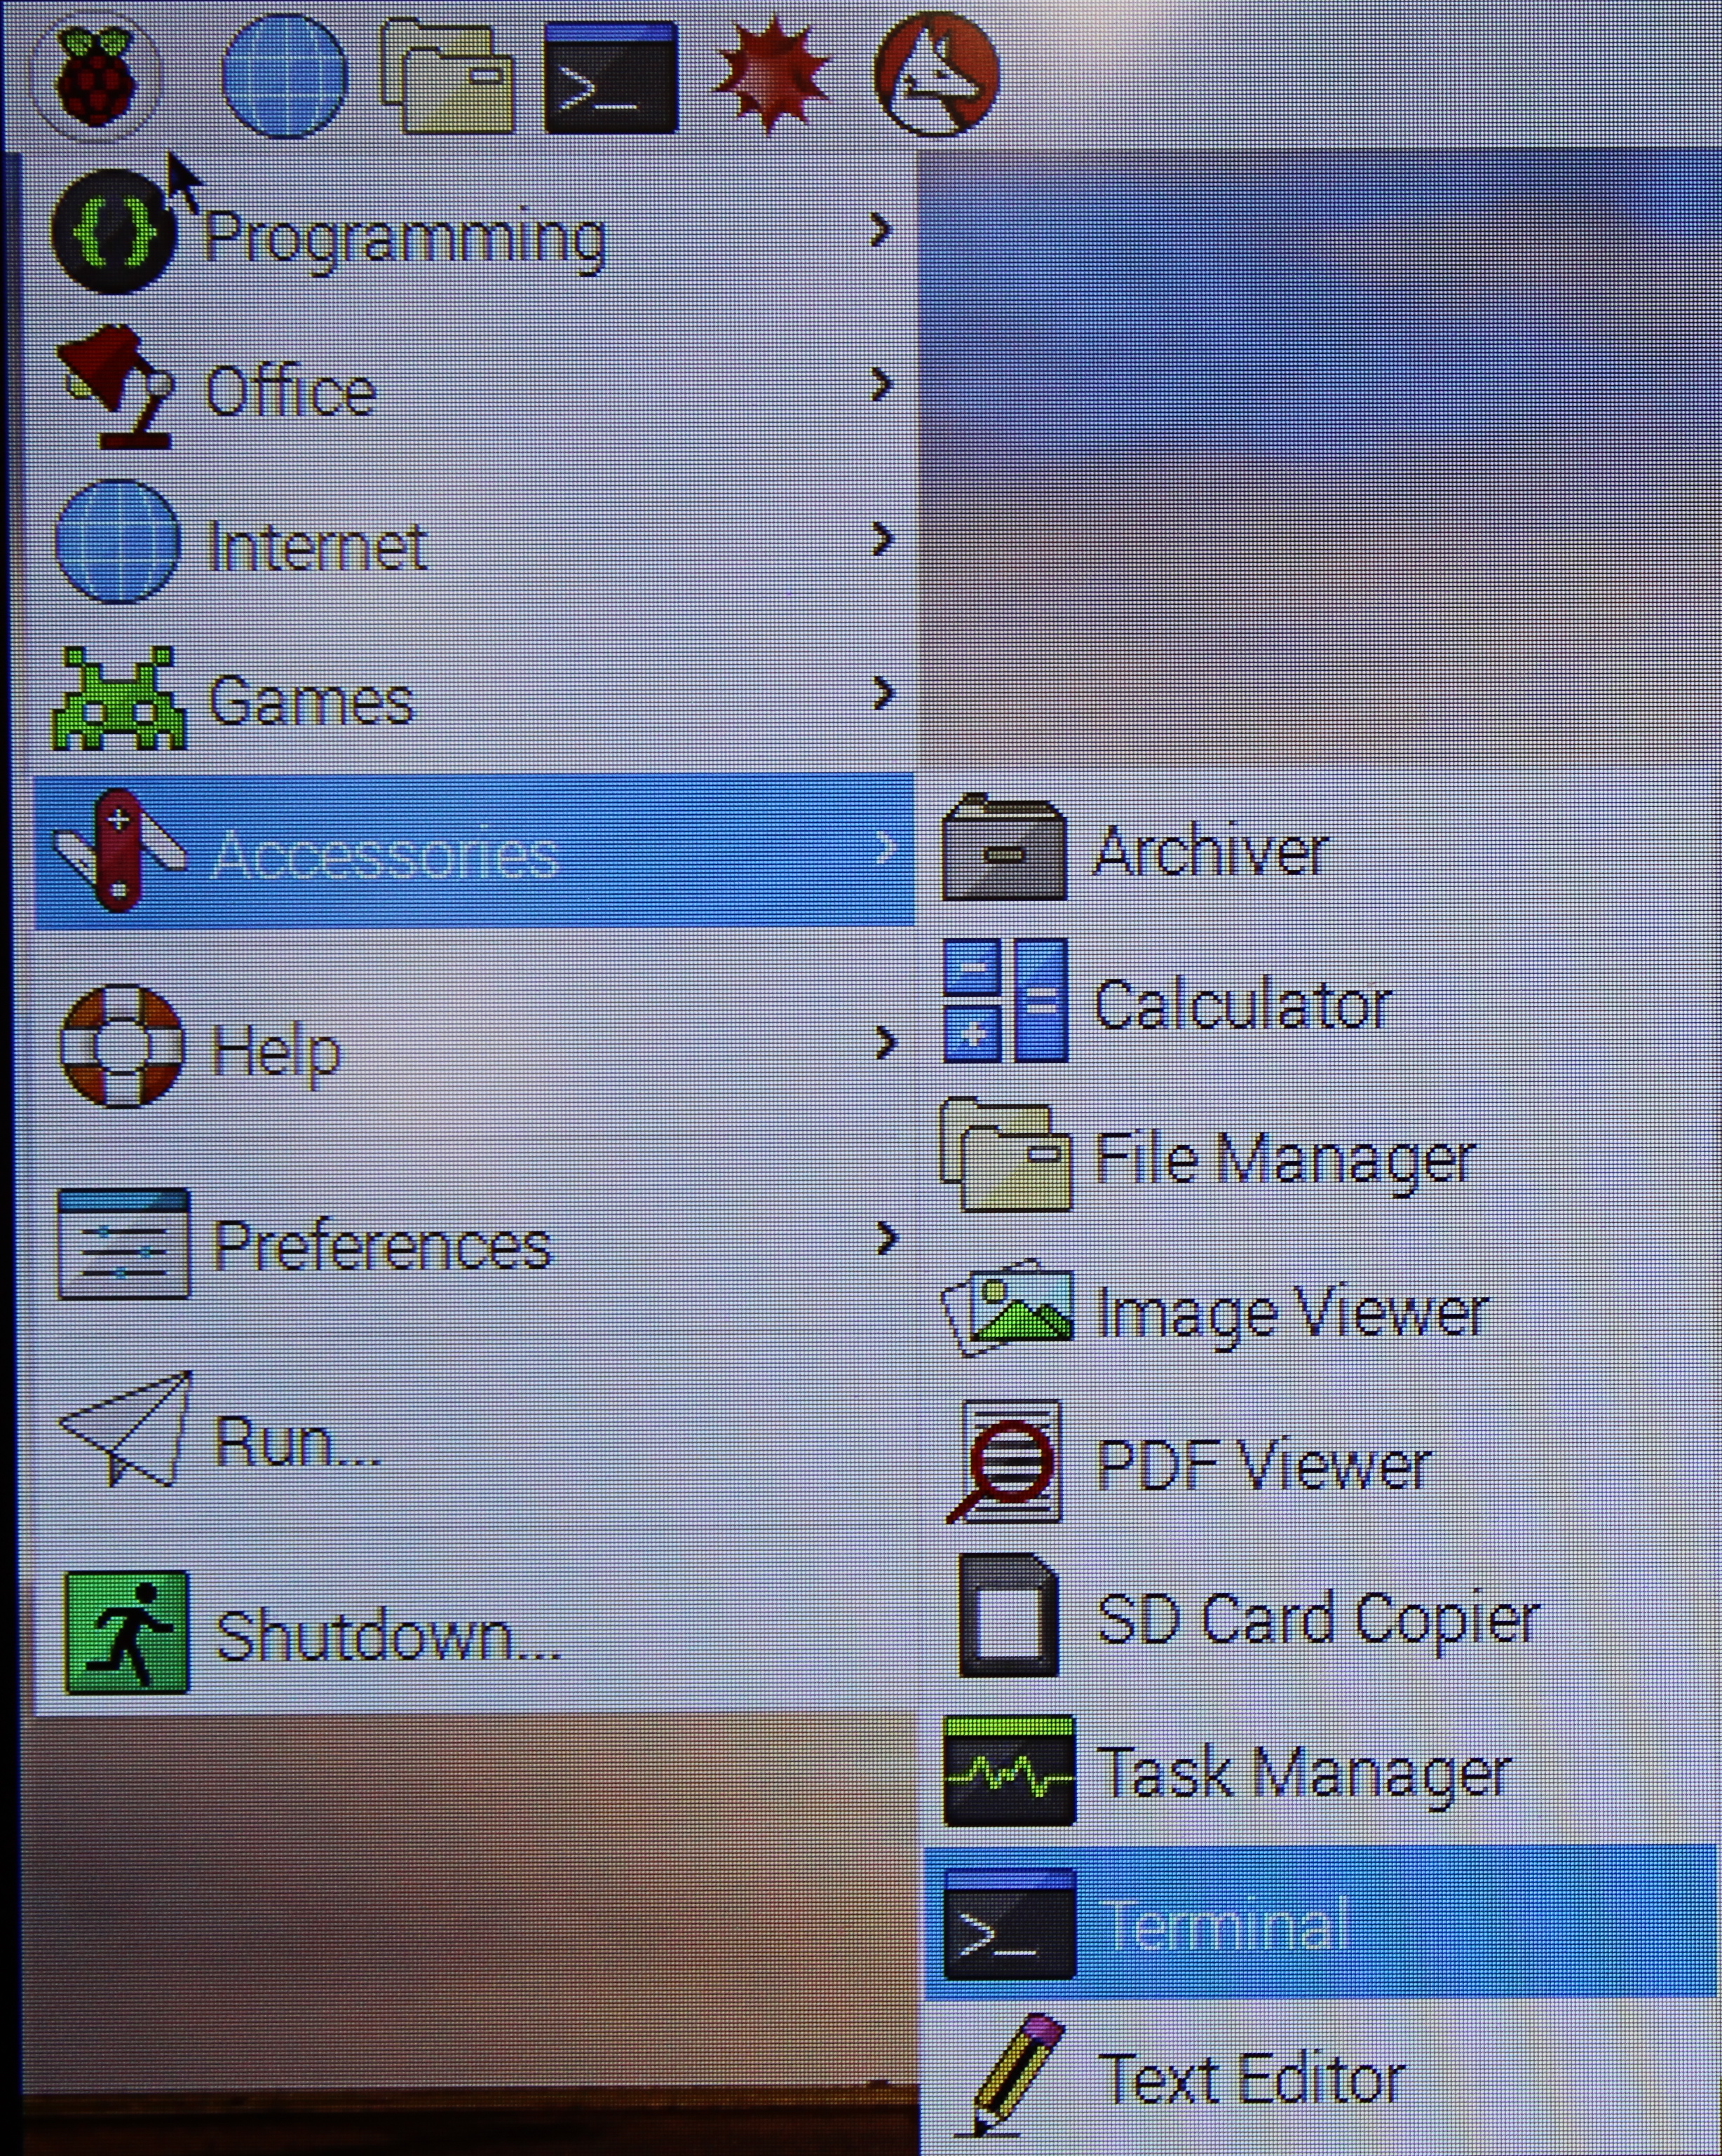
To launch the Terminal, press the Windows key on the external keyboard connected to your Pi to open the Applications Menu.
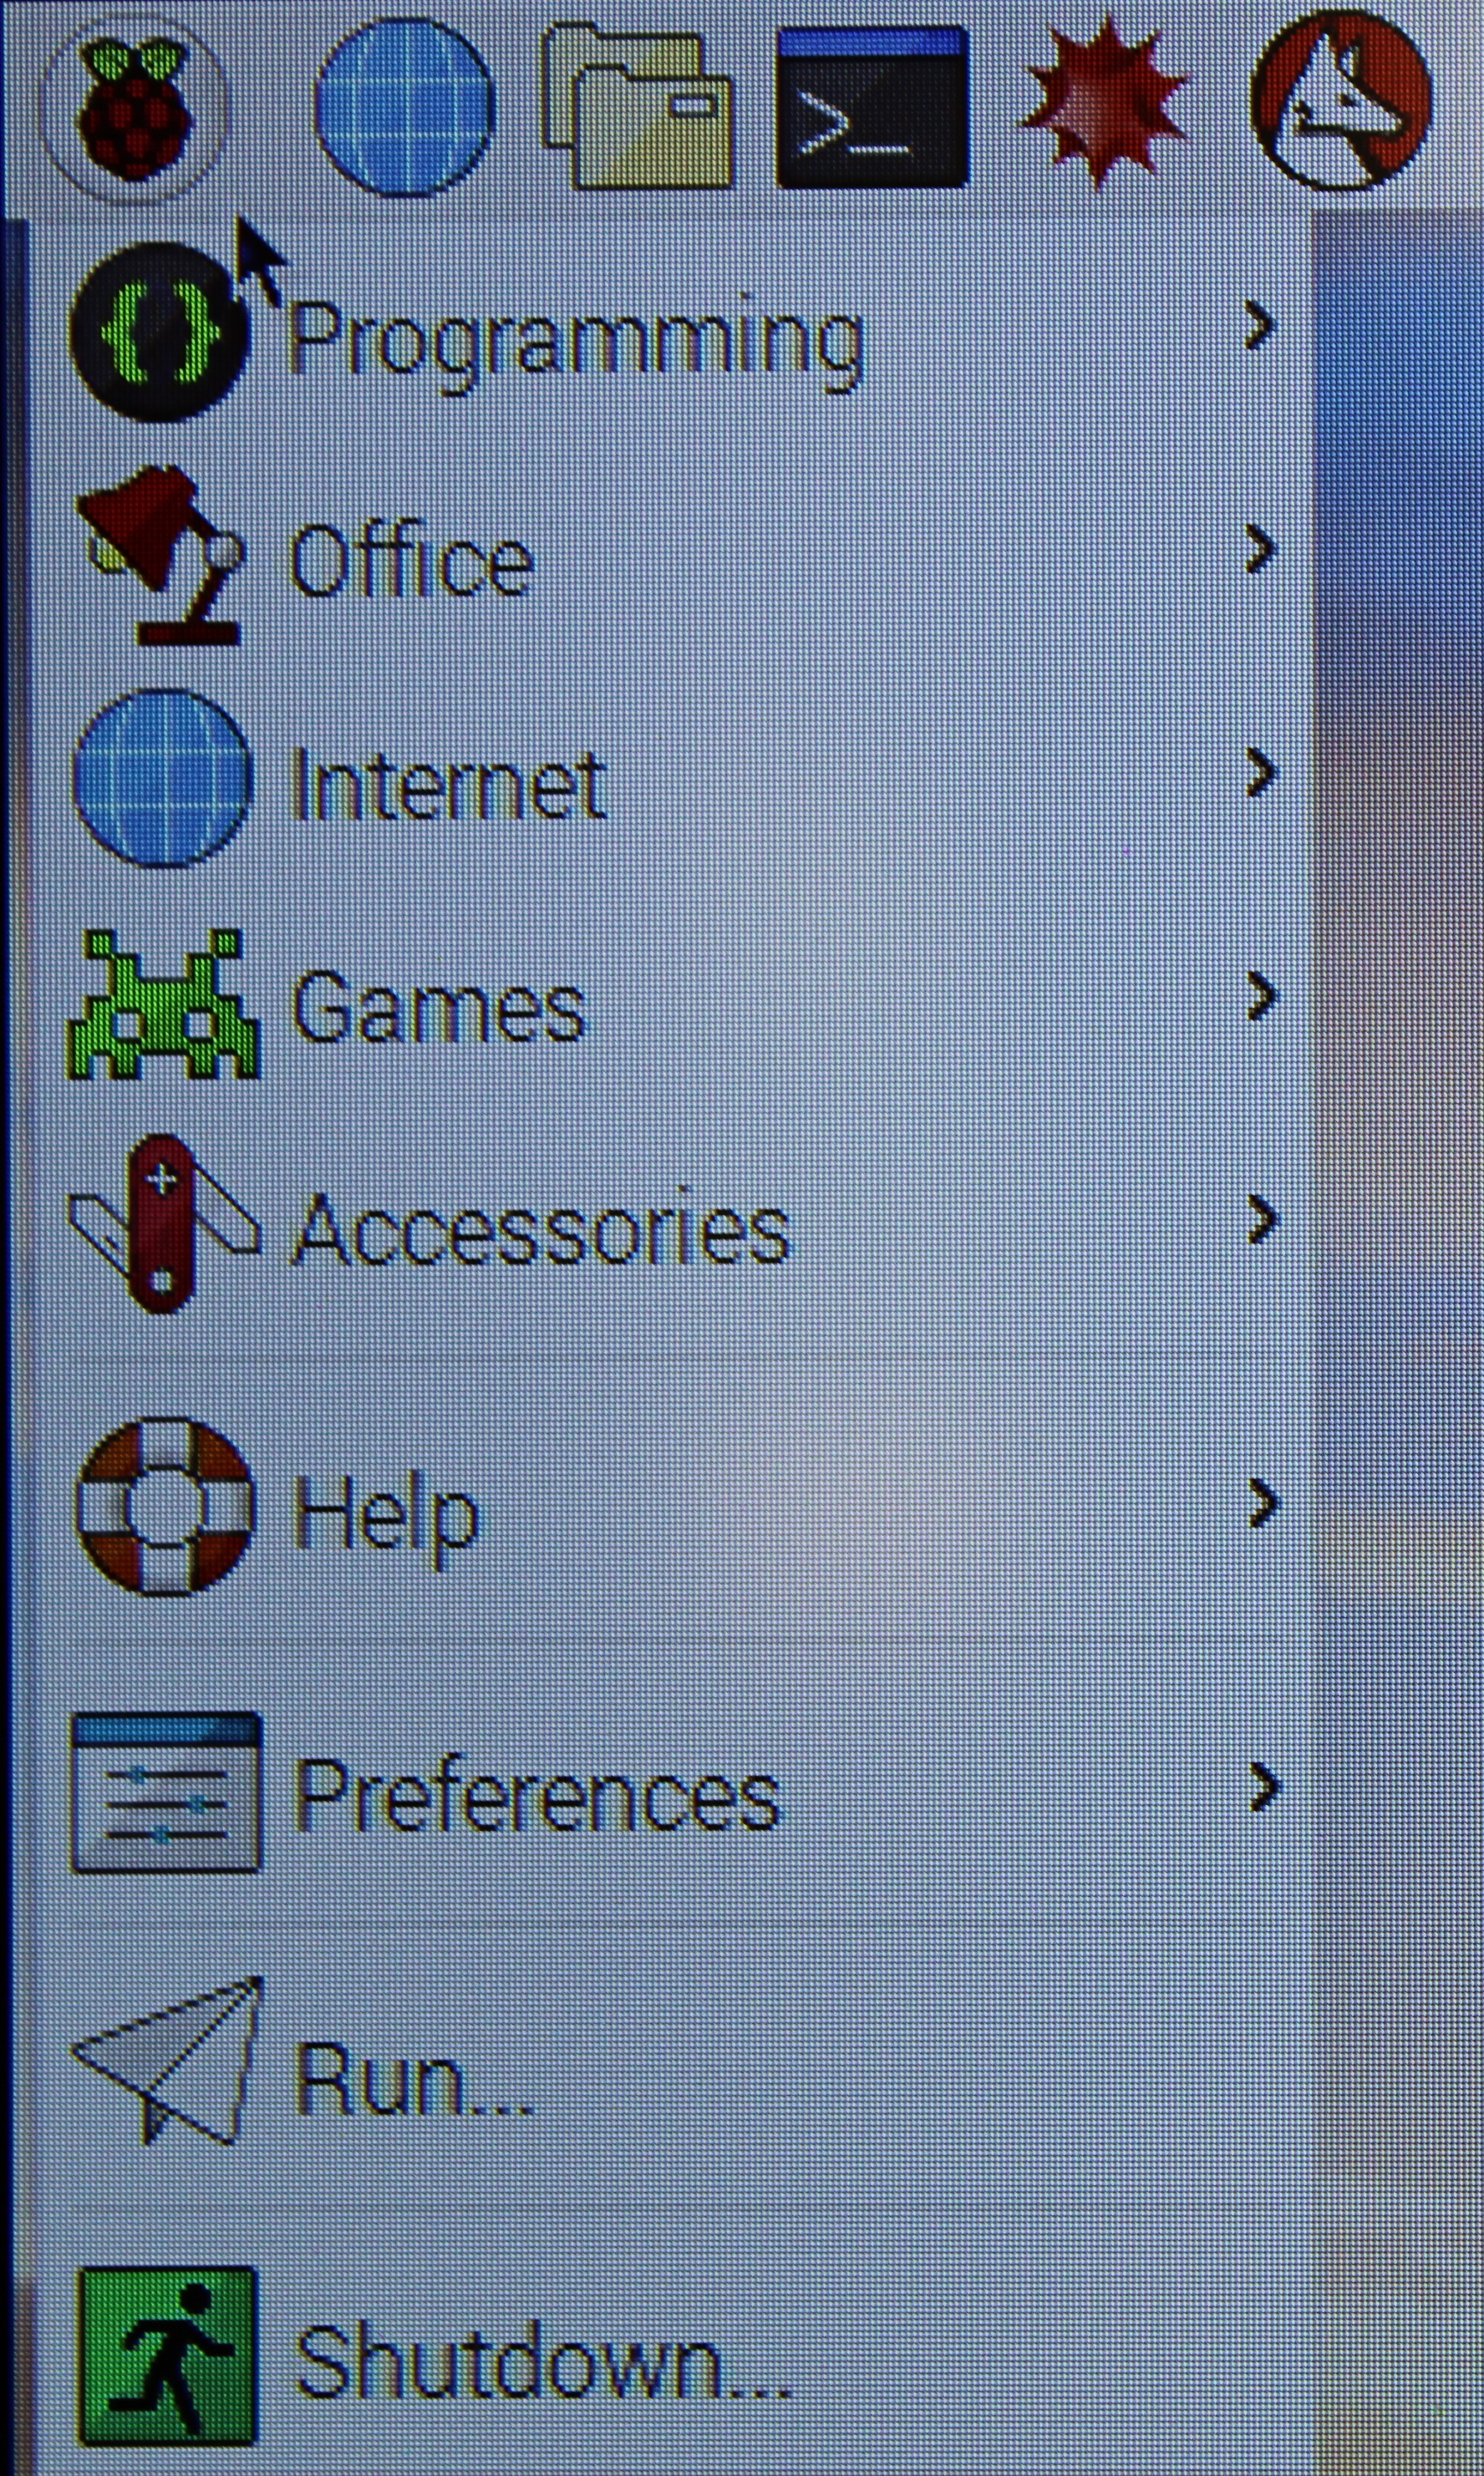
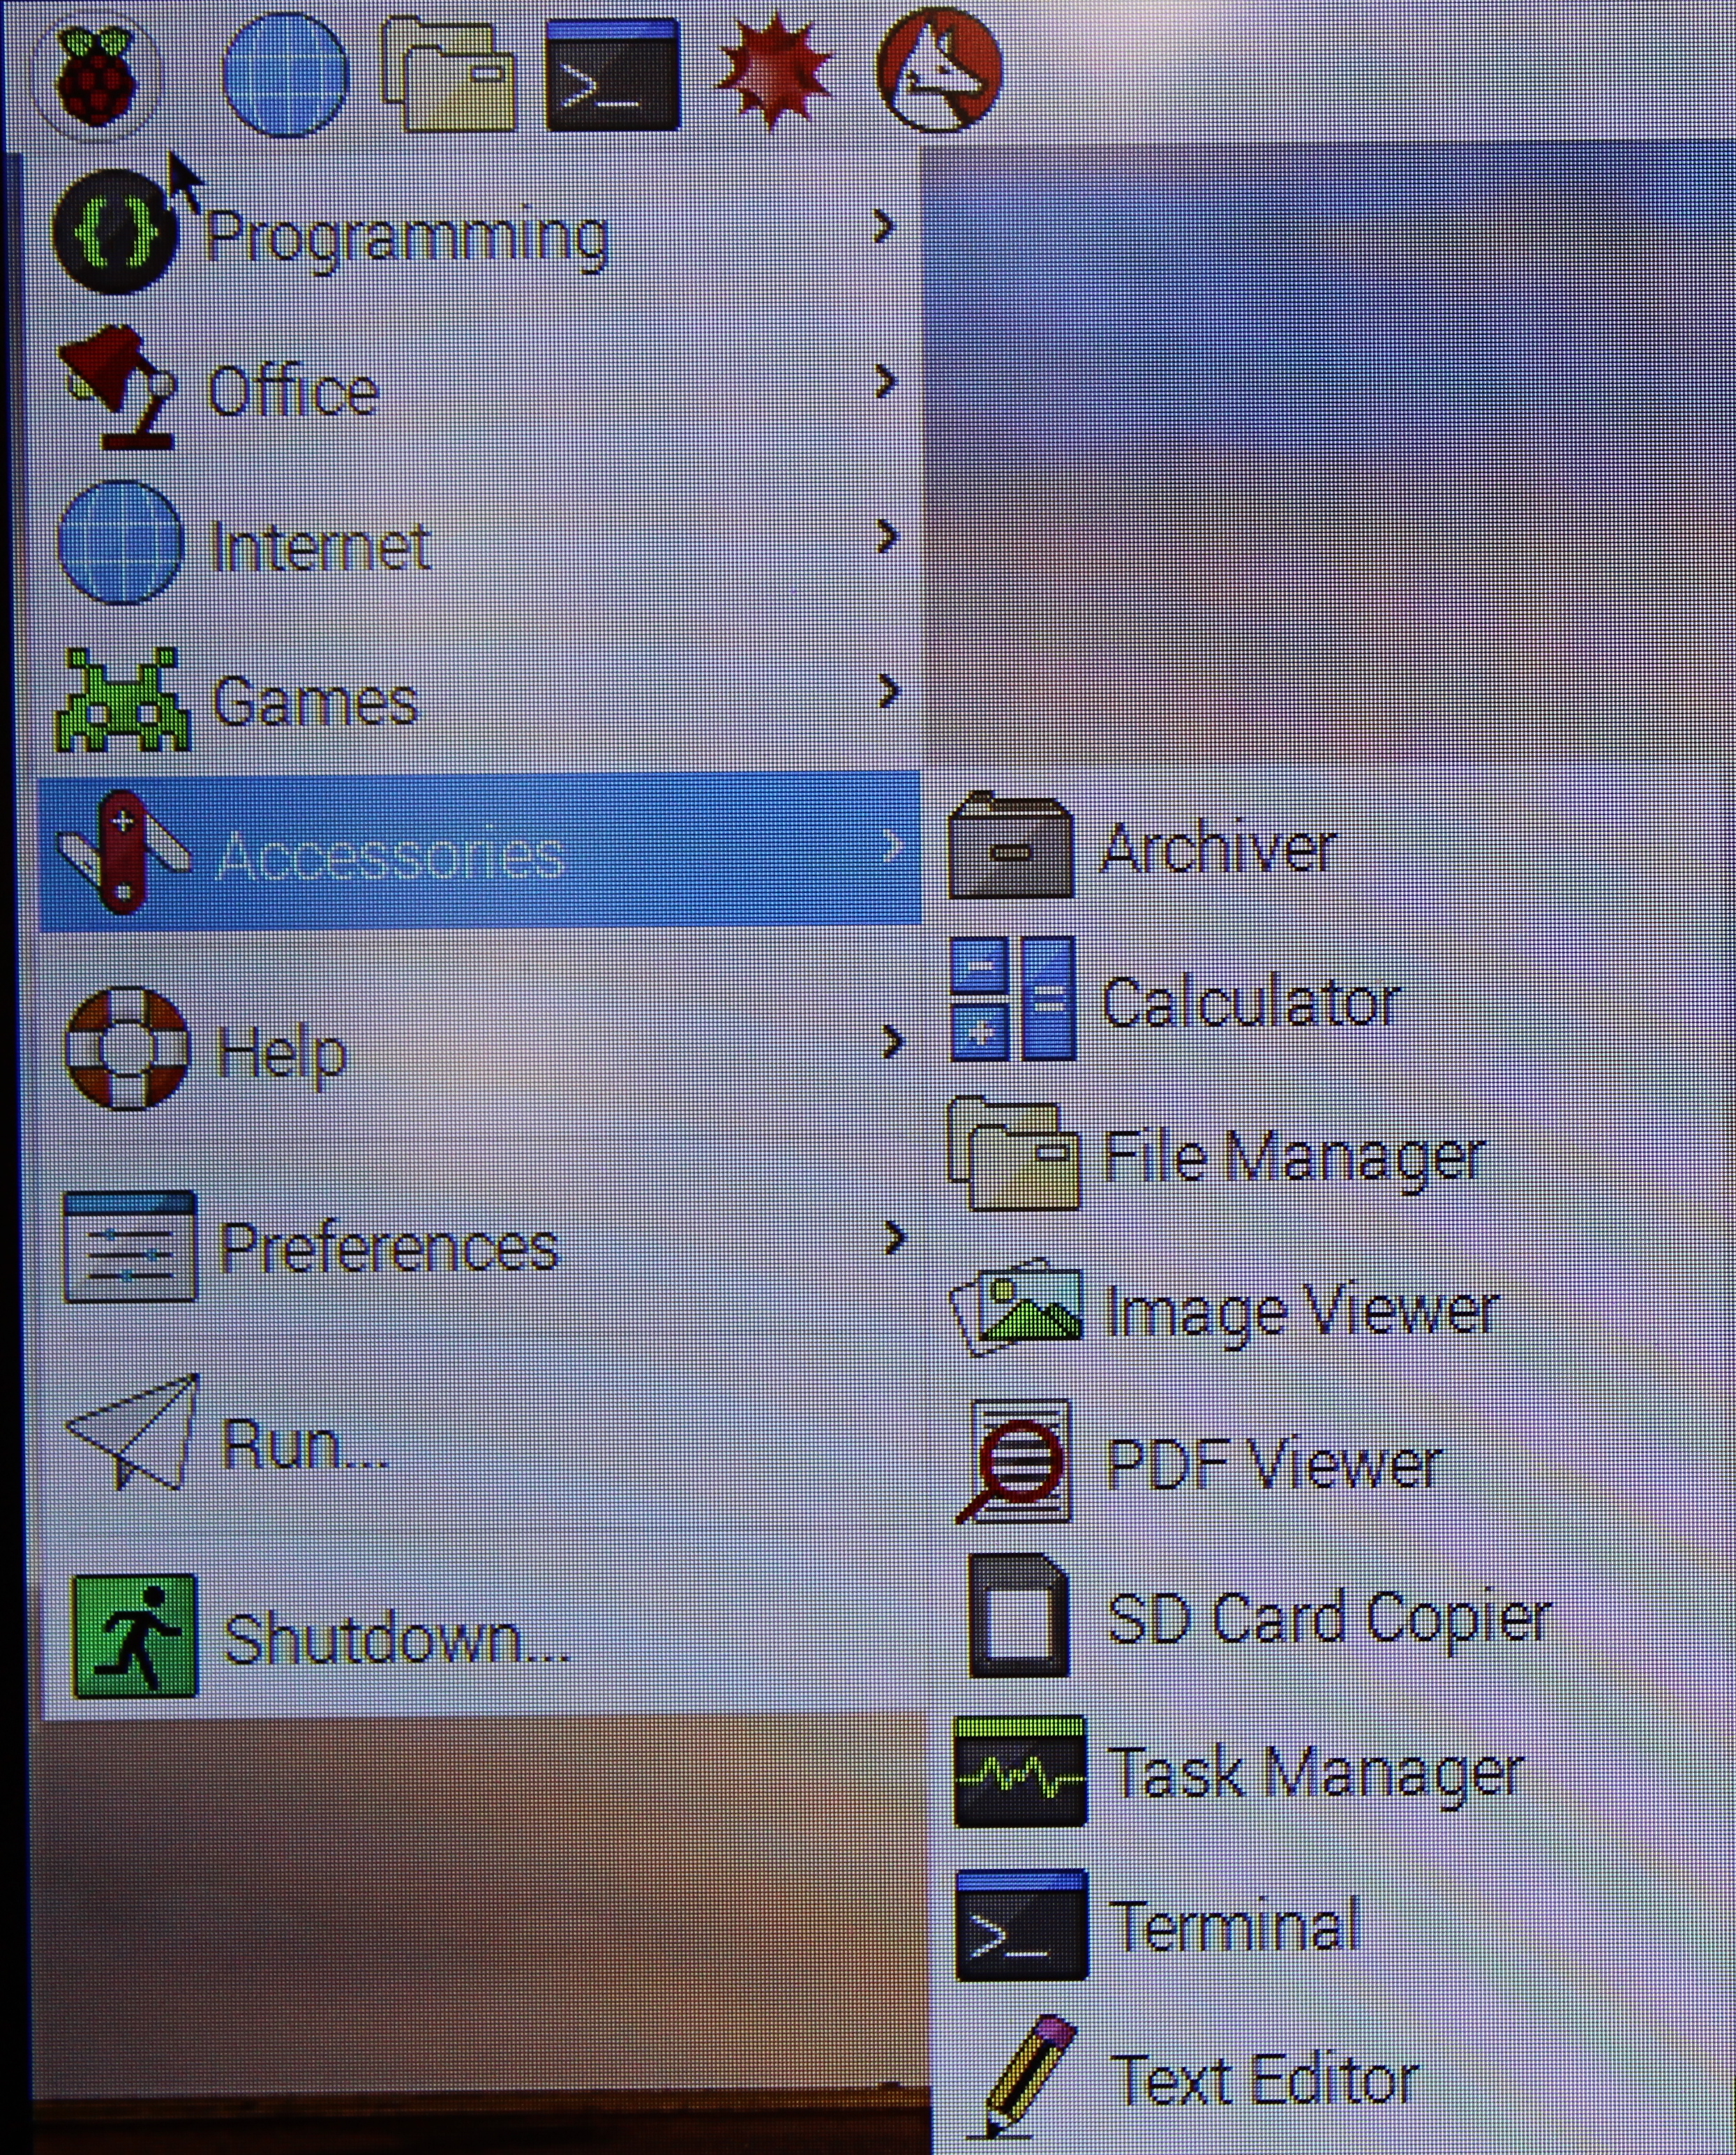
Use the down arrow key to navigate down to Accessories. Press the right arrow key to open the Accessories sub-menu.
Use the down arrow key to navigate to Terminal and, with Terminal selected, press the enter key to launch Terminal.
Use the down arrow key to navigate to select the Terminal and, press the enter key to launch Terminal.
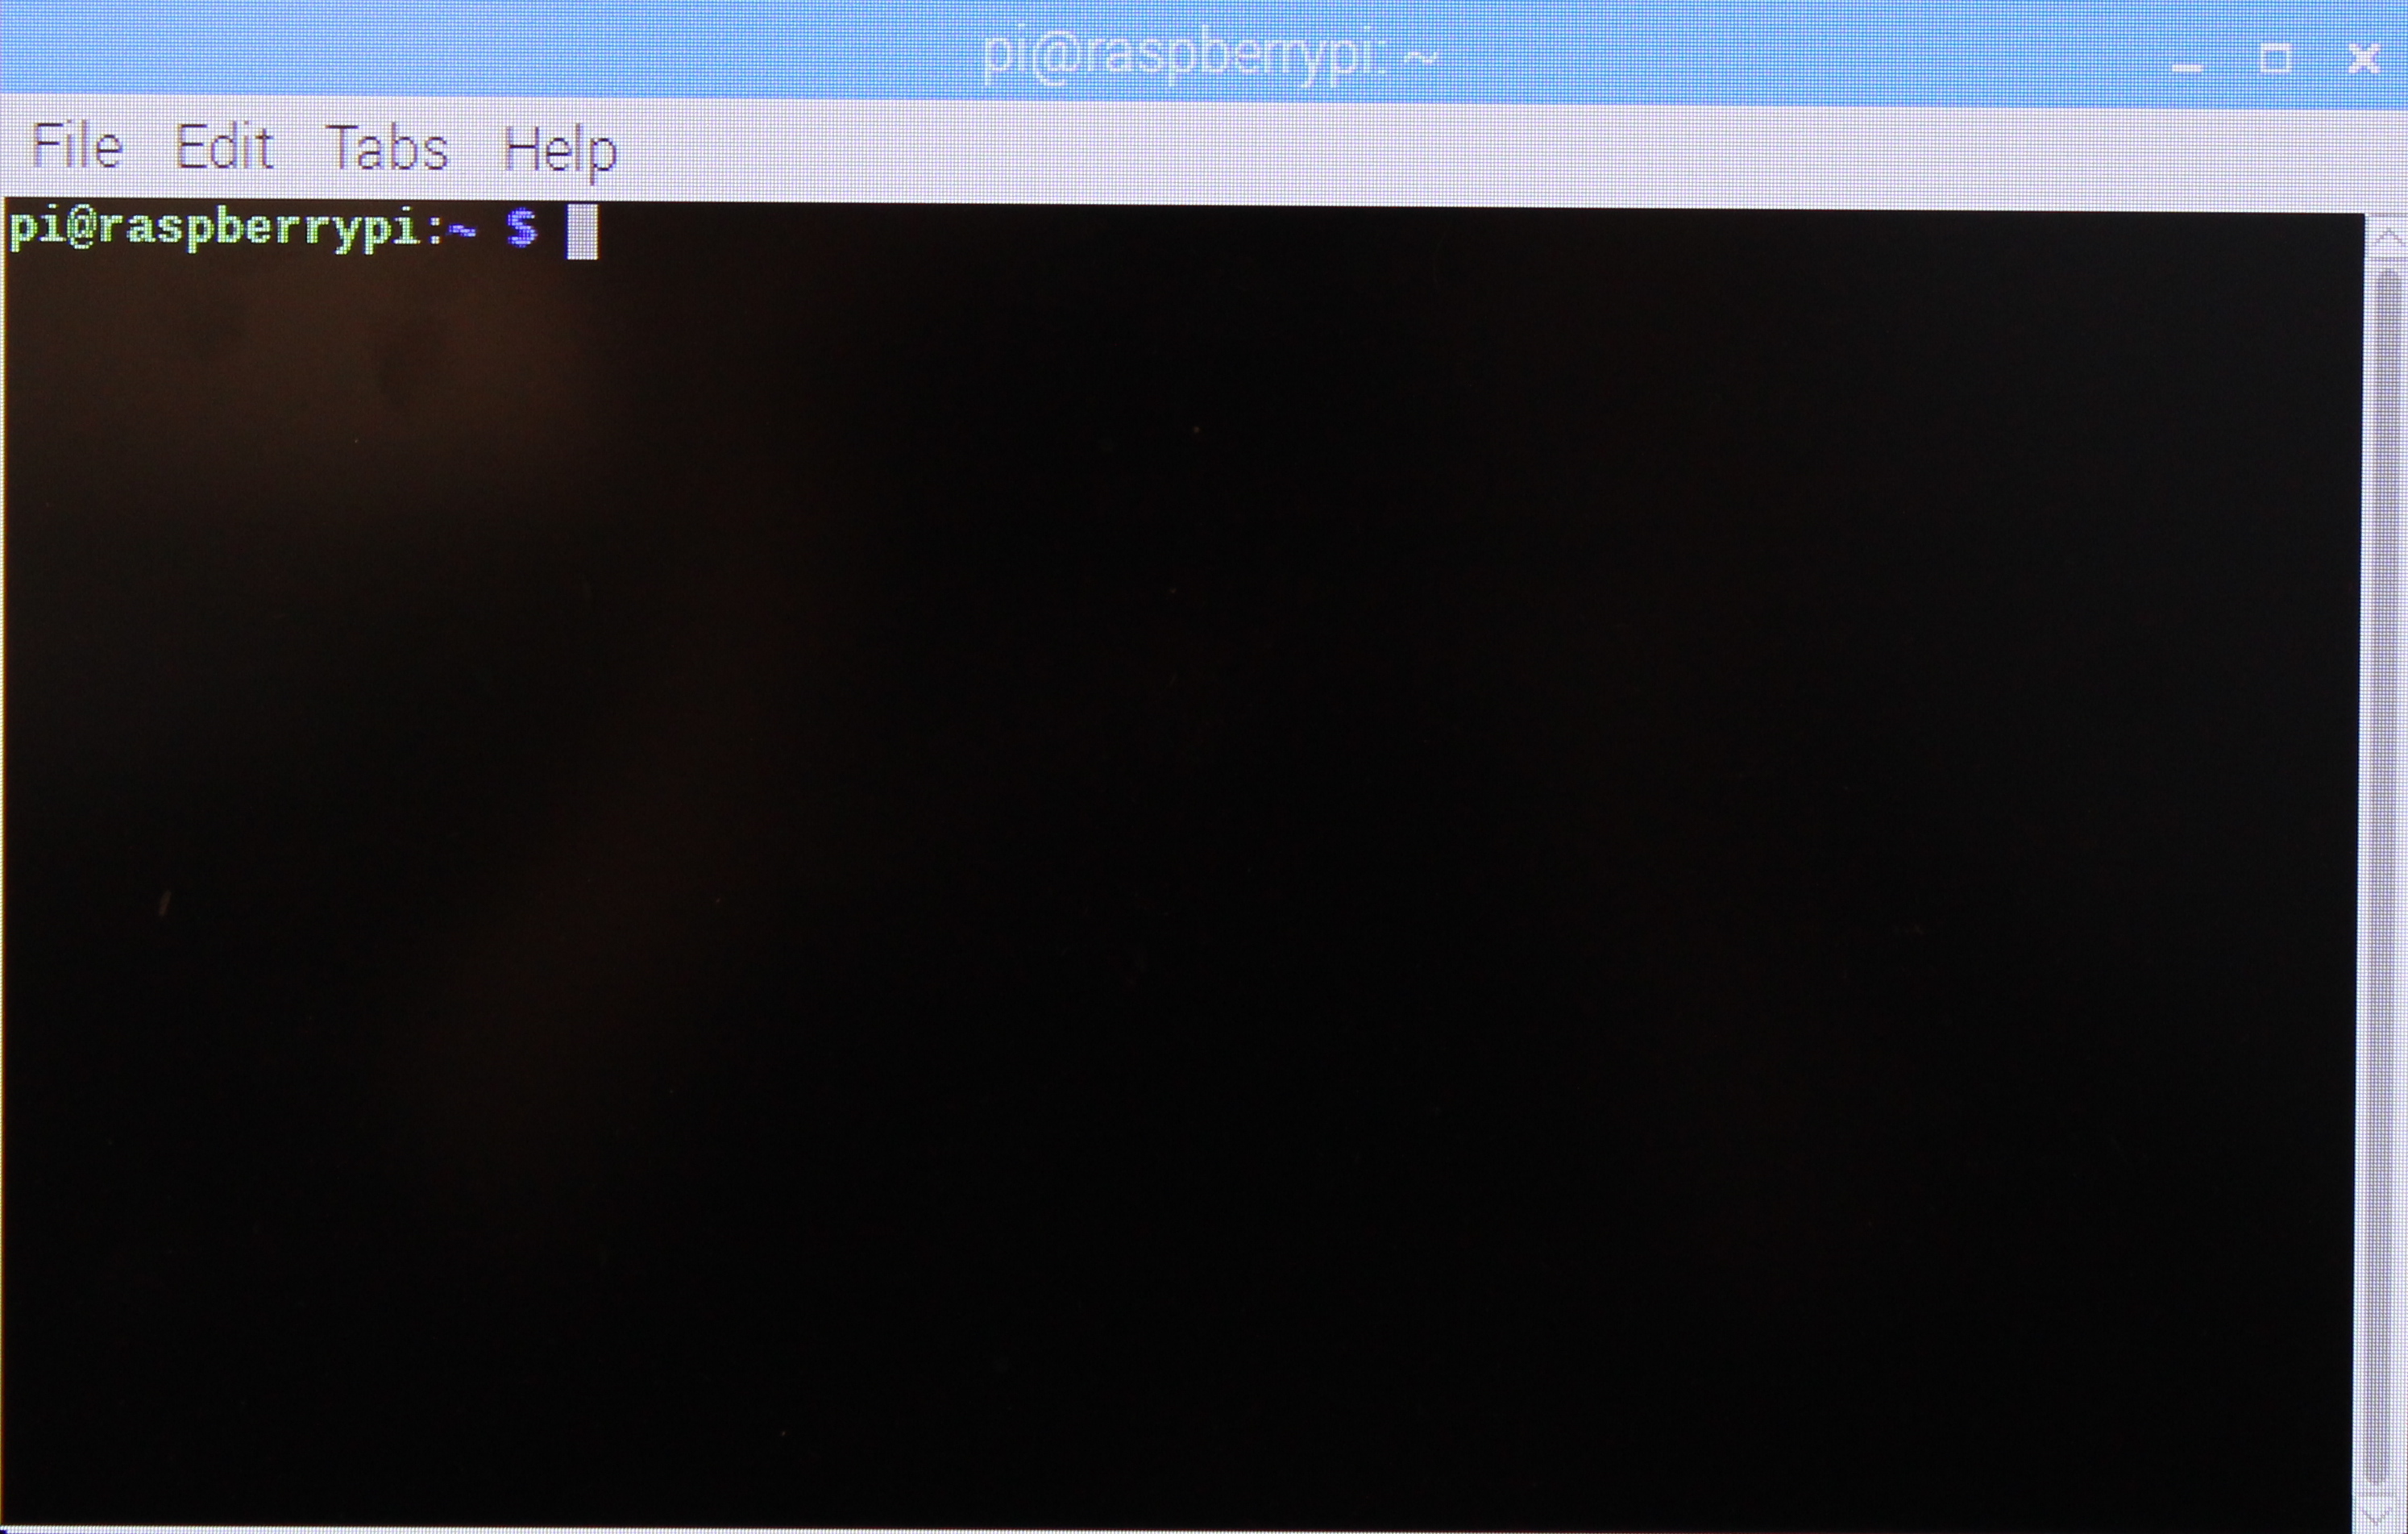
We will now configure the Raspberry Pi to boot into the command line interface (CLI) as opposed to the Desktop.
Execute the following command in the terminal:
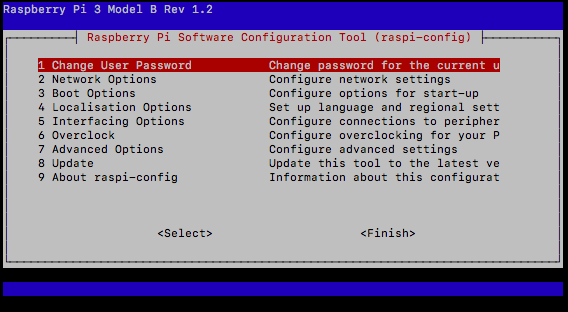
$ sudo raspi-configThis will open the Raspberry Pi configuration settings main page.
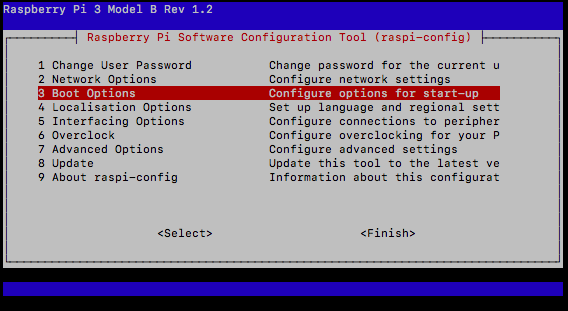
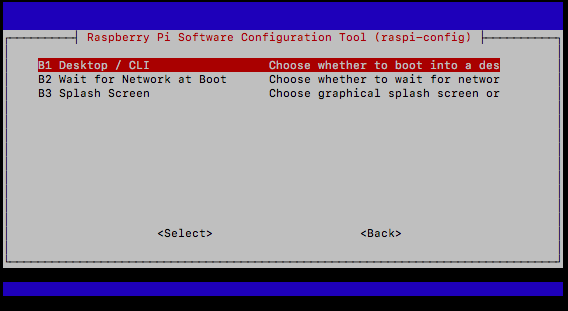
To change the Boot Options:
Use the arrow keys to select 3 Boot Options, and press the enter key.
Use the arrow keys to select B1 Desktop / CLI, and press the enter key.
Use the arrow keys to select B1 Console, and press the enter key.
After the selection, you will be returned to the settings main page.
The Boot Options to boot the Pi to the CLI is complete. We could reboot the Pi now, but we will enable Serial first.
If you do not already have the raspi-config open, execute the following command in the terminal:
$ sudo raspi-configThis will open the Raspberry Pi configuration settings main page.
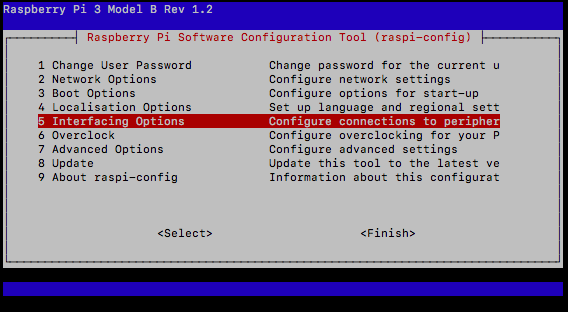
To Enable the Serial Intefacing Option:
Use the arrow keys to select 5 Interfacing Options; press the enter key.
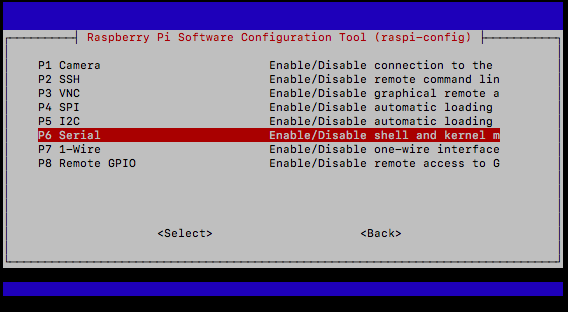
Use the arrow keys to select P6 Serial; press the enter key.
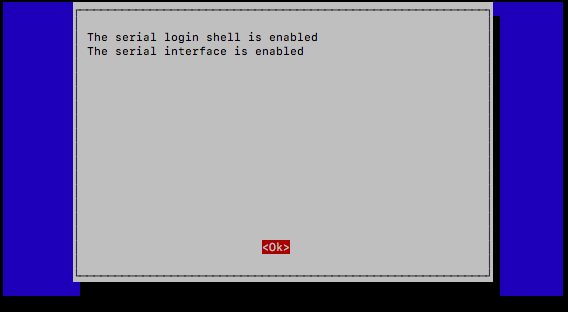
Use the arrow keys to select Yes; press the enter key.
Confirm the selection by pressing the enter key to confirm Ok.
After the selection, you will be returned to the settings main page.
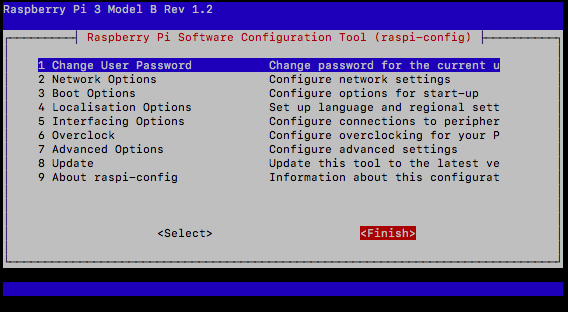
To save our configurations and exit the Raspberry Pi configuration settings:
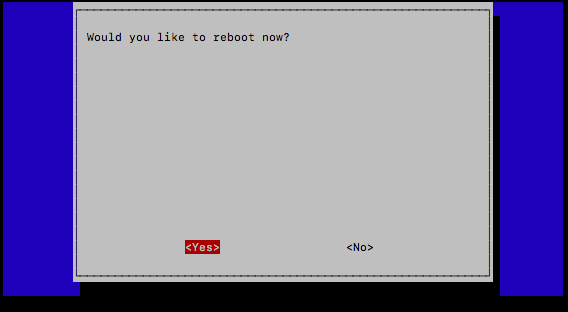
Use the arrow keys to select Finish; press the enter key.
Press the the arrow keys to select Yes; press the enter key.
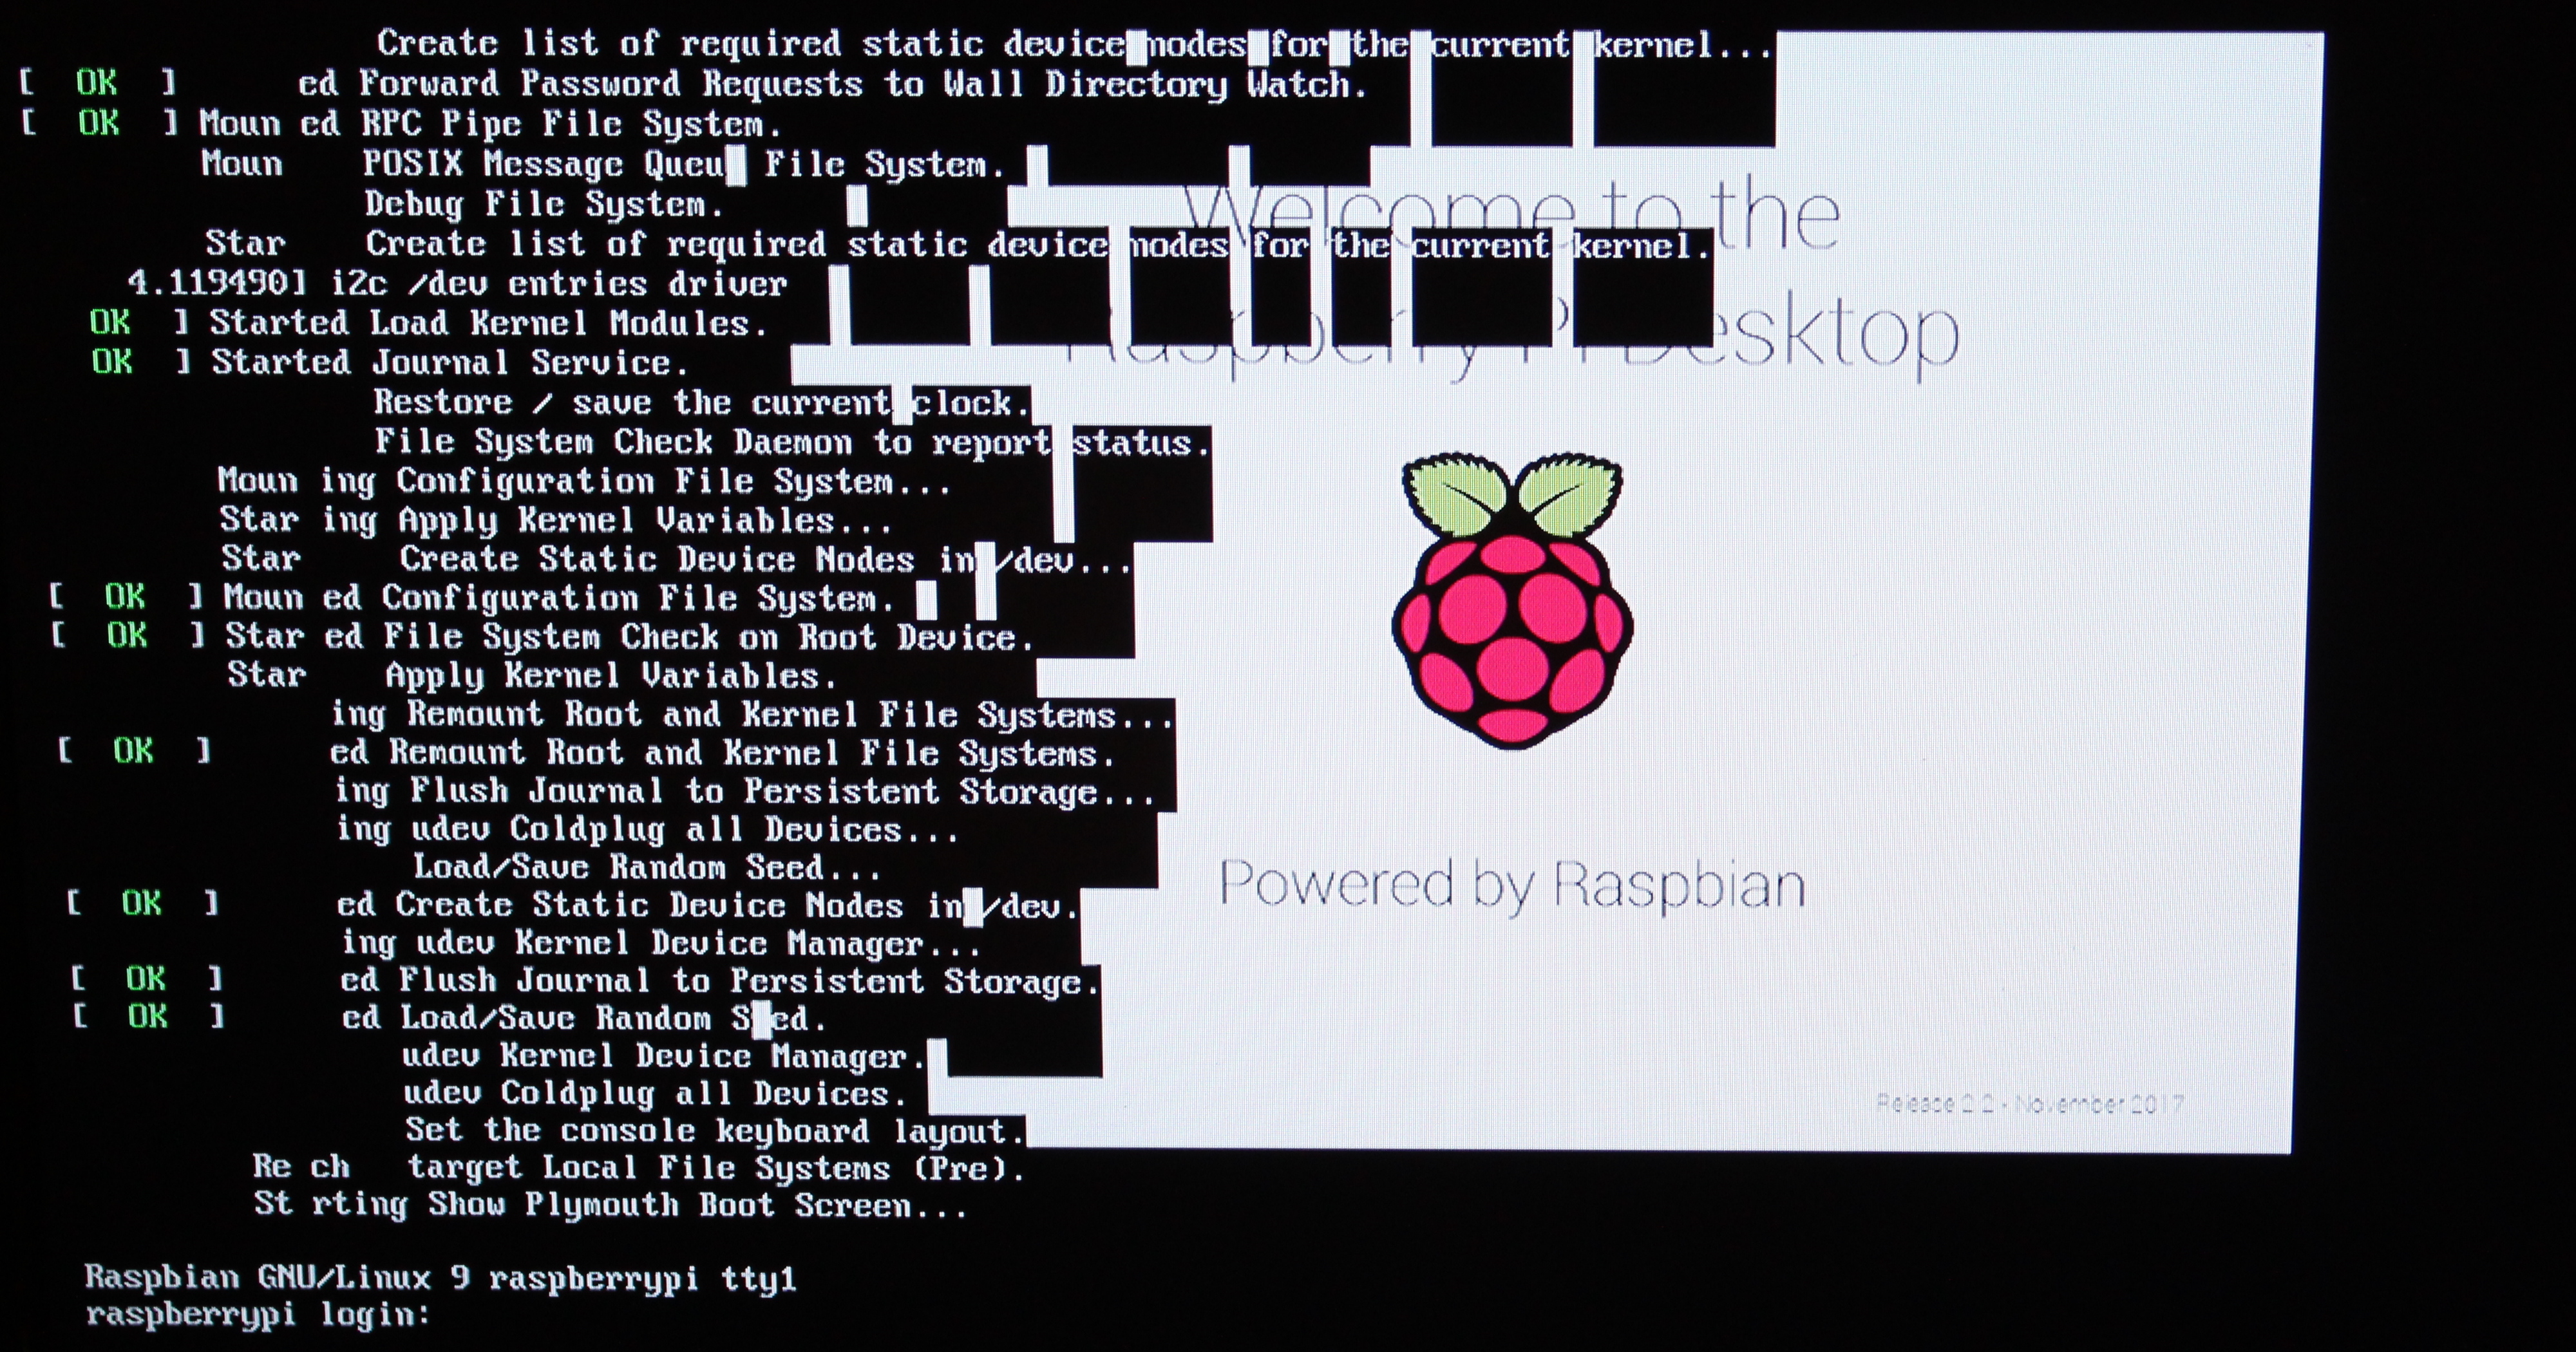
The Raspberry Pi will automatically reboot. When the boot completes, you will not be taken to the Desktop GUI, you will be taken to the CLI (Command Line Interface) - as expected! The Pi will prompt us to login.
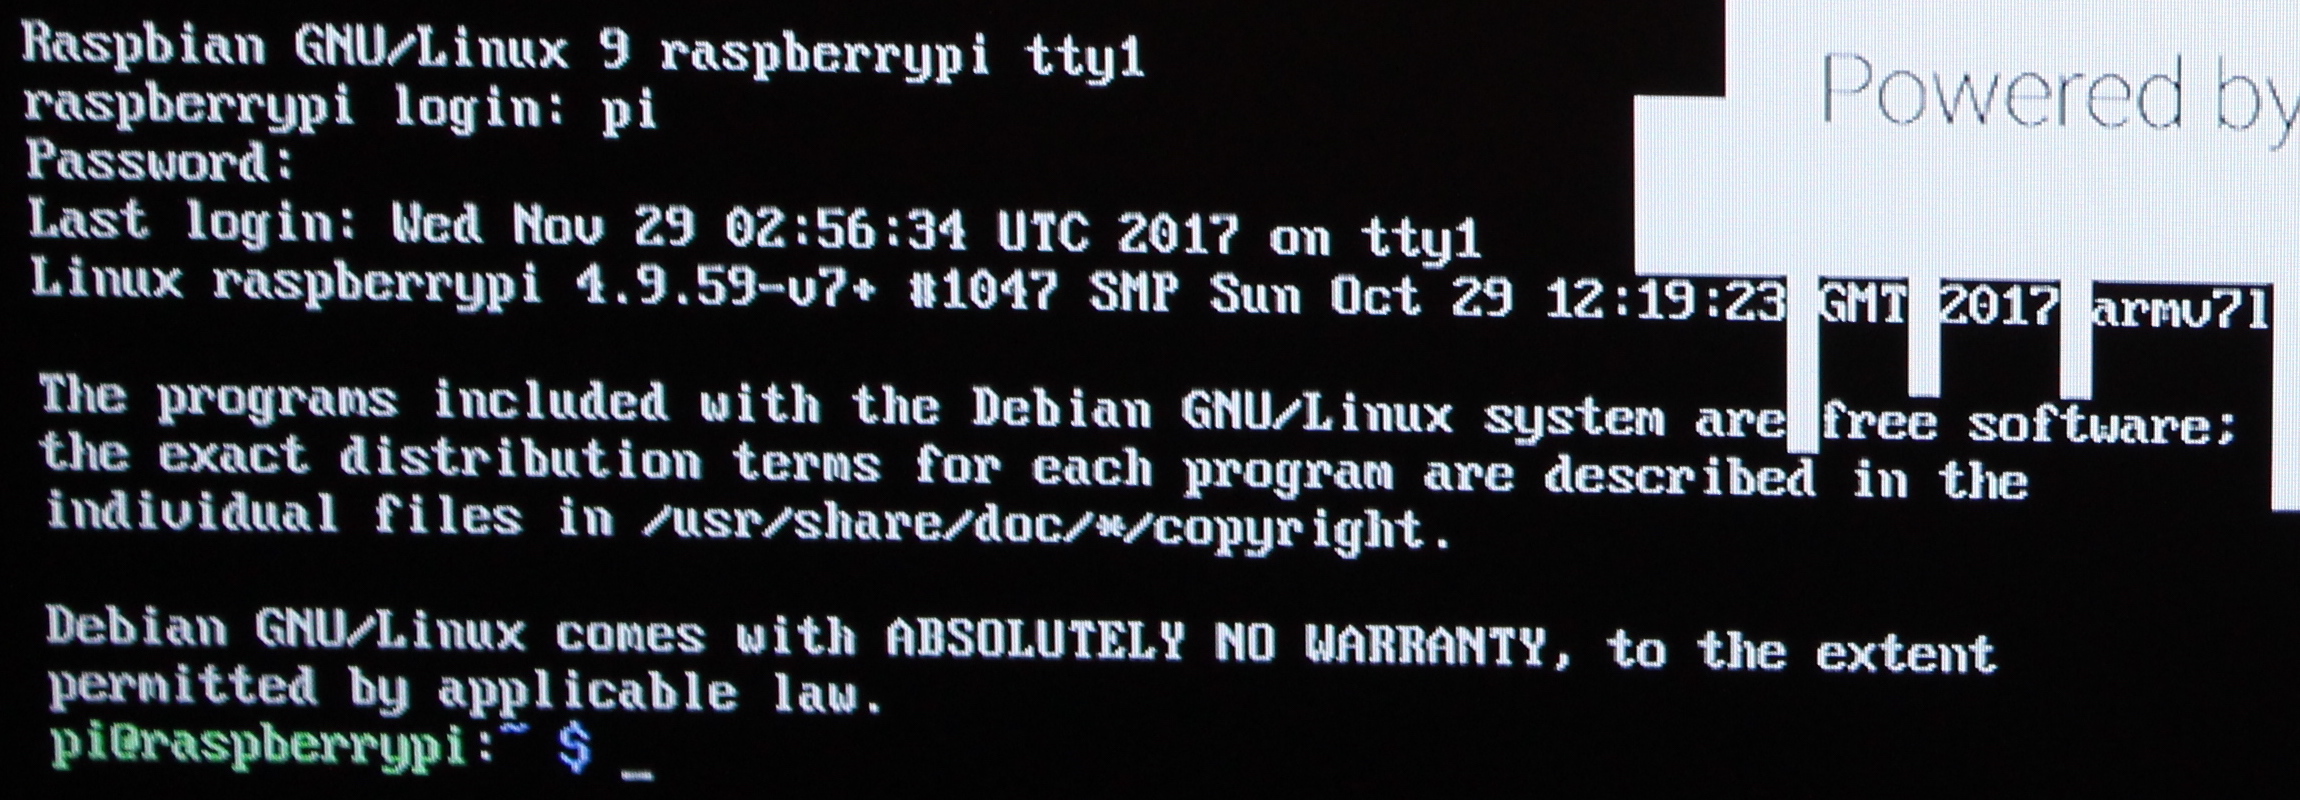
We could continue working with our rpi with the monitor and keyboard, but this a cumbersome process. Instead, we will make use of the Serial Interfacing Option we enabled. But first, we need to shutdown the raspberry pi. Log in using default credentials:
| Login | Password |
|---|---|
| pi | raspberry |
Type in the username: pi; press the enter key to affirm.
Type in the password: raspberry; press the enter key to affirm and login
When typing in the password, there will be no visible feedback.
If the login is successful, you will be taken to the Raspberry Pi CLI.
To shutdown the RPI, execute the following command:
$ sudo shutdown -h nowAfter a minute, you may safely remove the power adapter from the Raspberry Pi.
With the Boot Options set to booting up into the CLI and with the Serial Interface enabled, we are ready to move onto the Serial Console Cable Shell Login method.
In this section, we will remove the keyboard, mouse, and monitor peripherals - as promised. First we need to connect the Serial Console Cable to the Raspberry Pi. We may need to install the appropriate drivers to use the Serial Console Cable. Then we will interface with the Raspberry Pi with the Serial Console Cable peripheral - without the keyboard, mouse, and monitor peripherals! Finally, we will make one more Raspberry Pi configuration using raspi-config to enable SSH (Secure Shell Hosting) - which we will use in the next step to make the Raspberry Pi a fully headless system.
If the rPi is not off, shut it down before continuing. The command to shutdown via the CLI is:
$ sudo shutdown -h nowAfter a minute, you may safely remove the power adapter from the Raspberry Pi.
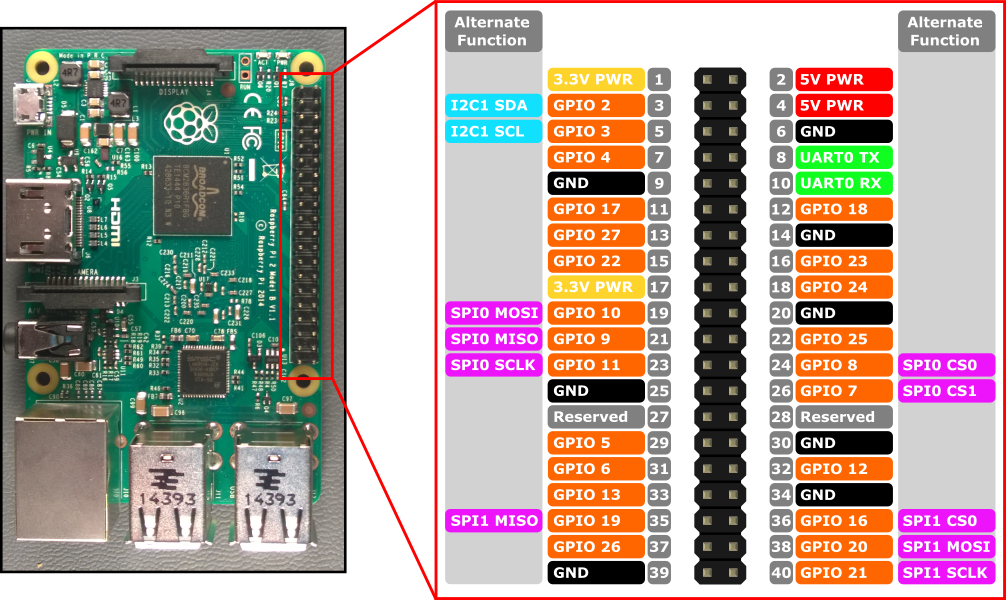
While the Raspberry Pi is off, connect the Serial Console Cable to the Raspbery Pi.
Do not connect the Serial Console Cable 5V pin (if applicable) to the raspberry pi - depending on where you bought the cable from, it may or may not have the 5V pin. Connecting the power adapter and the power from your USB (computer), may damage the Raspberry Pi. Also, powering the Raspberry Pi from the 5V 500mA power output from the USB port on your computer is not sufficient to power the Raspberry Pi.
| Raspberry Pi | [Adafruit] Serial Console Cable |
|---|---|
| DO NOT CONNECT! | 5V (red) |
| UART0 TX (pin 8) | RX (white) |
| UART0 RX (pin 10) | TX (green) |
| GND (pin 6) | GND (black) |
The pinout above is only for the Serial Console Cable linked in the Bill of Materials.
If you use a different Serial Console Cable and it has a VCC (power) connection - do not use it and the power adapter to power the Raspberry Pi at the same time!
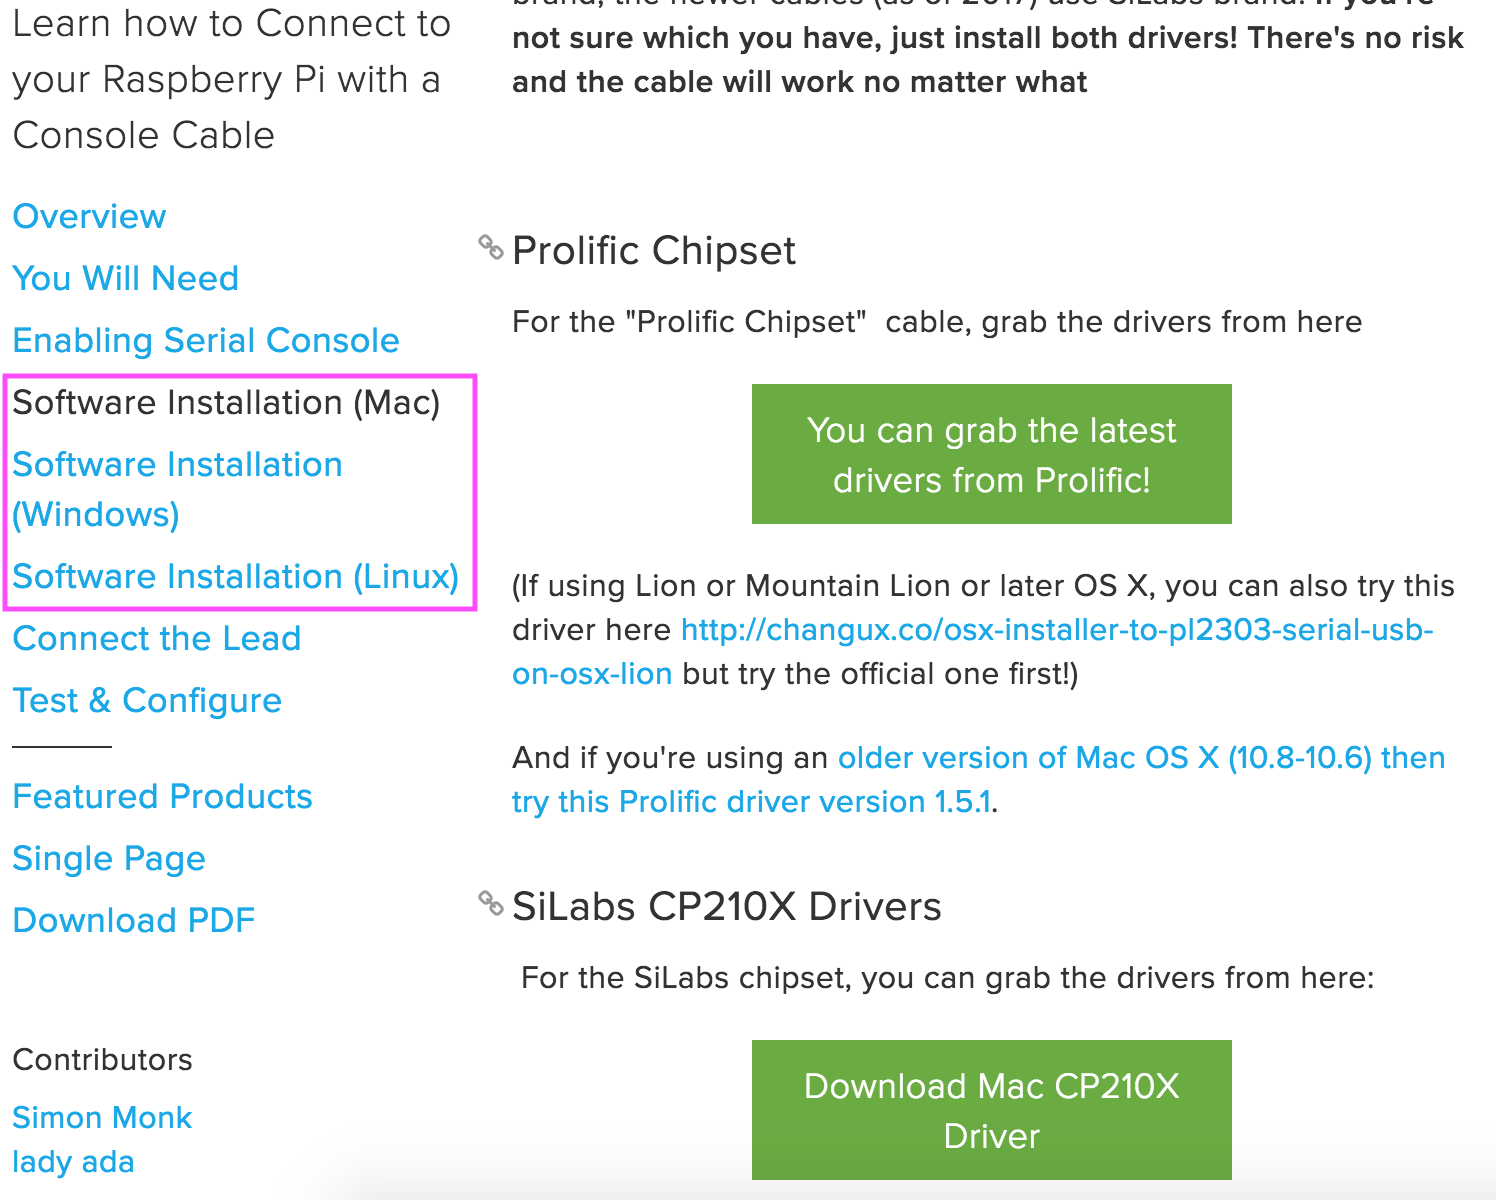
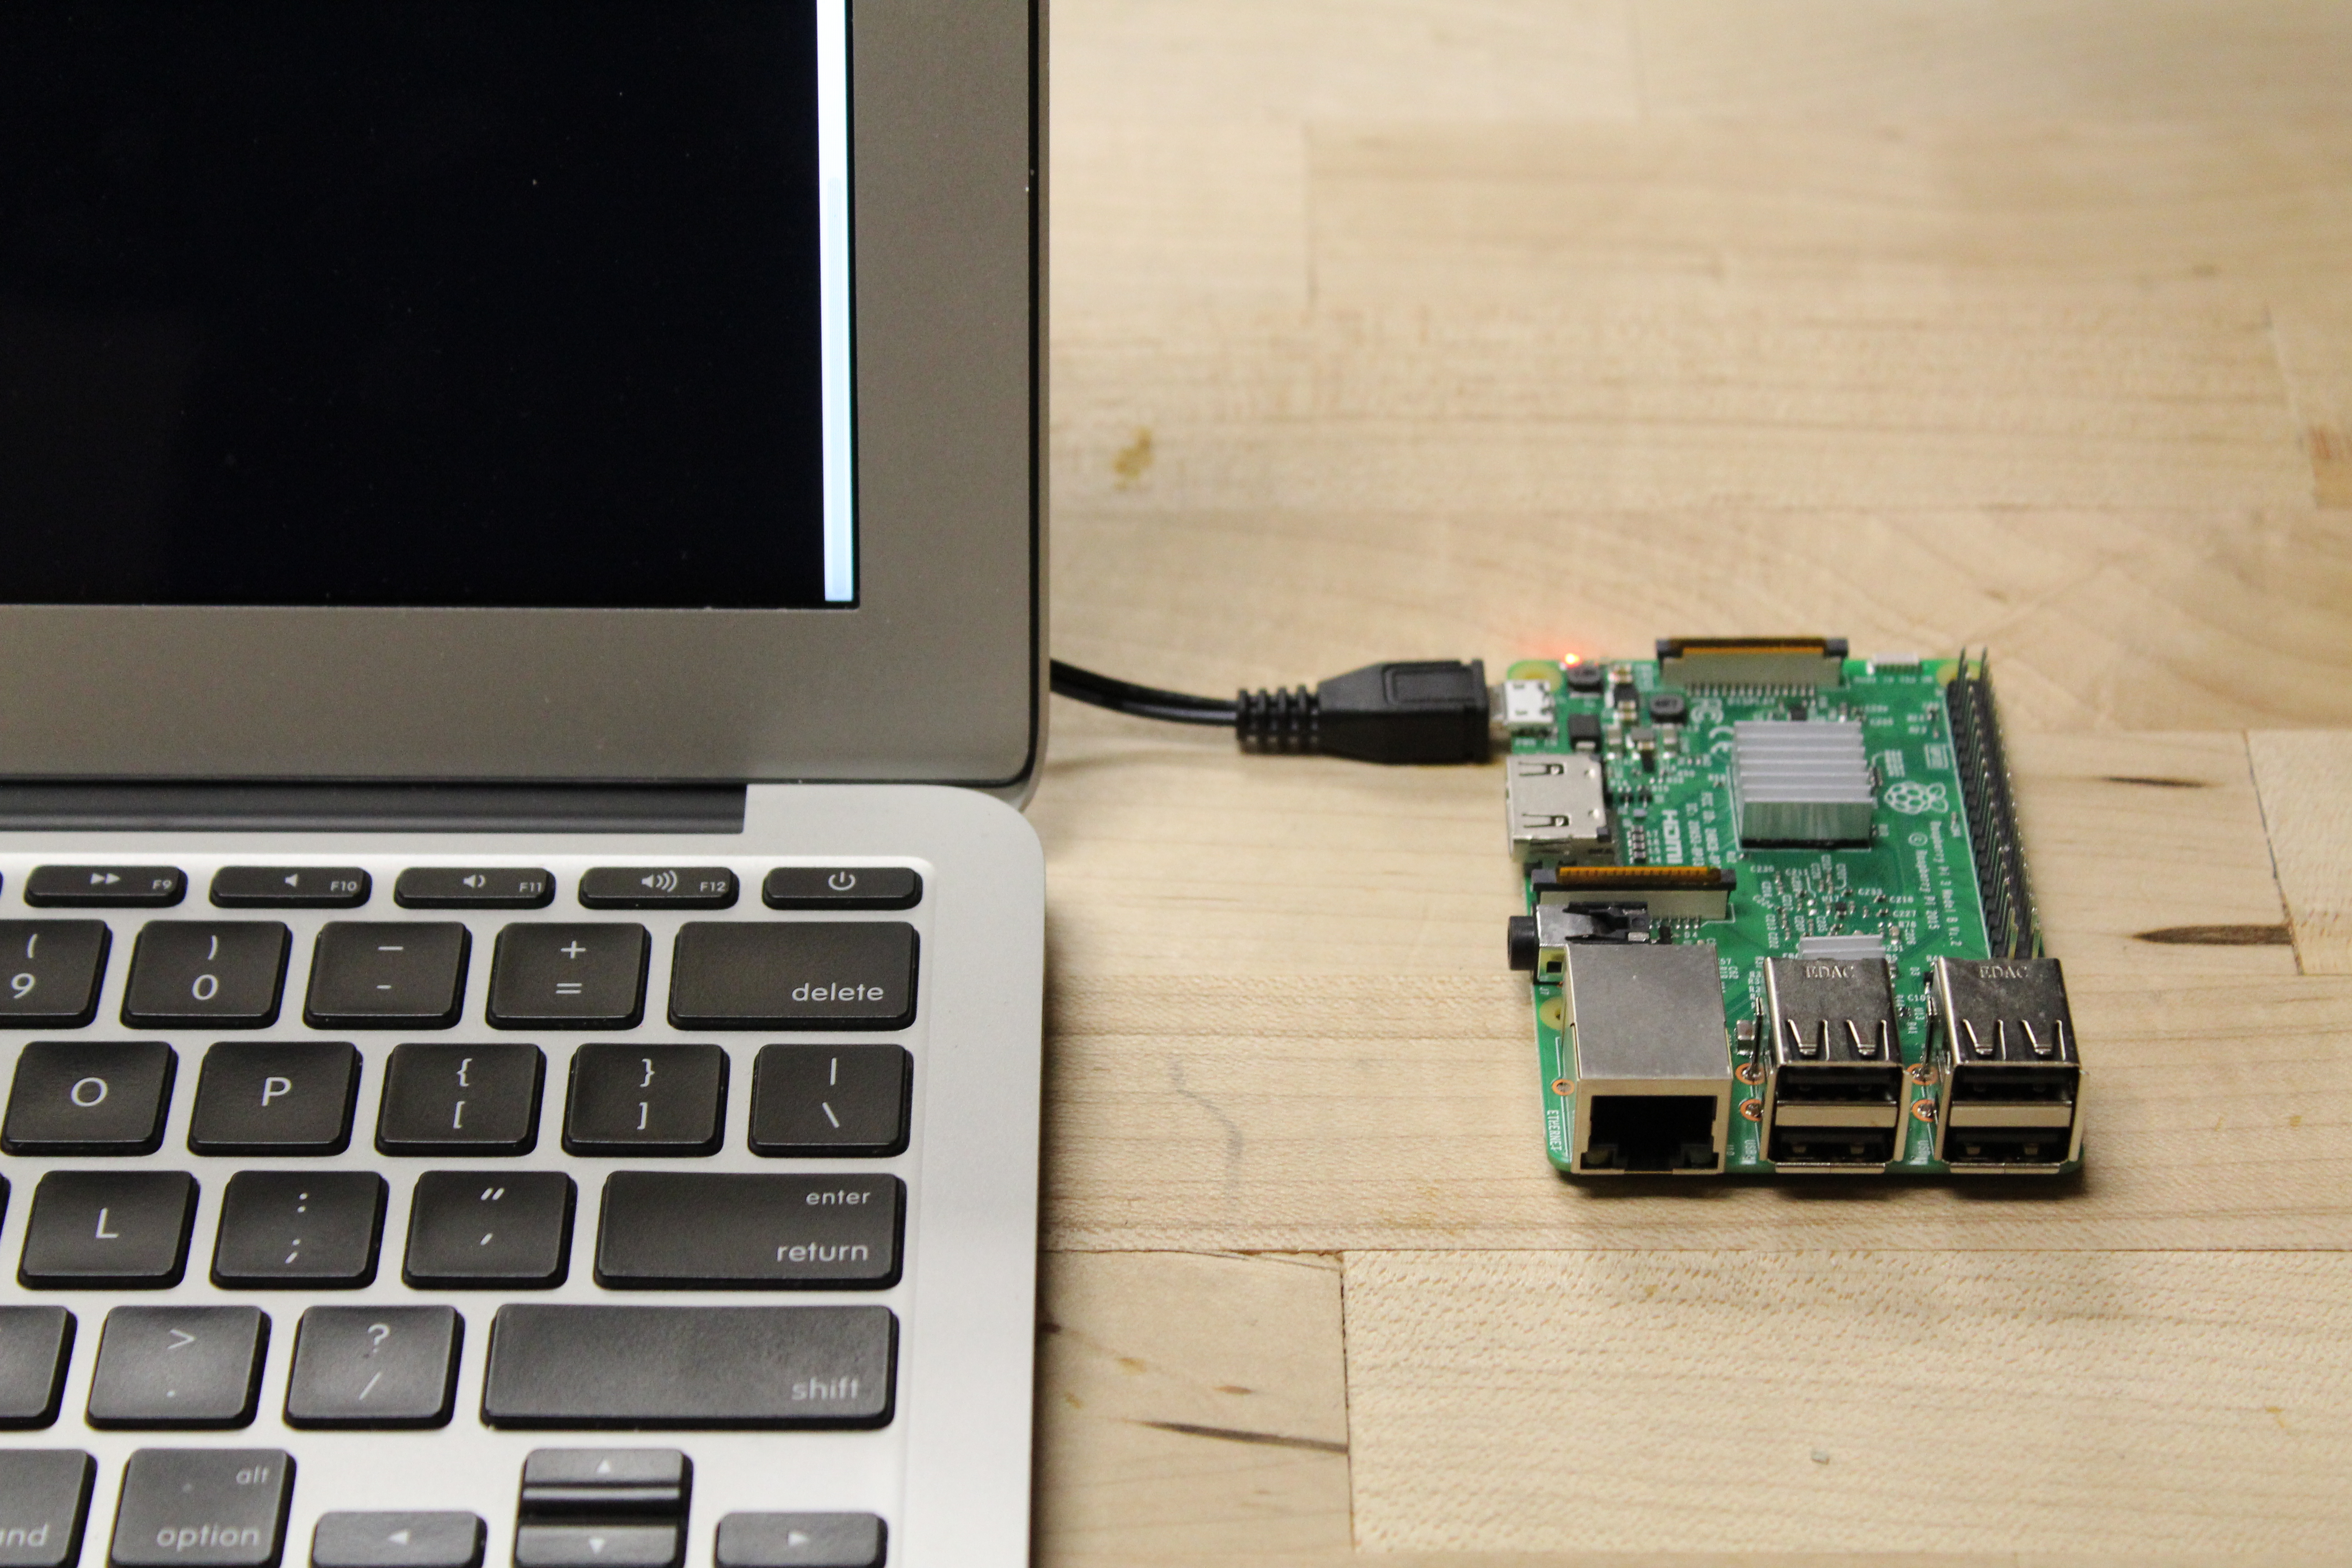
The next step involves logging in to the Pi from a laptop, so that you can use the laptop screen instead of a separate monitor. However, depending on your operating system, you may need extra drivers to perform this kind of connection.
We use Adafruit cables, so go to Adafruit's Download Page and follow the instructions for both the Prolific and SiLabs Chipsets for your operating system. You can select the correct tutorial from the menu on the left, as shown here:
We are ready to interface with the Raspberry Pi using the Serial Shell Login method using the Serial Console Cable.
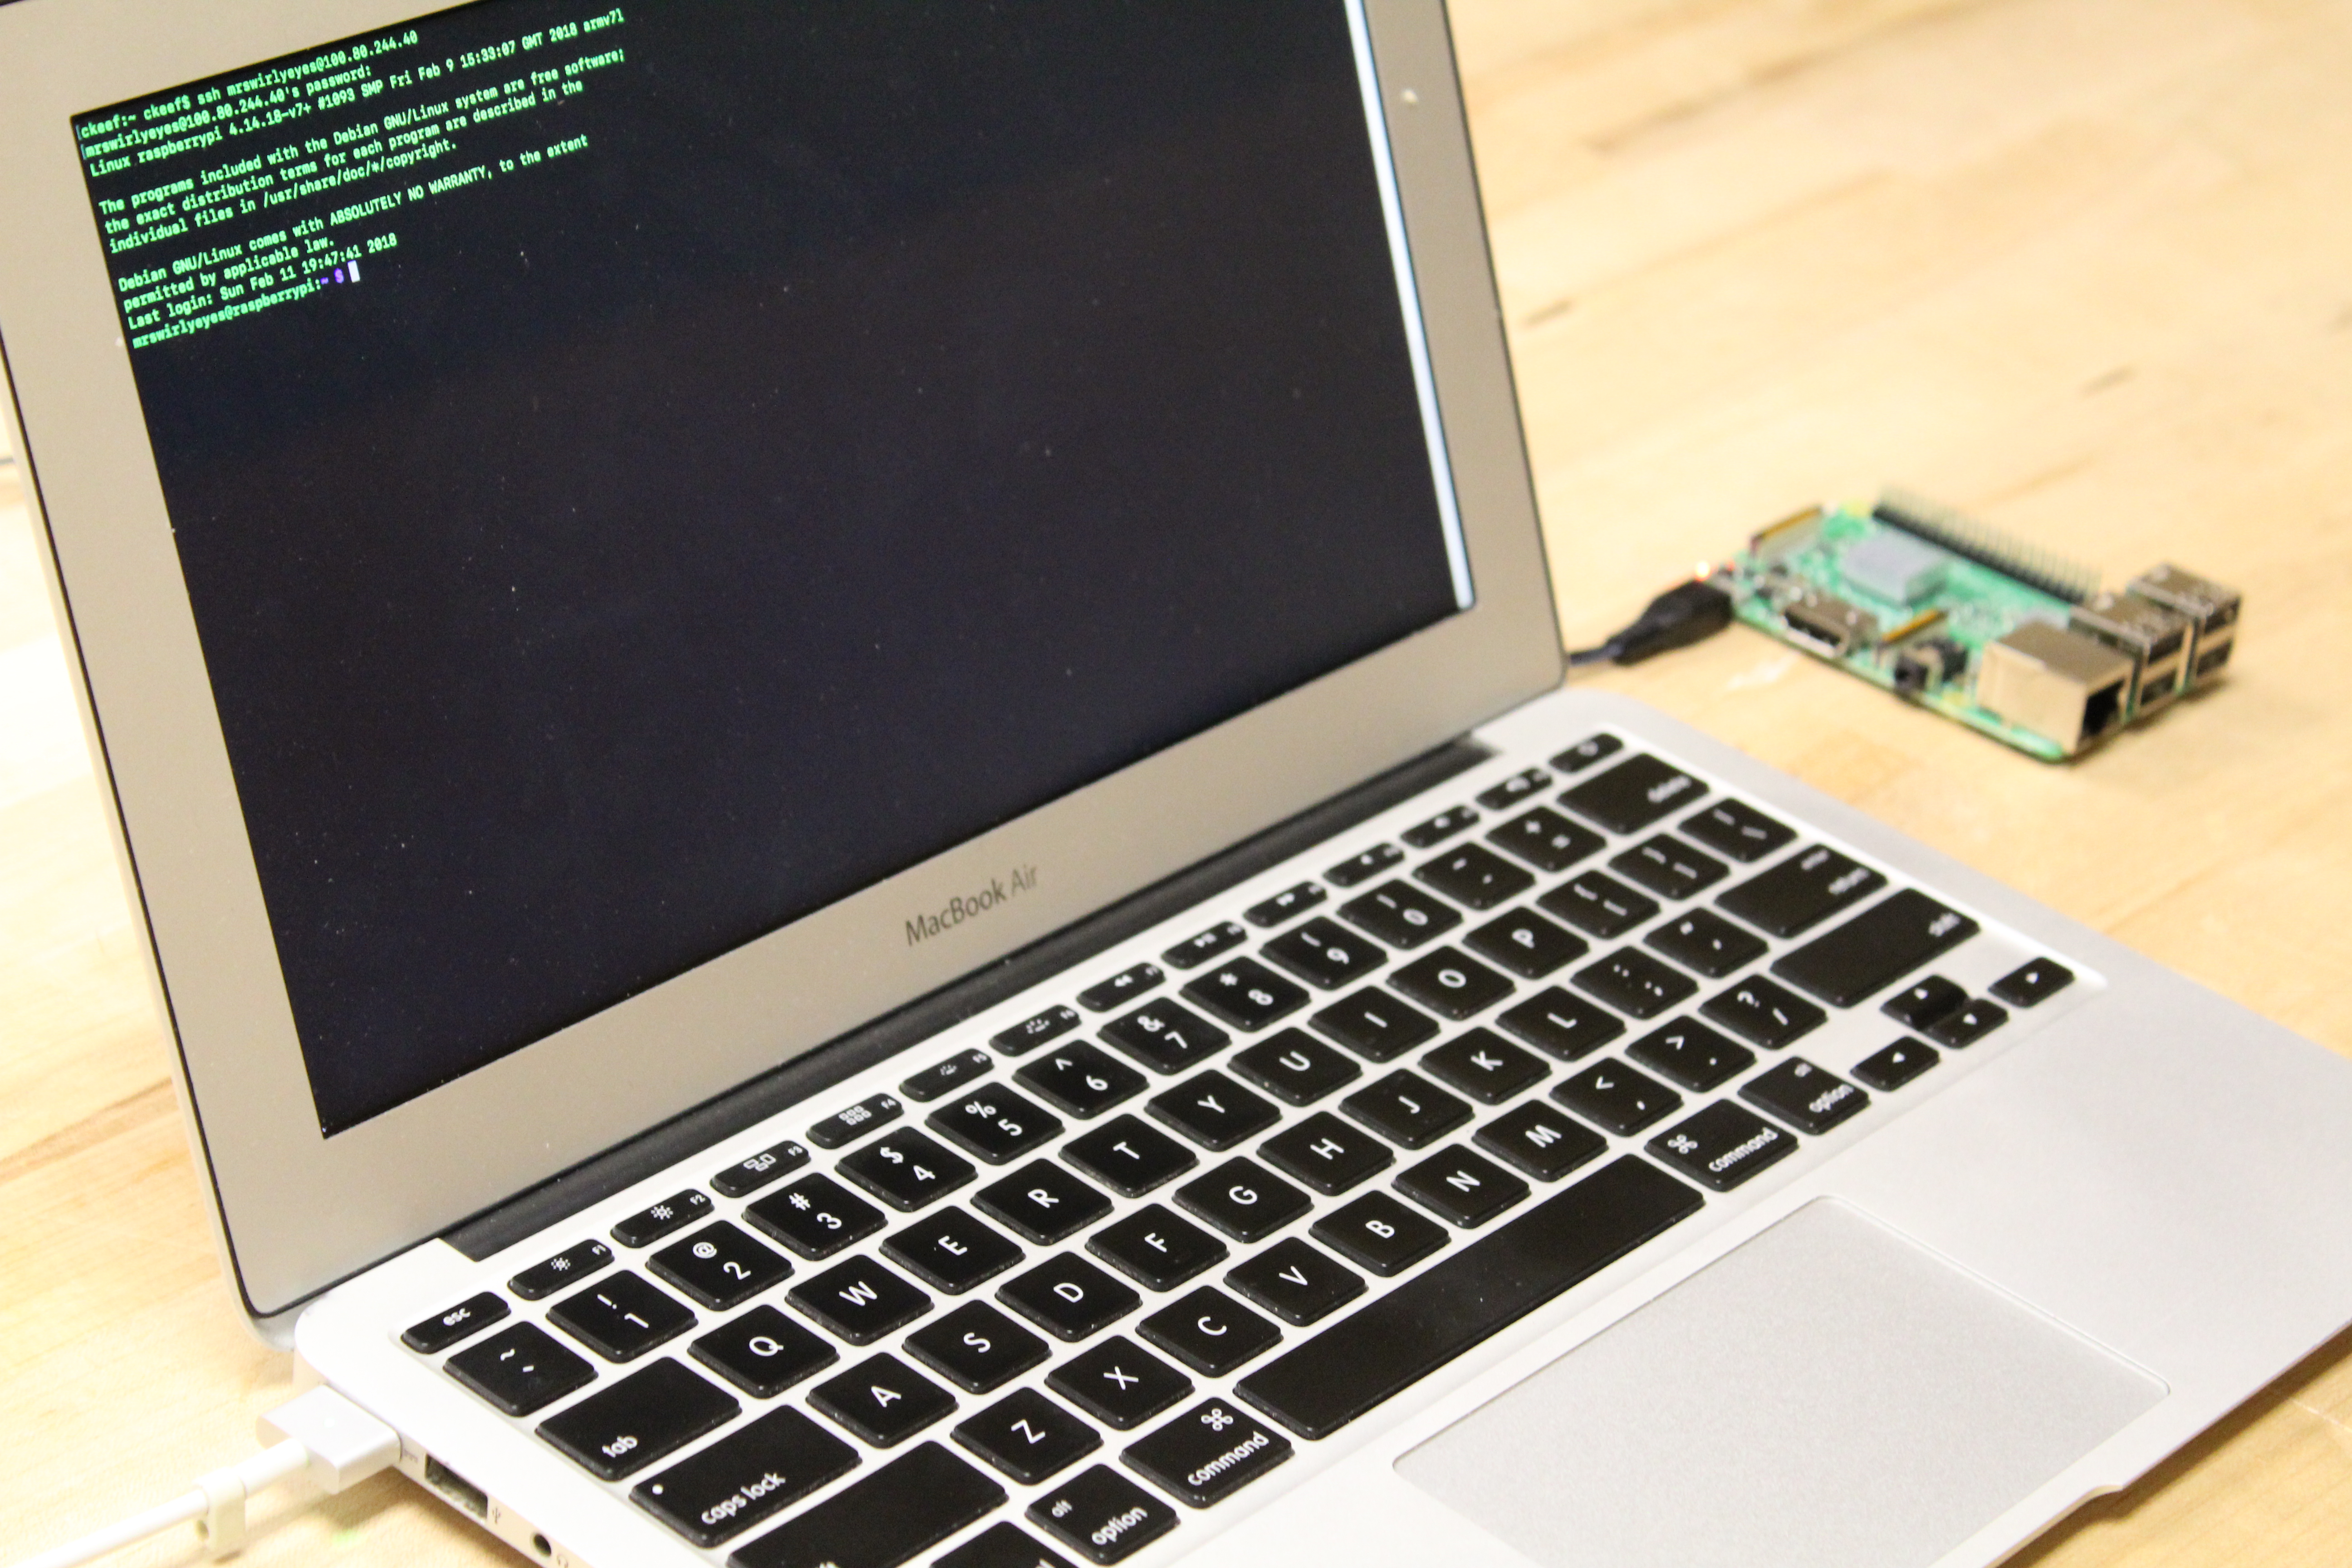
If not done already: power the Raspberry Pi using the power adapter and plug in the USB Serial Console Cable to the computer. Wait a minute for the Pi to fully boot up.
Using a Mac is extremely convenient! We will use the Terminal app, that comes default on every Mac laptop. Launch Terminal.
In the Terminal type the following command.
$ ls /dev/tty.Instead of pressing enter to send the command, press tab a couple times to autocomplete the incomplete command, which will display the available serial devices connected to your computer.
If only 1 serial device exists, it will autocomplete it for you.
We are interested in the tty.usbserial device.
Sometimes, it is cu.usbserial instead of tty.usbserial. If tty doesn't work, try cu instead.
If several other characters appear after the tty.usbserial option, that is OK.
If it doesn't appear, check that you plugged in the pins correctly, and try switching to a different usb port. Be careful with the pins! You could potentially burn your entire serial cable.
Now we will use screen to initiate the Serial Shell Login with the Raspberry Pi. Type the following command to initiate the serial connection:
$ screen /dev/tty.usbserialPress enter to execute the command, which will open the Serial Shell (over your existing Terminal).
You may see weird symbols/artifacts. Press enter a few times or wait for Raspberry Pi to complete booting.
If you have no output, check your wiring.
To exit the Serial Shell, type: ctrl + a, ctrl + k, and at the prompt, press: y and then press enter
This will return you to the Mac Terminal.
For linux users we base our guide on https://elinux.org/RPi_Serial_Connection. Refer here for the original instructions and guide. For convenience, we have summarized the instructions here.
In the command console,
type $ dmesg | grep ttyLook for the line saying pl2303 converter now attached to ttyUSB0. This is the port name your RPi is connected to.
The 0 can be any number as this just indicates the port number. For the following commands replace the 0 with whatever number is displayed on your machine.
The next command is
$ ls -l /dev/ttyUSB0This will display the permissions of the port. The permissions are split into three groups of rwx (read, write, execute), then the next words are the groups that have these permissions, so on my machine rw-rw---- root dialout means members of the root and dialout groups are able to read and write to the device. Yours may be different so take note of what group you need to be a member of to use the device.
To add yourself to the dialout group, run the command
$ sudo usermod -a -G dialout usernameFinally run the command
$ screen ttyUSB0 115200You may need to install screen using sudo apt-get install
You'll be prompted to enter your rPi credentials, and then you'll be in. If you don't see a prompt, press enter a couple of times. If you have just started your Pi, you may need to wait a minute for it finish booting.
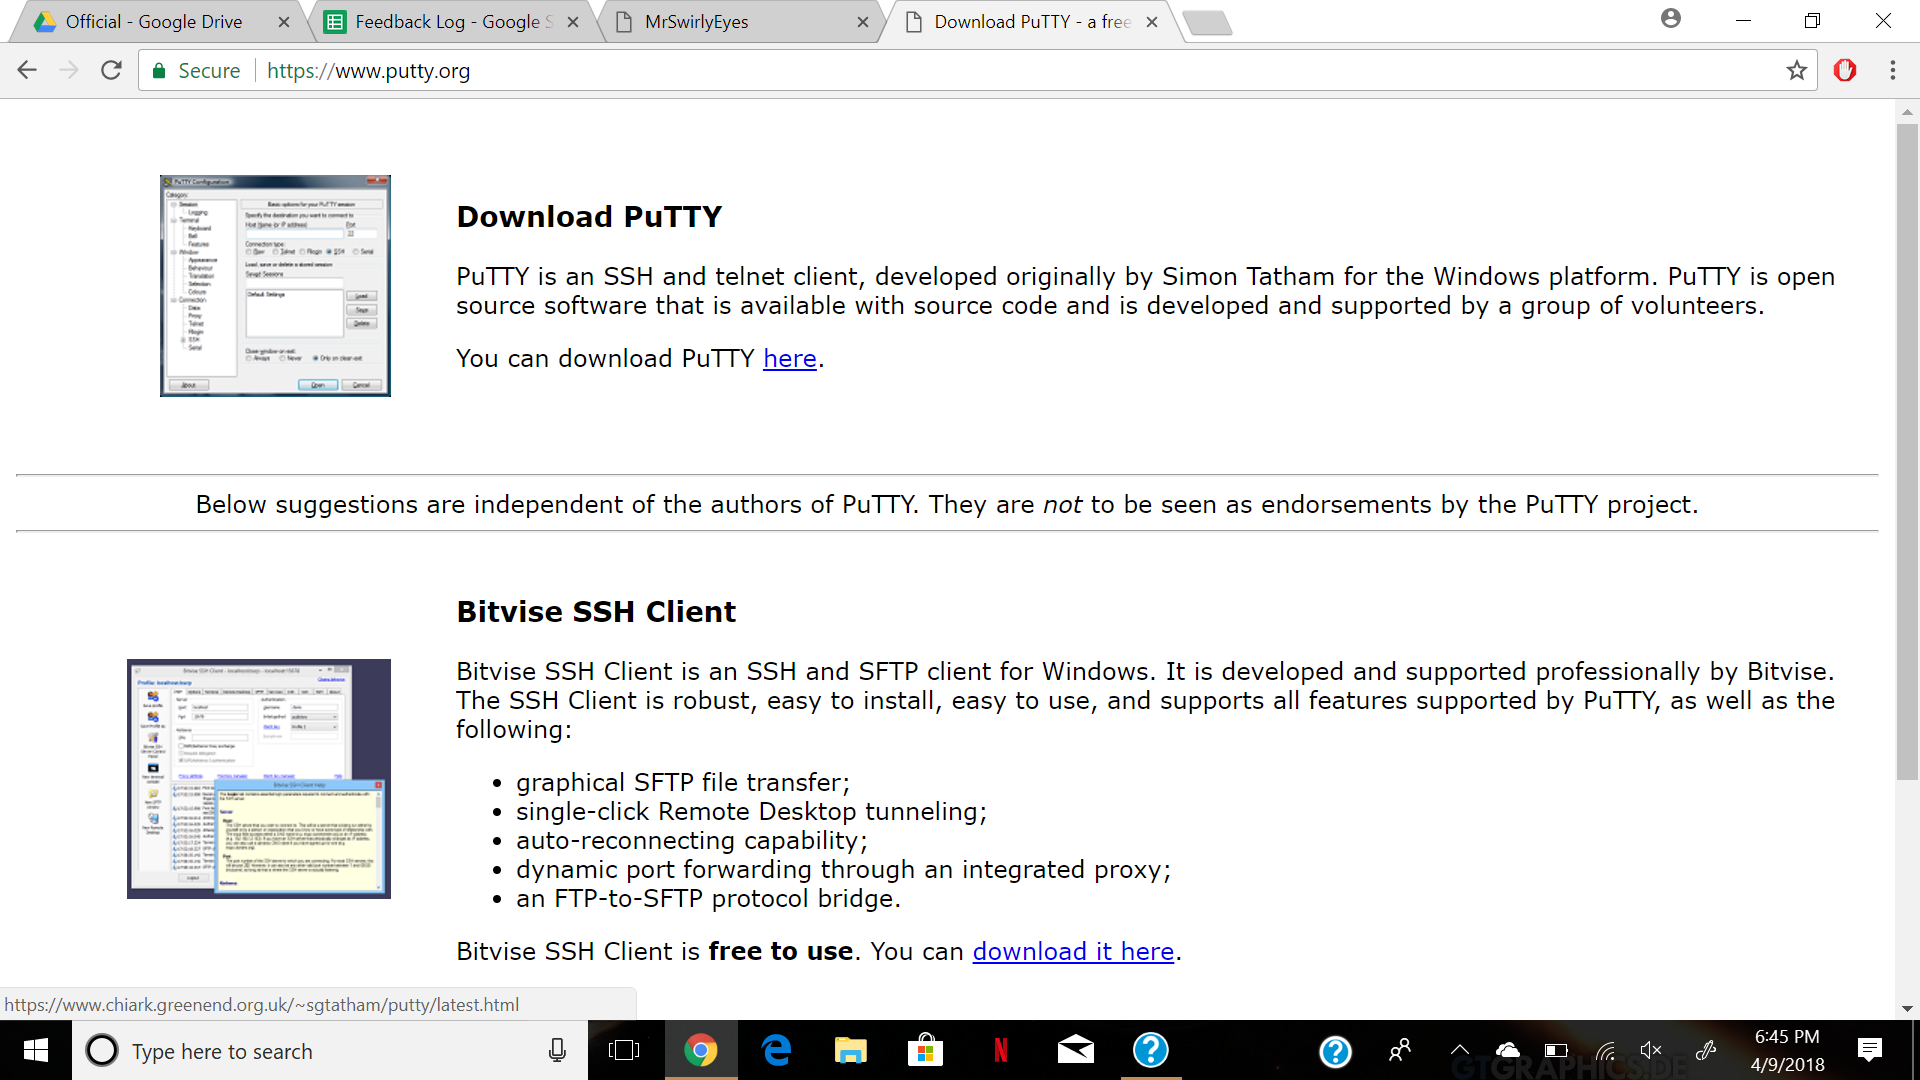
Go to www.putty.org and click You can download Putty here.
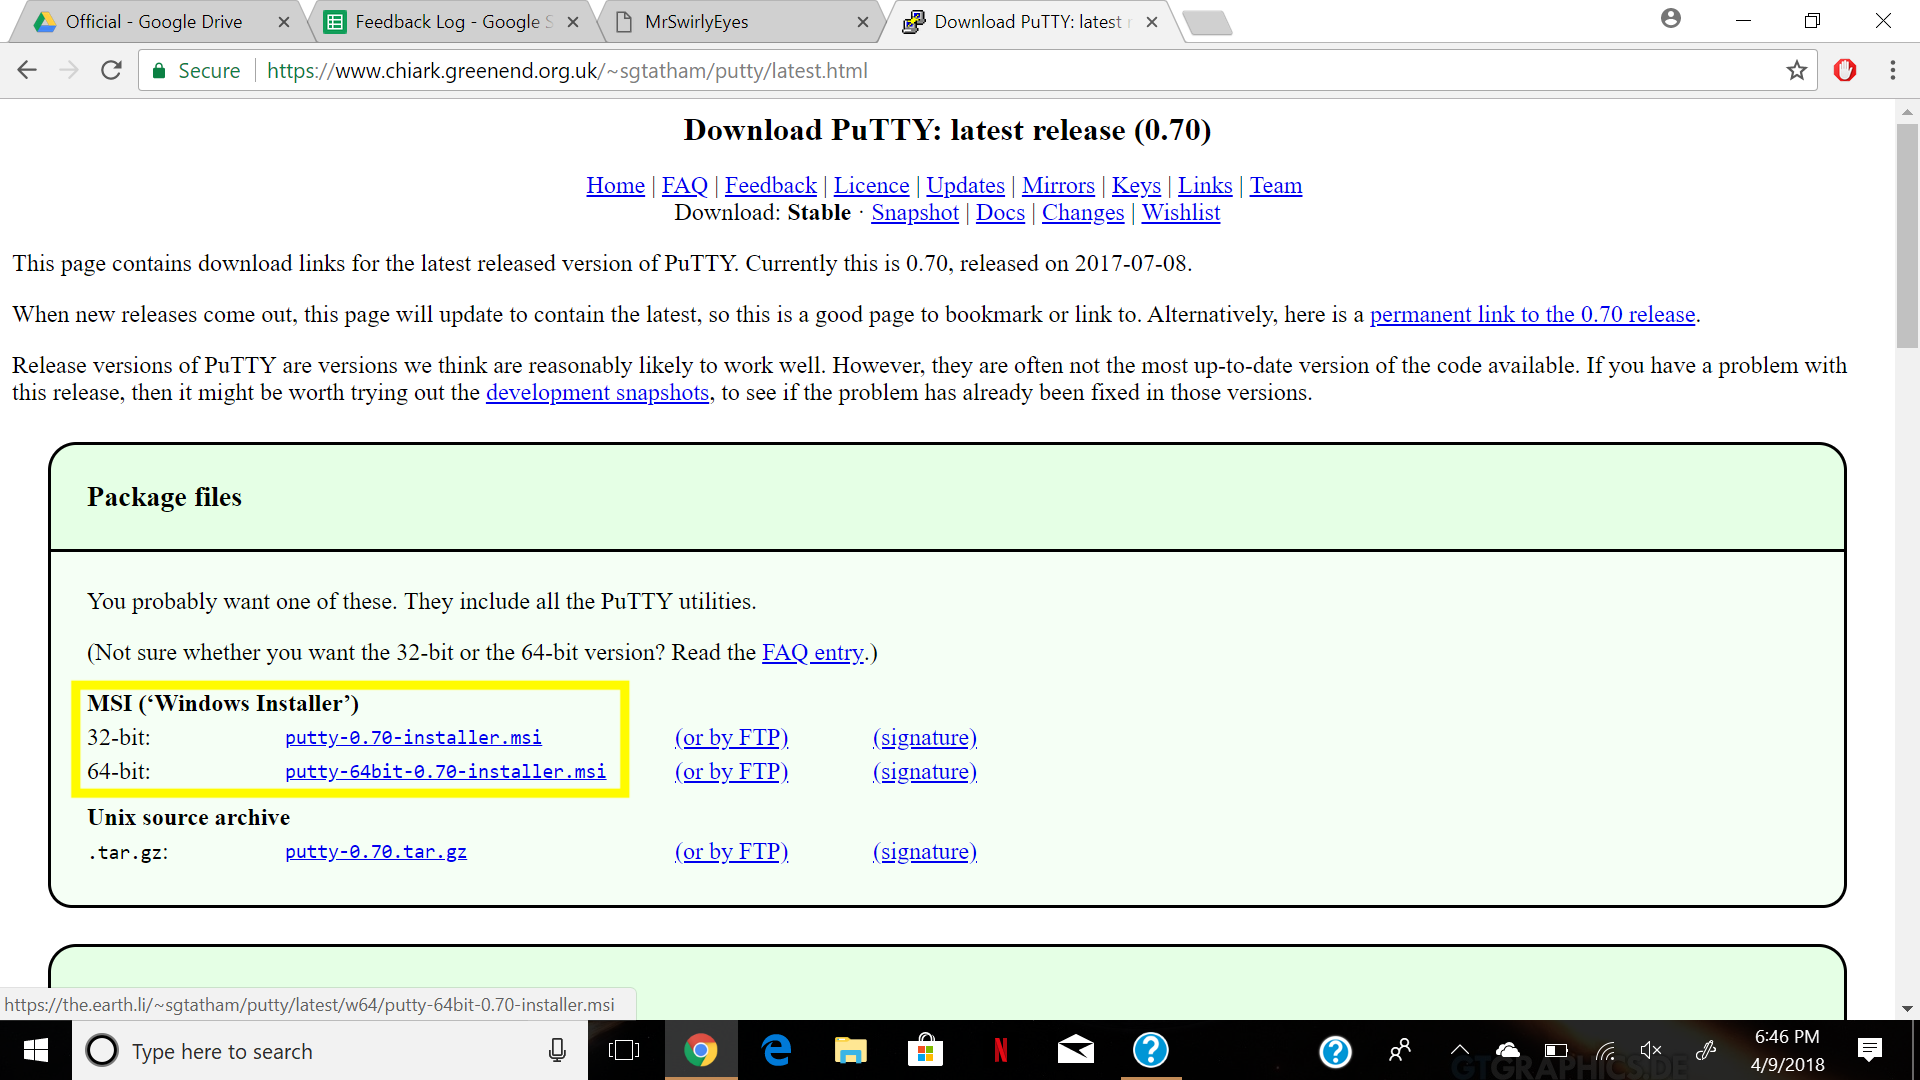
Click on the Windows installer (32 or 64bit depending on your system)
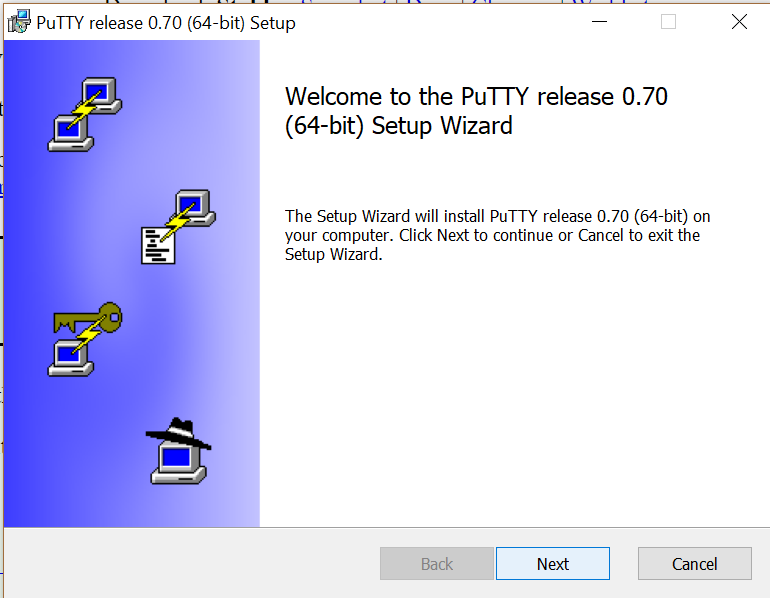
After downloading, start installing it - on the installer click next...
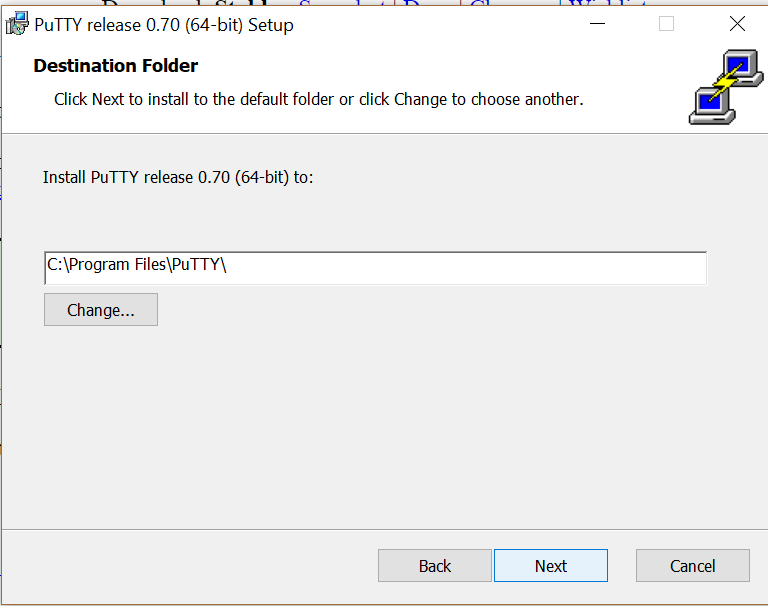
...change the destination folder if desired, then click next...
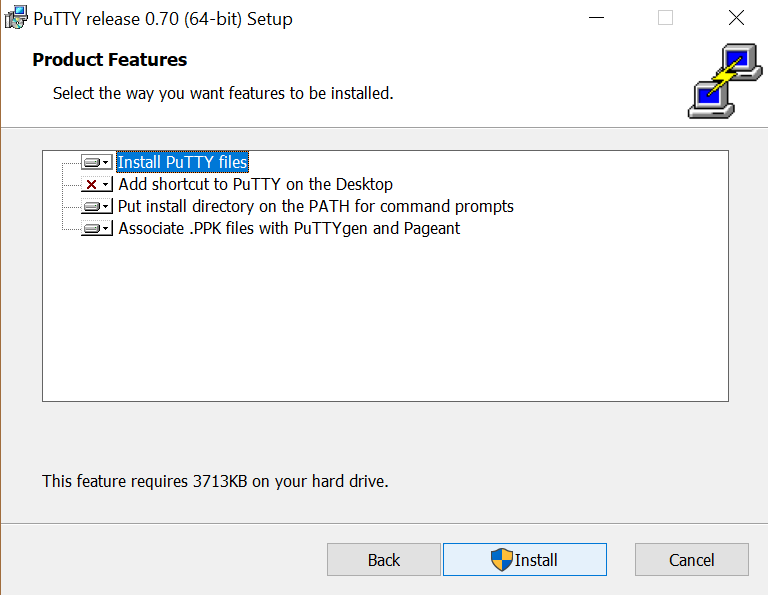
...then click install...
...and when it’s done click finish.
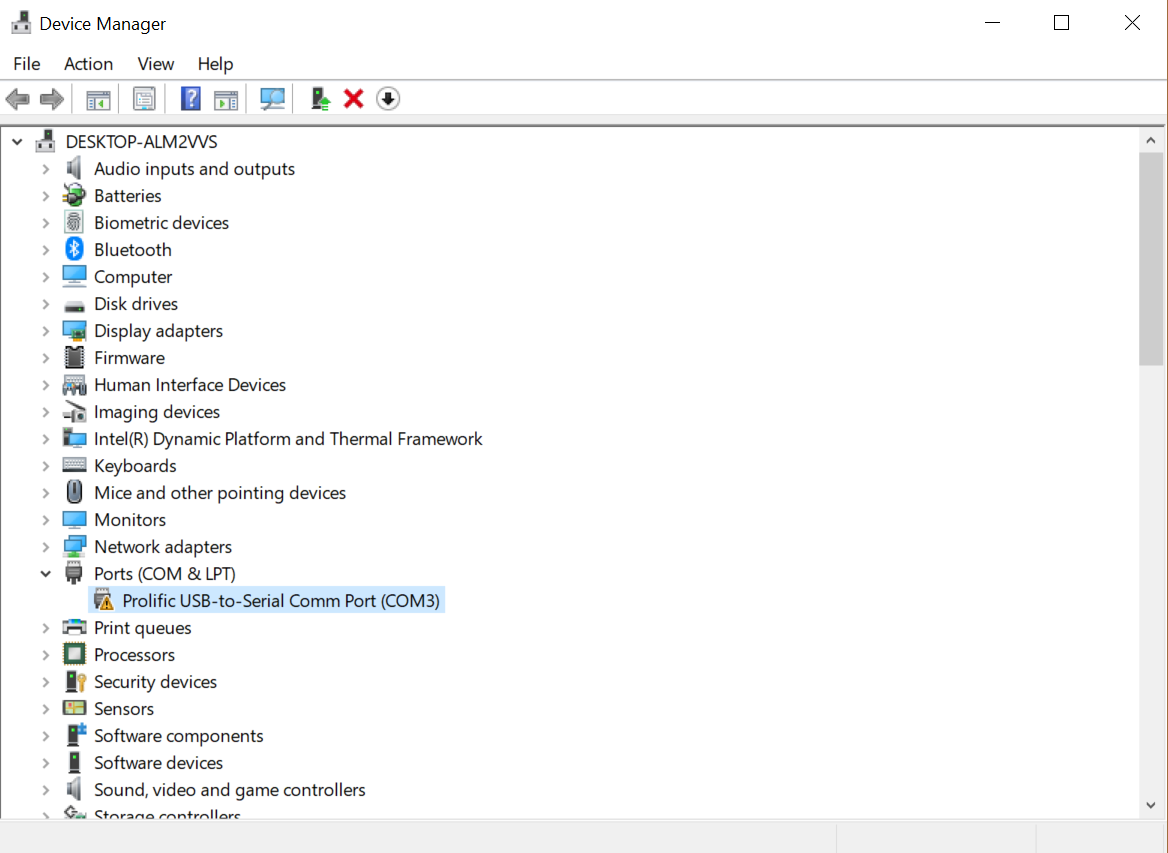
You will need to find out what port the rPi is connected to, so open your device manager, then scroll down to find ports and look for USB-to-Serial Comm Port and make a note of the COM#. You will need this when using Putty.
If you don't see the Ports dropdown, click on View in the top menu and select ...
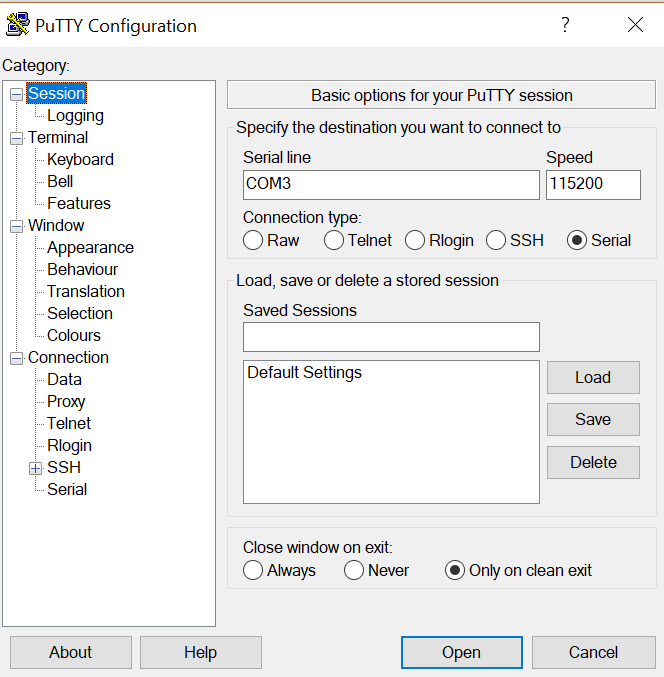
Now for the magic. Open Putty, and under Connection type click the Serial bubble, as below. Change the serial line to the COM# your rPi is connected to - this is the number you found in the device manager a couple of steps ago - and change the speed to 115200.
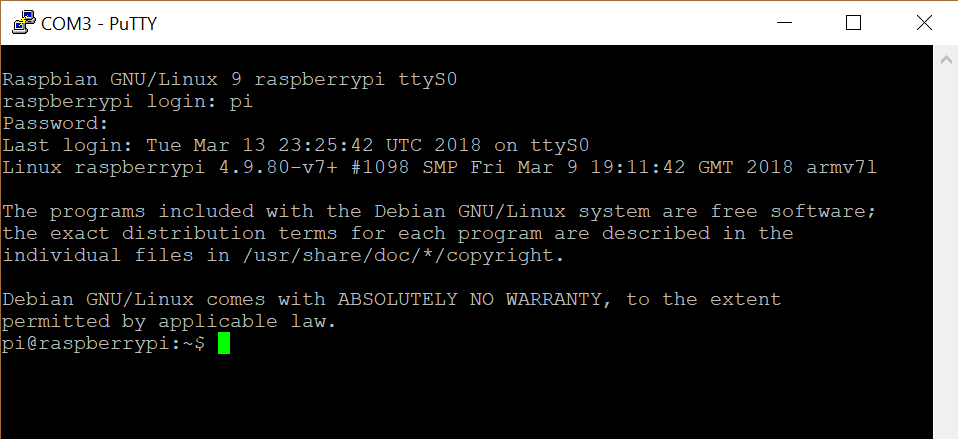
Finally, click Open, and you will be taken to this screen. Input your Pi credentials, and you're good to go!
If you see the login screen, you are successfully interfacing with the Raspberry Pi through the Serial Shell. Log in as we did in module 4. You no longer need the keyboard, mouse, and monitor peripherals!
In this section, we will create a new user for the Pi. Previously, when we logged in, we used the default username and password, pi and raspberry respectively. When we connect to the internet and allow SSH, this leaves your Raspberry Pi vulnerable and prone to being hacked because these are the same for all Pis. So, before we connect to the internet we will configure a new user with private credentials, and delete the default user pi.
Do not believe in this security issue? If you are on the UCSD campus, connect to the campus WiFi, enable SSH, and do not change the default user. Within a few hours you will be banned from the internet on the UCSD campus because the Pi poses a security threat - trust us, it has happened.
Log into your pi using the Serial Shell and the Serial Console Cable. Execute the following command into your CLI:
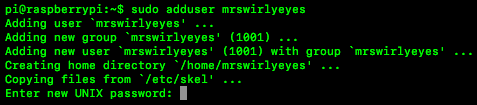
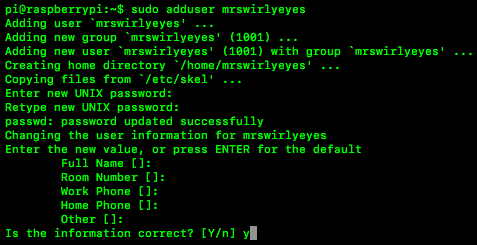
$ sudo adduser usernameReplace username with your own username. The username we chose was: mrswirlyeyes
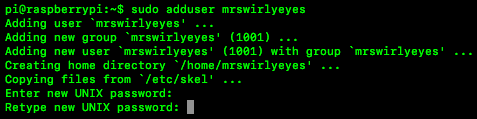
You will be prompted to give your new user a password. Pick a nontrivial password. (I will obviously not share my password with you, so it is your responsibility to remember your username + password going forward). You will be prompted to enter the new password twice.
You will not be able to see any feedback when typing the password.
After the password prompts, several more prompts follow. You may fill them out if you wish, I choose the defaults (since the questions are kind of creepy...). The final prompt asks for a confirmation that the information is correct. Press y, then press enter.
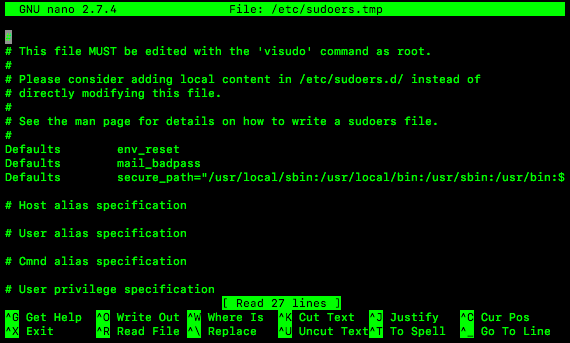
Next we will edit the user permissions of our new username. To do this, execute the following command:
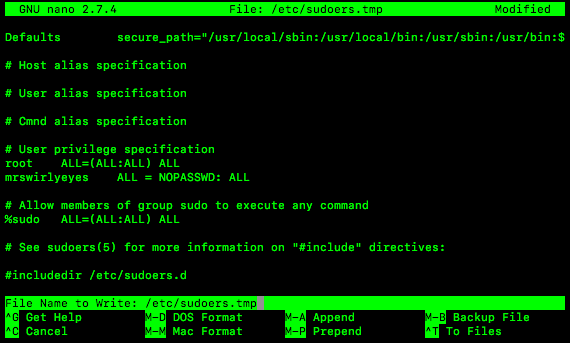
$ sudo visudoA window using the text editor nano appears. Scroll down to the part where it says # User privilege specifications using the arrow keys (the cursor will scroll down the text editor screen as it moves to the end of the viewable page).
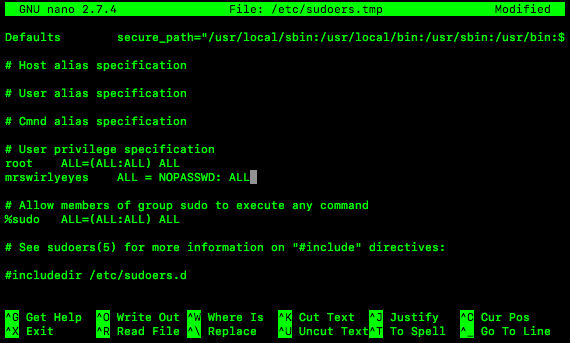
Under # User privilege specifications the specification for the user root is shown: root ALL=(ALL:ALL) ALL. We want to add specifications for the new username we created earlier, so under the root specifications write the following:
username ALL=NOPASSWD:ALLReplace username with your own username. The username we chose was: mrswirlyeyes
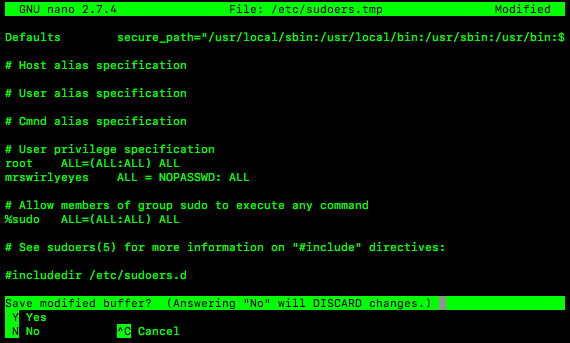
To save the file and exit perform the following: ctrl + X to initiate the exit. At the bottom of the window, we will be prompted to Save modified buffer? (i.e. Save our changes). Press y to confirm that we want to save the text file with the changes.
The next prompt asks us for the File Name to Write and will give us the current filename. We do not want to change this, press enter to confirm the filename to be written to, and exit the nano text editor.
Reboot the Raspberry Pi with the following command:
$ sudo shutdown -r nowWhen prompted to log back in, login with your new username and password.
Do not login with the pi account here, you must login with your new account for the following steps to work
Now that we are logged into our new user (which is much more secure than the default pi account), we will delete the pi account with the following command:
$ sudo pkill -KILL -u pi | sudo userdel -r piIf it gives you erroneous output - you probably did not login with your new username.
The interesting output shown in the image above is OK.
This will delete the pi user. To confirm, type the following command into the CLI:
$ exitThis command will log you out of the Raspberry Pi.
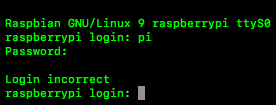
Now try to relog into the Raspberry Pi using the default username pi as we had done before we made the new username.
Observe, you should no longer be able to login using the default Raspberry Pi username: pi.
We have successfully created a new user for the Raspberry Pi and deleted the default login credentials. Our Pi is now secure enough to connect to the internet, bringing us another step closer to our goal of a headless system (of course, internet is useful for a lot of other stuff too).
We're going to guess that you got your Raspberry Pi to do something cool with the internet - from robotics to Internet of Things (IoT), the Raspberry Pi is a great and popular choice. So, with no further ado (I know, there has already been a lot of ado - we're nearly done!), let's get connected!
A little less exciting, but equally as important, after we connect the Raspberry Pi to a Network that both our laptop and the Raspberry Pi are connected to, we can interface with the Raspberry Pi over the local network using Secure Shell Hosting (SSH). Which means, as long as we know the IP address of the Raspberry Pi we can interface with the pi wirelessly. No Serial Console Cable required. A fully headless system.
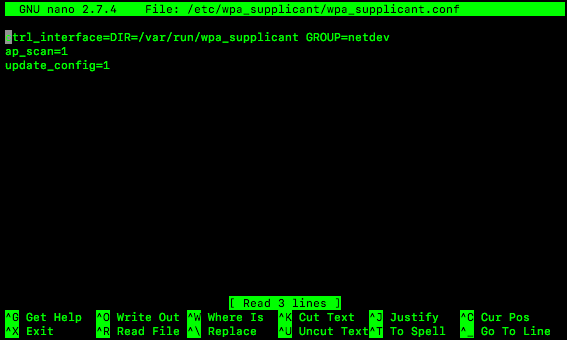
To connect to the Internet, execute the following command:
$ sudo nano /etc/wpa_supplicant/wpa_supplicant.confThis will open the configuration file wpa_supplicant.conf, which should look similar to the following:
There are several different type of networks. Connecting to each network requires different specifications depending on the network type:
Most home networks are secured networks, and you can simply add these lines to the bottom of the file. Replace "testing" and "testingPassword" with the credentials for your own network.
network={
ssid="testing"
psk="testingPassword"
}
Additionally, if the network is hidden, you'll have to add scan_ssid=1, as below.
network={
ssid="testing"
scan_ssid=1
psk="testingPassword"
}
An unsecured network is one which doesn't have a password. In the example below, replace "Swirly24" with the name of your network, and add this section to the bottom of the file.
network={
ssid=”Swirly24”
key_mgmt=NONE
}
Additionally, if the network is hidden, you'll have to add scan_ssid=1, as below.
network={
ssid=”Swirly24"
scan_ssid=1
key_mgmt=NONE
}
The UCSD Network is an Enterprise network and requires the following parameters to connect:
network={
ssid=“UCSD-PROTECTED”
key_mgmt=WPA-EAP
eap=PEAP
identity=“UCSD_AD_USERNAME”
password=“UCSD_AD_PASSWORD”
phase1=“peapver=0"
phase2=“auth=MSCHAPV2”
}
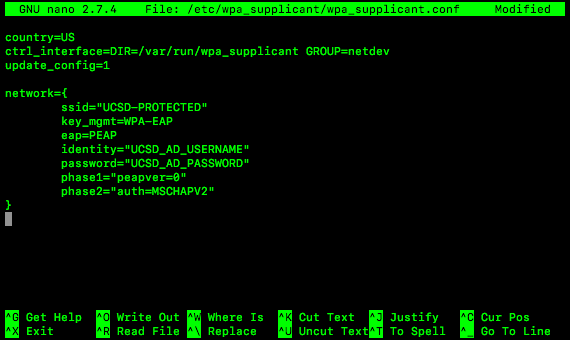
The full contents of the configuration file wpa_supplicant.conf configured for the UCSD Network should look as follows:
Replace UCSD_AD_USERNAME and USSD_AD_PASSWORD with your UCSD Network Credentials - the same login and password you use to connect to the Internet on your laptop.
This is all the configuration needed to connect to the UCSD Network. Close the file as we did earlier: ctrl+x, followed by y, followed by enter.
Some notes that apply to all of the network types: there are no spaces anywhere - not between equals signs (=), brackets, words, nothing. The indents are exactly one space. The wpa_supplicant is very picky about these things, and if anything goes wrong with your connection, come check for mistakes here first.
After you have configured the wpa_supplicant.conf wireless configuration file, regardless of what type of network you have configured to connect to, let us see if the information we input was correct.
First, we must reboot the Pi:
$ sudo shutdown -r nowAfter the Pi reboots and we log back in, execute the following command to fetch the (network) interface configuration:
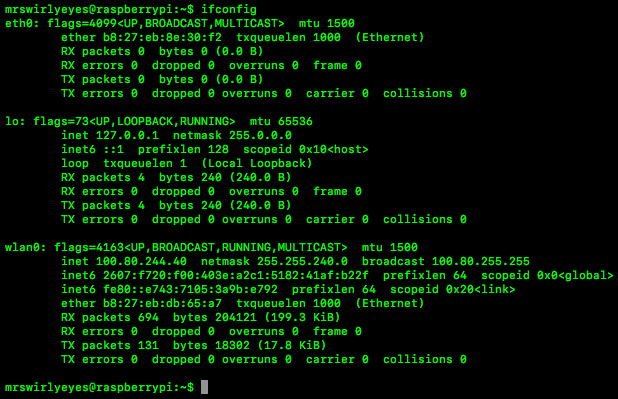
$ ifconfigThe command should return results similar to the following:
You should see an IP Address for inet, netmask, and broadcast
If you see no such information, please check wpa_supplicant.conf for typos.
There are 3 interfaces shown by the Raspberry Pi:
| Interface | Description |
|---|---|
| eth0 | This is the physical Ethernet port, for an Ethernet cable plugged into the Raspberry Pi. |
| lo | This stands for localhost, which always has an IP address of: 127.0.0.1. We use this address to host webservers and is the address the Pi itself uses to see its own hosted webserver. (Other users that desire to see the Pi's webserver will use a different IP addres - not the localhost address) |
| wlan0 | This is the wireless adapter integrated onto the device. |
If it was successful, you should have been assigned an IP address denoted by inet. Here, we were assigned the IP address: 100.80.244.40.
Most Home Networks typically assign an IP address with the prefixes: 192.168.1.XXX, 192.168.0.XXX, 10.0.0.XXX.
If you have an IP address (inet) of: 169.XXX.XXX.XXX, you do not have a valid IP address, please check validity of your wpa_supplicant.conf.
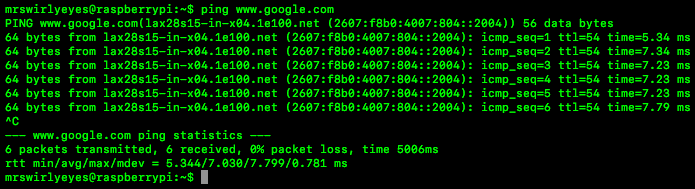
To test if we are connected to the Internet, we will ping Google. To ping, we use the following command:
$ ping www.google.comThe results of the ping commands should be similar to the following:
To stop the pinging (it will go on forever if they are successful pings), press: ctrl + C.
If you do not get results that give some time in milliseconds (ms), then you probably do not have a valid connection to the Internet, please check validity of your wpa_supplicant.conf.
If you got a valid ping, then you have successfully set up wireless connectivity on your Raspberry Pi! The world has opened up to you!
Important for Security and having the latest drivers, updating the Raspberry Pi is essential. In this section we will send a few commands and relax for several minutes. Sometimes updating the Raspberry Pi takes a while to do - especially if you do not update it frequently.
Updating the Raspberry Pi is nothing exciting or very special. There are 3 different updates to be done:
| Update Type | Description |
|---|---|
| Update & Upgrade |
The update, will update the packages list including packages already installed and packages that are new. The upgrade, will install all the packages from the updated packages list. |
| Firmware | This will upgrade the firmware of the Raspberry Pi. |
| Distribution | This will upgrade the Raspberry Pi's distribution. As of this writing, the latest distribution version is Stretch. If the Raspberry Pi is already on the latest distribution, then this upgrade will do nothing. |
In general, the updates will proceed in the same order as the table.
First we will update the packages list, then upgrade the updated packages list.
To update the packages list, execute the following command:
$ sudo apt-get updateTo upgrade the updated packages list (from the previous command), execute the following command:
$ sudo apt-get upgrade -yThe -y option simply prevents a prompt for the user to accept installing the package, by answering Yes to all prompts.
You must perform the update before the upgrade - the upgrade looks for changes found by the update command. If you don't do update first, then upgrade won't see anything to do, and will say that you are up-to-date even when you are not.
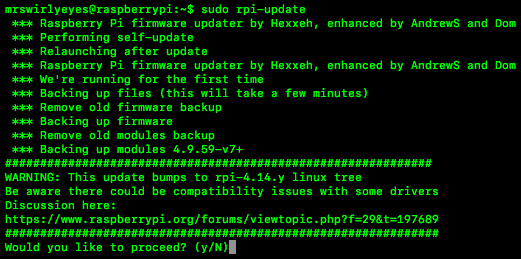
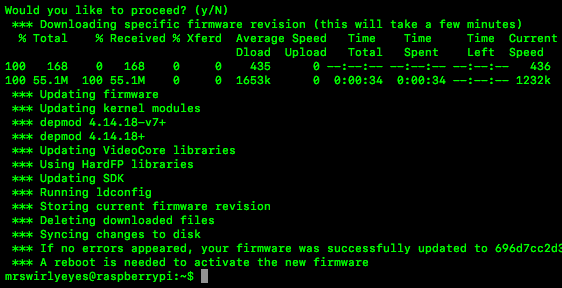
To update the current Raspberry Pi firmware, execute the following command:
$ sudo rpi-updateYou will be prompted to proceed with the firmware update, press y, followed by enter to continue.
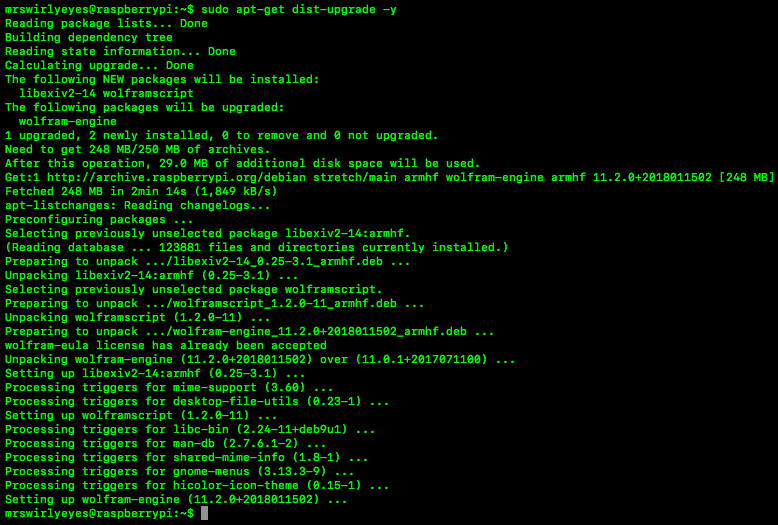
To upgrade to the current Raspbian distribution, execute the following command:
$ sudo apt-get dist-upgrade -yAfter all these various updates and upgrades finish, reboot the Raspberry Pi.
We may now turn on Secure Shell Hosting (SSH). The other interfaces follow the same process, and you may enable whichever ones you need for a given project. However, our main objective is to turn on SSH so that, in the next module, we can make our Raspberry Pi into a fully headless system.
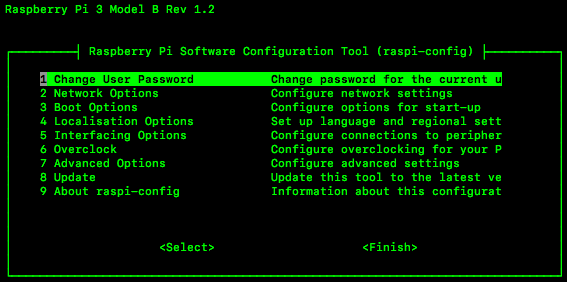
Log onto the Raspberry Pi. Execute the following command to launch the Raspberry Pi Configurations menu:
$ sudo raspi-configYou should be greeted with the following menu:
All the Raspberry Pi configuration options we will address in this module are Interfacing Options. Use the arrow keys to select 5 Interfacing Options, and press the enter key.
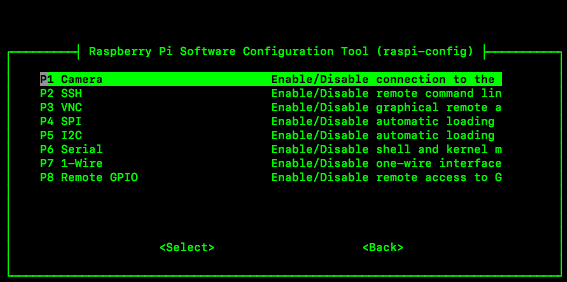
You will be taken to the Interfacing Options menu:
There are several interfaces that we can toggle on and off. We have already enabled Serial, which allowed us to use the serial console cable to interface with the raspberry pi via Serial Shell Login. Enable (or disable) the interfaces you wish to change.
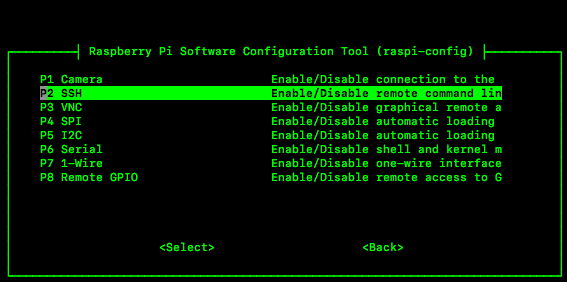
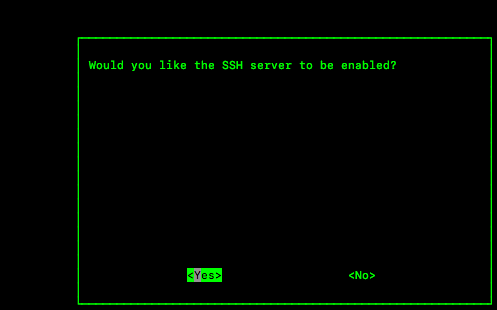
To enable the SSH server, use the arrow keys to select P2 SSH, and press the enter key.
You will be taken to a menu to select whether you wish to enable or disable the SSH server. Use the arrow keys to select Yes, and press the enter key to affirm.
The next screen will notify you of your selection. Press the enter key to confirm the change.
You will be returned to the main Raspberry Pi Configuration page.
After you have completed enabling or disabling the interfaces desired, exit the Raspberry Pi configuration menu by returning to the raspi-config main menu. Use the arrow keys to select Finish, and press the enter key.
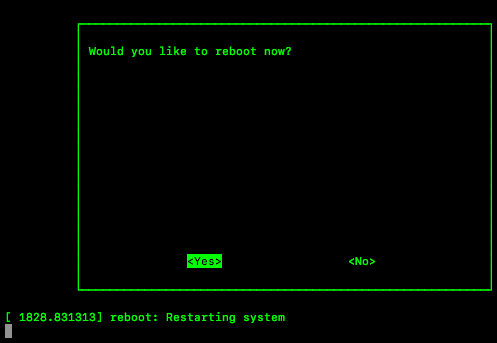
Depending on what you enabled, you may be asked to reboot, as in the following screen. If you are, then use the arrow keys to select Yes, and press the enter key. If they don't ask you to, then you may progress without rebooting.
After the Raspberry Pi reboots, the interfaces that were enabled or disabled should take effect.
Finally, we will make our Raspberry Pi a fully headless system. This is most people's preferred way of connecting to the Pi because it is as simple as a command on your main computer - no setup required. The catch is that, as you will see below, you need to know your Pi's IP address, which can change when it reboots. If you don't know the IP address, you can always log in with the console cable, run ifconfig to find the IP address, and then ssh. It'll hold you over until the next time you turn the Pi off.
We recommend keeping the serial console cable around as backup. If you forget or the Pi gets a different IP address, it is fast and easy to access the Pi using the serial console cable - it is very reliable.
Make sure you have enabled SSH via raspi-config, as shown in the previous module.
We will connect to the rPi SSH server that is now running on the device.
You need to be on the same network as the rPi for SSH to work. That is, both your laptop/computer and the raspberry pi need to be connected to the same “router” or “network” (Being connected to the internet on the rpi and your laptop/computer does not necessarily mean you are on the same network).
In order to connect to the rPi SSH server, we need to know the IP address of the rpi for our computer to know “whom” to initiate the connection with.
Login to the Raspberry Pi (via our previous methods). Execute the following command to fetch the (network) interface configuration:
$ ifconfigThe command should return results similar to the following:
You should see an IP Address for inet, netmask, and broadcast.
Observe in the wlan0 interface details, the inet IP address is the address we need to initiate the connection from our computer. Here, the IP address of our Raspberry Pi on the network we are connected to is: 100.80.244.40.
Remember this IP address for later!
The IP address of your Pi will probably not be the same as ours.
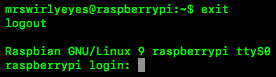
Presuming that you are still connected to the rPi via the Serial Shell, let us log out via the following command:
$ exitYou will be prompted to log back into the Pi. Do not log back in.
For Mac and Linux machines, to exit the Serial Shell, type: ctrl + a, ctrl + k, and at the prompt, press: y and then press enter.
This will return you to the Terminal.
We are no longer connected to the Serial Shell in the next few steps.
We will now initiate a connection from our computer to the SSH server on the Raspberry Pi. That is, we will request to access the Raspberry Pi.
Common terminology used for initiating a connection with a remote device (here, our Pi) using SSH is to say: SSH into the Raspberry Pi.
We can use the Terminal to SSH into the Pi using the following command:
$ ssh username@ip_addressWhere username is the username of your Pi.
Where ip_address is the IP address of your Pi.
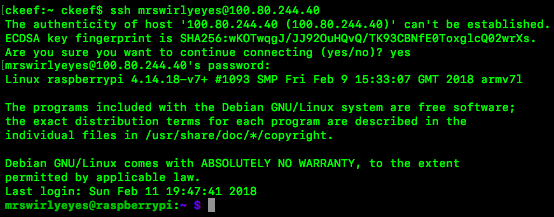
You may be given the following prompt:
This is a security flag that your computer is throwing to make sure you trust this host (i.e. the Raspberry Pi). Since you are connected to the Internet, anyone can technically SSH into your Raspberry Pi - making your system vulnerable to hackers. (Hence, why we needed to change the username of your Pi several modules ago).
You will only be given this prompt the first time you SSH into the Pi from your computer.
Confirm that we trust this host by typing: yes, then press the enter key.
You will be prompted to enter the Raspberry Pi's password like a typical login using any other method.
You will not be able to see any feedback when typing your password.
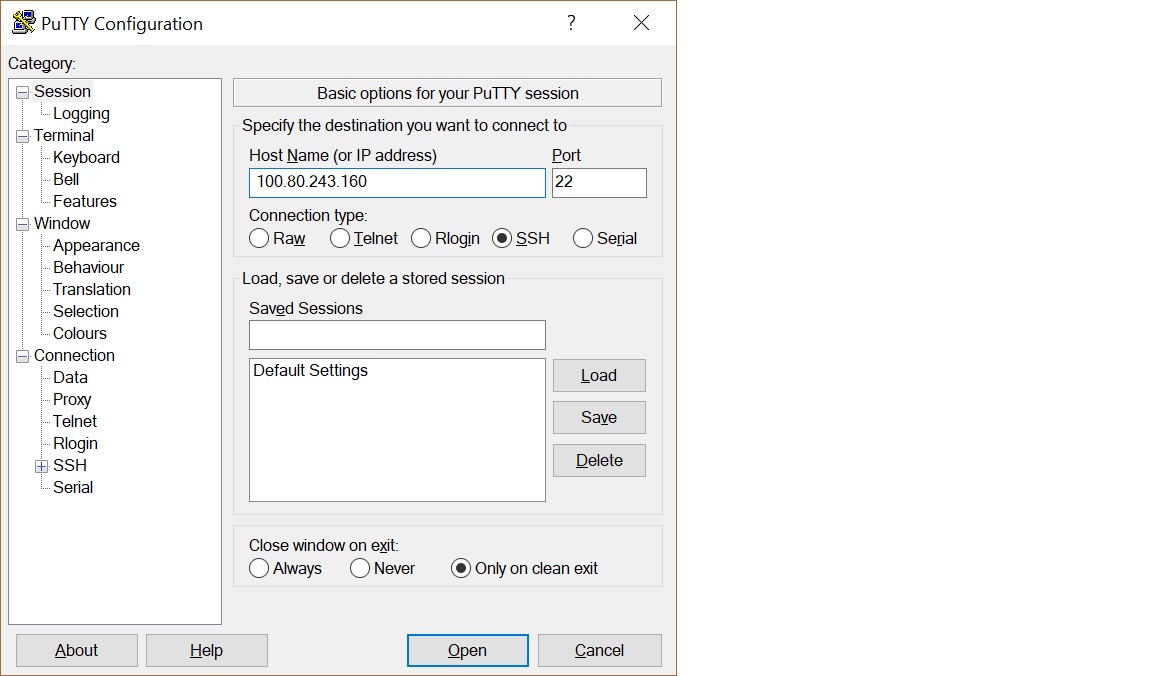
Open Putty and make sure you select SSH in the Connection type radio buttons. Enter in the IP address of the rPi in the Host Name field, then click enter. This is the IP address you found from ifconfig, and will stay the same until you restart the Pi or connect it to a different network.
Then enter your username and password when prompted in the terminal.
That's all! Easy peasy.
You are in! You should be greeeted as you have with any of the previous methods. You also get color! Access through the serial console cable did not display color, proving that SSH is a superior interfacing method.
You are able to access your Pi without any peripherals. This is what is called a headless system. That is, your Pi is headless.
You should no longer need the the serial console cable. You may remove it if you wish - you may do it right now! However, again we recommend keeping it close-at-hand as a backup method for accessing your Pi. Especially, you will need the serial cable whenever you restart your Pi. Any device connecting to a network is randomly assigned an available IP address, and there is absolutely no guarantee that you will get the same one every time you connect. Thus, any time you disconnect from the network (move locations, restart the Pi, etc.), you will have to log in with the serial cable, run ifconfig, and then SSH in using the IP address.
In this module we will install VIM. VIM stands for Vi Improved. It is a widely-used text-editor because it is lightweight, customizable, and powerful. The editor we have been using is the default editor on the raspberry pi called nano. Although you can use this editor for all applications, it is not a very powerful (or useful) text editor, and most users quickly get annoyed with it. We recommend installing VIM, and most of our projects branching off from this tutorial will use it.
You need to be connected to the Internet on the Pi.
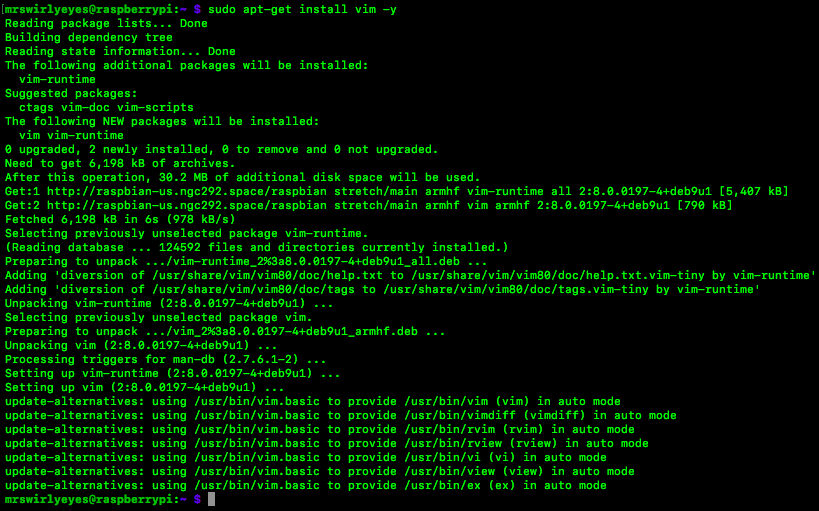
To install VIM, execute the following command:
$ sudo apt-get install vim -yThe -y option simply prevents a prompt for the user to accept installing the package, by automatically answering Yes to the confirmation prompt.
After several lines of output to the Terminal, the VIM text editor will be installed
If a message saying that VIM could not be found occurs, then execute the command: sudo apt-get update. Then follow the above instructions to install VIM.
There are many online tutorials for using VIM, and we encourage you to look into them. An intro to VIM is out of the scope of this tutorial, however, our projects that heavily use it will explain commands as needed.
This tutorial took a Raspberry Pi from a clean slate to a system that is ready for any Raspberry Pi project. The Raspberry Pi is a great project device - literally a computer that can fit into the palm of your hand, and you are now ready to explore projects related to automation, robotics, and internet of things.
We hope this tutorial served you well in getting your Raspberry Pi up and running! We encourage you to go further, there are other tutorials and full-scale projects below. These guides will bring out the potential of the Raspberry Pi and give you the knowledge to understand how and why you are doing it, so that you can take your Raspberry Pi project to the next level!